Wondering how to add fonts to Cricut Design Space? Here's the short version: you don't add them to Design Space at all. You install them on your computer, and Design Space picks them up the next time it opens.
That one sentence clears up most of the confusion I see. There's no font upload button in Design Space, and people spend ages hunting for one. It isn't there.
Once the font is installed, it shows up under the System tab in the font menu. That tab is the whole trick, and it's where nearly every “my font isn't showing up” panic ends.
Below I'll walk you through it on Windows and Mac, sort out the iPad question, and fix the font that stubbornly refuses to appear.
This post contains affiliate links. If you buy through them, I may earn a small commission at no extra cost to you.
Quick Links
- Find a Font You Can Actually Use
- Download and Unzip the Font File
- Install the Font on Your Computer
- Restart Design Space and Look Under System
- Adding Fonts on iPad and iPhone
- Why Your New Font Is Not Showing Up
- Getting the Most From Your New Font
- Can You Sell Projects Made With Downloaded Fonts
- Frequently Asked Questions
Find a Font You Can Actually Use
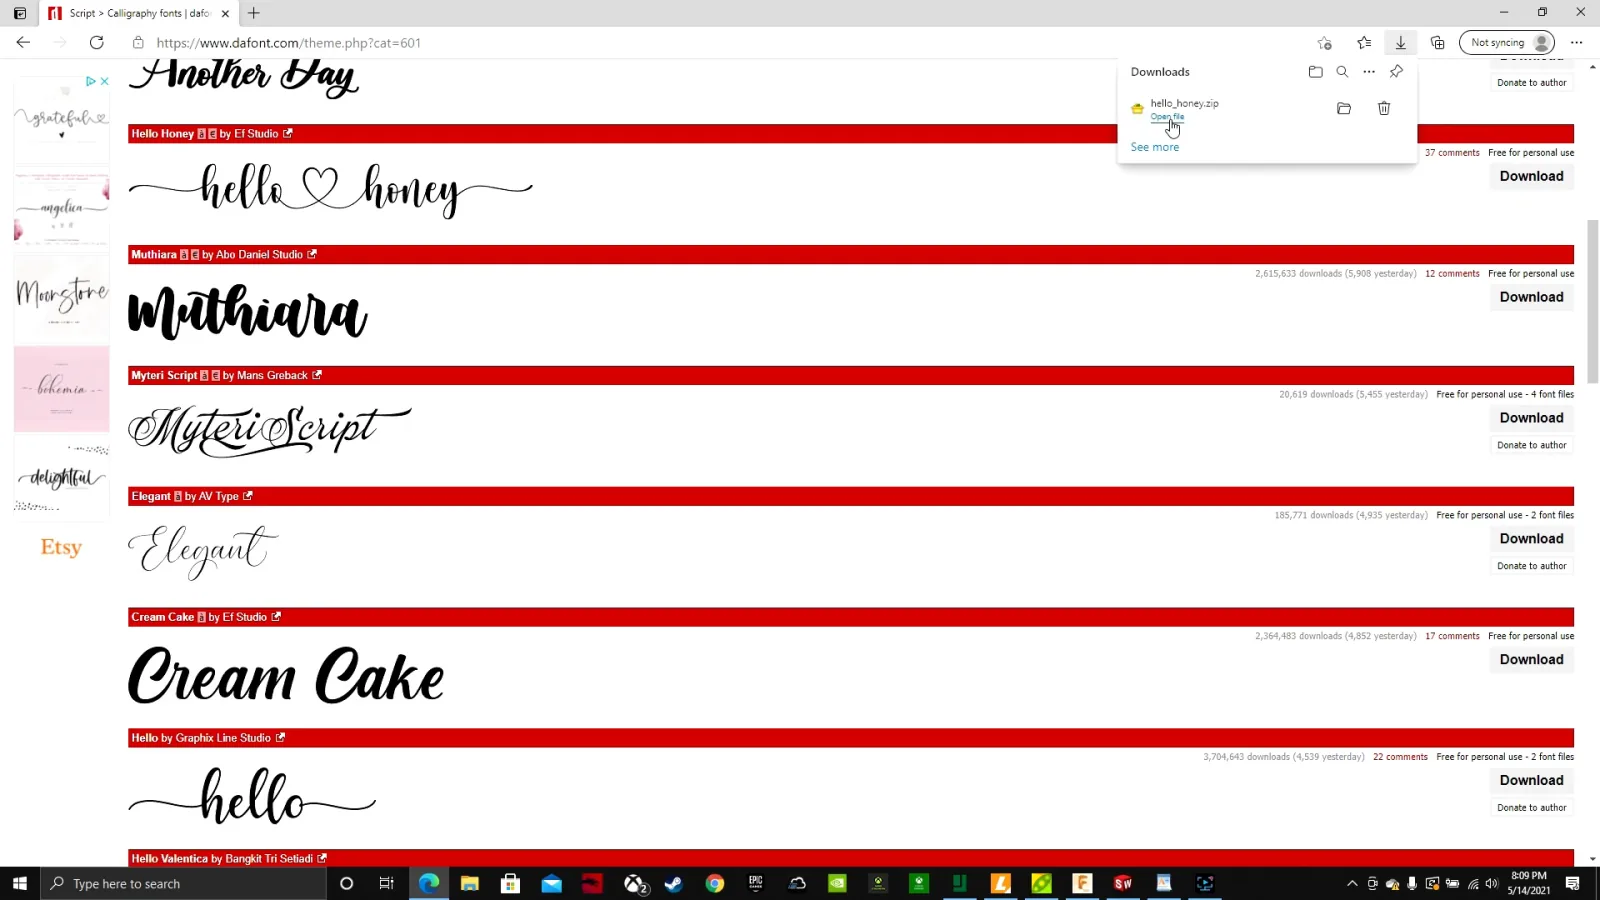
Start by picking your font. My three go-to places are Google Fonts, DaFont, and Creative Fabrica.
Before you download anything, check the license. It's the step everyone skips, and it's the one that matters the second you sell something.
- Personal license: fine for your own projects and gifts. Not for selling.
- Commercial license: what you need the moment money changes hands.
Google Fonts and DaFont both have plenty of free options, but on DaFont the license changes font by font, so read each one. A Creative Fabrica subscription covers personal and commercial use across the whole library, which is why I lean on it when I'm making something to sell.
I go a lot deeper on where to find good fonts, which free ones are safe to sell with, and the licensing trap that catches people out in my guide to where to get the best fonts and graphics.
Download and Unzip the Font File
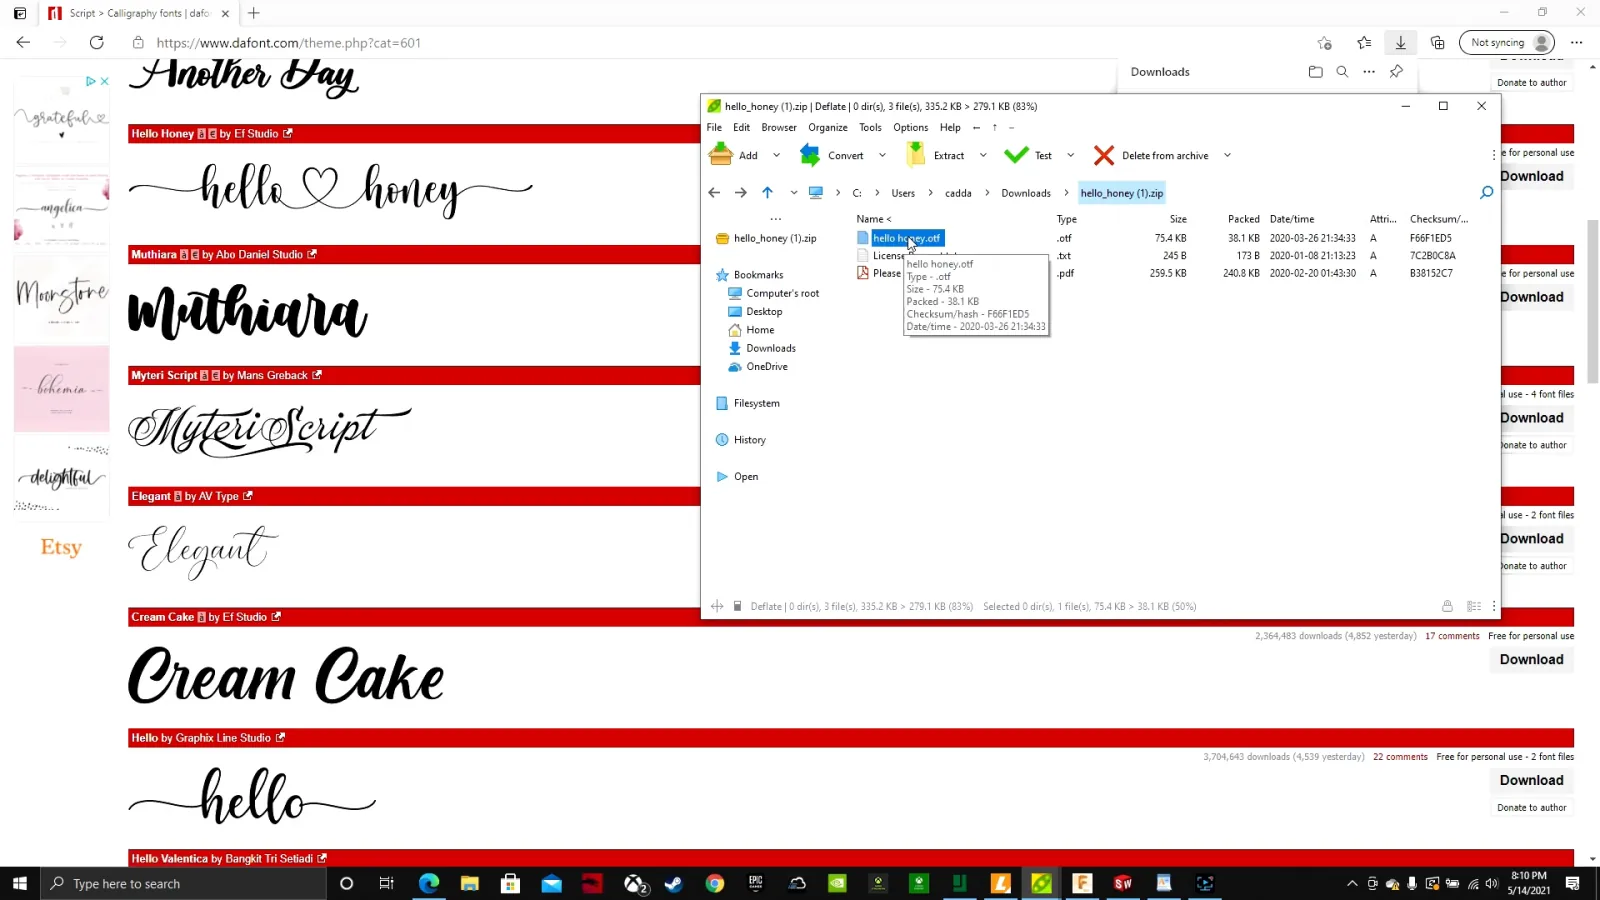
Download your font and head to your Downloads folder. Fonts almost always arrive as a ZIP, so double-click it to open it up.
Inside you'll find one or both of these:
- OTF (OpenType Font)
- TTF (TrueType Font)
If you get a choice, take the OTF. OTF files can carry extras that TTFs can't: ligatures, alternate letters, fractions, and swashes. Those swashes and alternates are where the pretty flourishes hide, so grab the version that has them.
Only got a TTF? That's completely fine. It'll still work.
You'll usually get a license file in there too, like the License.txt below. Don't bin it. That's the document that tells you whether you're allowed to sell what you make.
Install the Font on Your Computer
Here's the part people brace themselves for, and it turns out to be a totally normal font install. Nothing Cricut-specific happens at all.
On Windows:
- Double-click the OTF or TTF file.
- A Font Preview window opens showing the alphabet.
- Click Install.
On Mac:
- Double-click the font file.
- Font Book opens with a preview.
- Click Install Font.
That's genuinely it. The font is now available to every program on your computer, not just Design Space.

If you'd rather watch me do it, here's the whole thing on Windows using a free font from DaFont. I also cover connecting cursive letters and digging out the hidden flourishes, which are the two questions I get straight afterwards:
 8:17
8:17
See this step
HOW TO UPLOAD FONTS FROM DAFONT TO CRICUT DESIGN SPACE IN WINDOWS
One heads up on that video: I recorded it on an older version of Design Space, so a few buttons have moved since. Every screenshot in this post is from the current interface, so if the video and the pictures disagree, go with the pictures.
Restart Design Space and Look Under System
This is the step that trips up almost everyone.
If Design Space was open while you installed the font, close it completely and reopen it. It only checks your computer's fonts when it starts up, so anything you install mid-session won't appear until you restart it.
There's a quicker way than shutting the whole thing down, though. Click the three dots in the top bar, then View, then Reload. That refreshes Design Space and picks up your new font without a full restart.

Even quicker once you know it's there: Ctrl+R does the same thing. That's the one I actually use, because installing a font and forgetting to reload is the single most common reason people think it didn't work.
Then go find it:
- Click Text in the left toolbar and type something.
- Click the font name in the toolbar along the top. The font panel opens down the left-hand side.
- Choose the System tab, near the top of that panel.
There it is.

The panel splits into four tabs, and knowing what's in each one saves a lot of pointless scrolling:
- Cricut: fonts built into Design Space. Some free, some subscription-only.
- System: every font installed on your computer, including the one you just added. This is where your downloads live.
- Recent: fonts you've used lately.
- Bookmarked: fonts you've saved for later.
Fonts with a small green a icon need a Cricut Access subscription. If you don't have one, use the filter to show free fonts only. Saves you falling in love with something you can't use.
Still finding your way around the software? My beginner's tutorial for Cricut Design Space covers the canvas from scratch.
Adding Fonts on iPad and iPhone
Good news: this absolutely works. Design Space on iOS reads the fonts installed on your device, exactly the way the desktop version reads the ones on your computer.
What changes is how the font gets onto the device. Apple won't let you double-click a font file on an iPad, so it goes through an app instead:
- Open the App Store and install a font app.
- Open that app and install the font you want.
- Check it worked: go to Settings, then General, then Fonts. Anything installed shows up in that list. Apple's own walkthrough is here.
- Open Design Space, tap Text, and pick your font. Fonts from your device are labelled System, same as on desktop.
One thing worth knowing before you get attached to a font: Cricut points out that system fonts weren't designed for Design Space, so a few of them have quirks it doesn't handle well. If a font behaves strangely on the canvas, that's usually why, and it isn't something you did wrong.
I'll be straight with you: I haven't tested this on an iPad myself, so those steps come from Apple's and Cricut's own documentation rather than from me sitting there doing it. The desktop steps above are the ones I use every week.
Careful moving a project between devices
You can build a project on your computer and open it on the iPad afterwards, since projects sync across your account. There's a catch worth knowing about first, though.
Your text on the canvas is still live text, and it's leaning on a font that's installed on that computer. Cricut says it plainly: because system fonts are installed on a particular device, the fonts available to you vary from device to device.
So what actually happens? I tested it rather than guessing. Open the project somewhere the font isn't installed and Design Space puts an orange Missing Content warning across the top:
This project contains fonts that are not installed on your computer. If you make any edits to the text, “Singsong” will default to Cricut Sans.

Honestly, that's better behaviour than I expected. Your design still looks right, and Design Space even names the font that's gone missing.
But read that second sentence again, because it's the trap: the moment you edit that text, it drops to Cricut Sans. Change a letter, fix a typo, resize the wording, and your font is gone. The design survives right up until you touch it.
The fix is to weld your text before you move it. I tested this one properly rather than guessing: I installed a font, typed some text with it, welded it, then uninstalled the font completely. The design stayed exactly as it was.
That's because welding turns the letters into a single shape. Once it's a shape, the project stops caring whether the font is installed anywhere at all.
Just know it's a one-way trip. Once text is welded you can't edit the wording, and the font drop-down vanishes with it. If you need to know which font you used later, right-click the layer and choose Image Info.
So: weld a finished design before sending it to another device, and keep an unwelded copy of the project if you might want to change the words later.
Why Your New Font Is Not Showing Up
Nine times out of ten, it's one of these four.
You're looking at the wrong tab. Downloaded fonts never show under Cricut. Only under System. Check there first.
You didn't restart Design Space. It reads your font list at startup. Close it fully and reopen it.
You unzipped but never installed. Opening the ZIP is not installing. You have to double-click the actual OTF or TTF file and click Install.
The font is not called what you think. The file name and the font's real name are often different. Type the first few letters into the font search box instead of scrolling for it.
Still nothing? Restart your computer. I know that sounds like a cop-out, but font caches occasionally need it, and it fixes this more often than it has any right to.
Getting the Most From Your New Font
Once your font is in, a few habits will save you a lot of frustration.
Weld your script fonts. Script and cursive fonts need welding so your Cricut cuts the word as one connected piece, instead of separate letters that fall apart the moment you weed them. Some cursive fonts weld themselves, plenty don't, so just make it a habit.
The other half of making script look right is letter spacing, or kerning. Script fonts often type with gaps between the letters. Click Format in the toolbar and drag the Letter Space slider down until the tails actually touch:

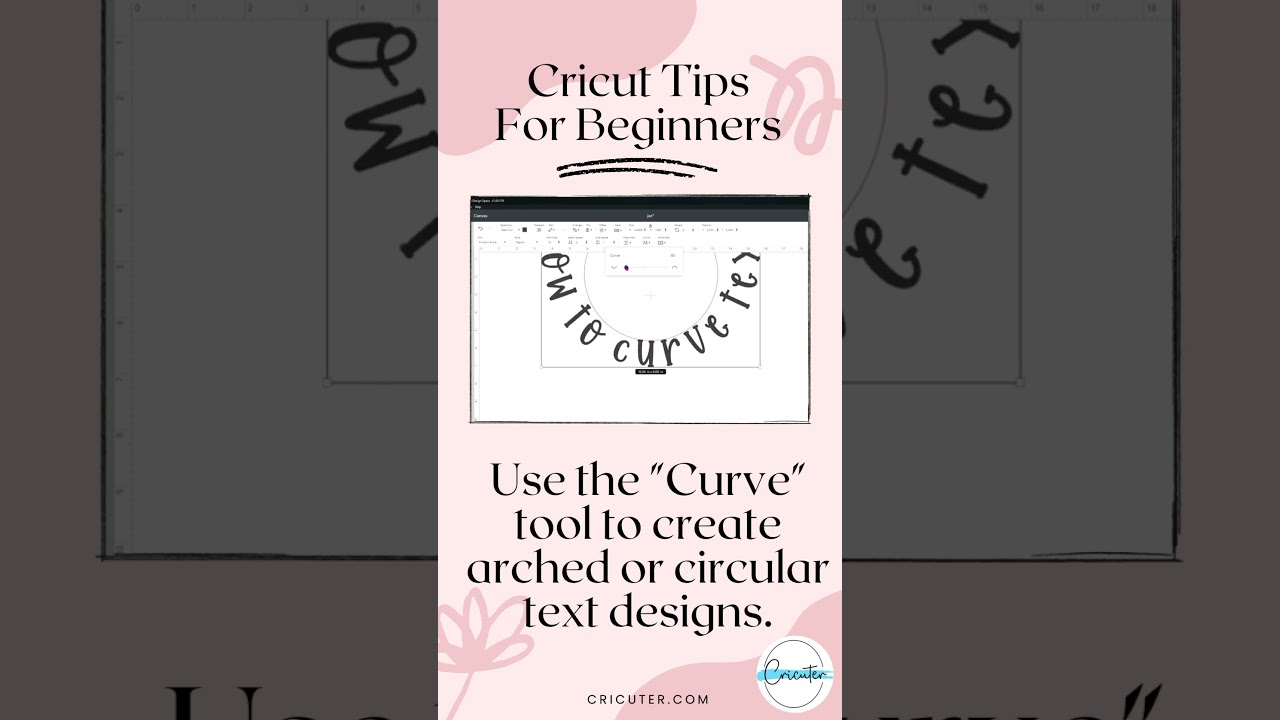
🔴 Curving your text? Do that next, before you go any further. Curve lives under Effects in the toolbar, and it works on your text as one whole piece. Split the letters apart first and you've lost your chance to arc them as a set.

Curved text is what you want for anything going on a tumbler or a round sign. Here's the walkthrough:
 0:18
0:18
See this step
Mastering Cricut: Curving Text in Design Space Made Easy for Beginners
Now you can fix any individual letters that still sit wrong. Click Format, then Select Ungrouping, then Ungroup to Letters. Each letter becomes its own layer and you can nudge it exactly where you want before welding:

So the running order that saves the most rework is: space it, curve it, ungroup it, weld it.
If the insides of your letters fill in solid black when you weld, undo it, nudge the letter spacing out a little, and weld again. That overlap is what causes it.
One warning: welding is permanent unless you undo it right away. If you might want to change the wording later, use Unite instead. Same job, but you can still take it apart.
Handy to know: once text is welded, the font drop-down disappears and you can't see which font you used anymore. Right-click the welded layer and choose Image Info to get its name back.
Thin fonts cut badly. Very fine fonts tear when you weed them, especially in vinyl. Here's my fix for bulking one up so it actually survives:
Watch how to get thicker fonts:
 1:00
1:00
See this step
Cricut Design Space Tip - Get Thicker Fonts
Find the hidden characters. Fancy fonts often hide swashes and alternate letters that never appear when you just type. On Windows, start by opening Character Map from the Start menu:

Pick your font, tick Advanced view, set Character set to Unicode, then change Group by to Unicode Subrange and choose Private Use Characters. That's where font designers hide the good stuff:

Click the character you want, hit Select, then Copy, and paste it straight into your text in Design Space:

On Mac it's simpler: open Font Book, select the font, and switch to Repertoire view to see everything the font contains.
That's where the fancy tails and looped letters on everyone else's projects come from. I walk through it on screen in the Windows video above if you'd rather see it than read it.
Can You Sell Projects Made With Downloaded Fonts
Yes, as long as the license allows it. There are two separate sets of rules here and people mix them up constantly.
For fonts you downloaded yourself, the font's own license decides. A commercial license means you can sell finished items made with it. A personal license means you cannot, no matter how small your shop is.
Designers usually spell it out right on the download page. Here's the note on the font I used above: free for personal projects, buy a commercial license if you're making money from it. That's typical, and it's the bit worth reading before you fall in love with a font.

For fonts built into Design Space, Cricut's Angel Policy applies. The short version:
- You can sell up to 10,000 finished items a year using Cricut Access fonts and images, the ones with the green a icon.
- Anything without that green icon is personal use only.
- You must add the line “Includes Copyright Material of Cricut” to the finished item, a tag, or a label.
- Every item must be made by one person. No assembly lines.
- Licensed characters like Disney and Marvel are never allowed for sale, even though they show up in Design Space.
- You cannot sell digital files. Finished physical products only.
And modifying a Cricut design does not get you out of the policy. It still counts.
Want the full breakdown of what a subscription actually includes? I compared it here: what is Cricut Design Space and Cricut Access.
I go into fonts, licensing, and selling in a lot more depth in Cricut For Dummies, my beginner guide published by Wiley.
Frequently Asked Questions
How do I add fonts to Cricut Design Space?
Install the font on your computer first, then restart Design Space. On Windows, double-click the OTF or TTF file and click Install. On Mac, double-click it and click Install Font. Reopen Design Space, add a text box, open the font menu and switch to the System tab. Your font will be sitting there.
Why is my downloaded font not showing up in Cricut Design Space?
Almost always because Design Space was open when you installed it, or because you're looking under the Cricut tab instead of System. Close Design Space completely, reopen it, and check the System tab. If it's still missing, make sure you actually installed the OTF or TTF file rather than just opening the ZIP.
Where do downloaded fonts appear in Cricut Design Space?
Under the System tab in the font drop-down. The Cricut tab only shows fonts that belong to Design Space itself, so your downloads will never turn up there.
Can I add fonts to Cricut Design Space on an iPad?
Yes, but you get the font onto the iPad differently. Install a font app from the App Store, use it to install your font, then check it under Settings, General, Fonts. Once it's on the device, Design Space lists it under System when you tap Text.
What happens if I uninstall a font I already used in a project?
I tested this both ways.
If you welded the text first, nothing happens at all. I installed a font, typed with it, welded it, then uninstalled the font, and the design was completely unchanged. Welding turns the letters into a shape, so the font stops mattering.
If you did not weld it, the project still opens and still looks correct, but Design Space shows a Missing Content warning naming the font. The catch is in the small print: if you edit that text, it defaults to Cricut Sans and your font is lost. So weld a finished design before you uninstall a font or move a project to another device.
Do I need Cricut Access to use my own fonts?
No. Cricut Access covers Cricut's own font and image library, the ones marked with the green a icon. Any font you install on your computer is yours to use in Design Space for free.
Is OTF or TTF better for Cricut?
Take the OTF if you're offered both. OTF files can include ligatures, alternate letters, fractions, and swashes, so you've got more to play with. TTFs work perfectly well, they just tend to carry fewer extras.
Can I sell things made with free fonts?
Only if the font's license allows commercial use. Free to download doesn't mean free to sell with. Check the license on every font and keep a note of it. A Creative Fabrica subscription includes commercial rights across the library for $4.99 a month, which saves checking them one at a time.
Call to Action and Community Invite
Now go install that font that's been sitting in your Downloads folder for three weeks. It takes about ninety seconds, and the System tab is waiting for it. And if you are still deciding which ones are worth the space, these are the fonts I use on almost every project.
Once it's in, the fun part is working out what to make with it. If you're still figuring out what your machine can handle, start with what a Cricut machine can do.
And if your font still won't show up, come tell me what's happening over on YouTube, where I post new Cricut tutorials every week.