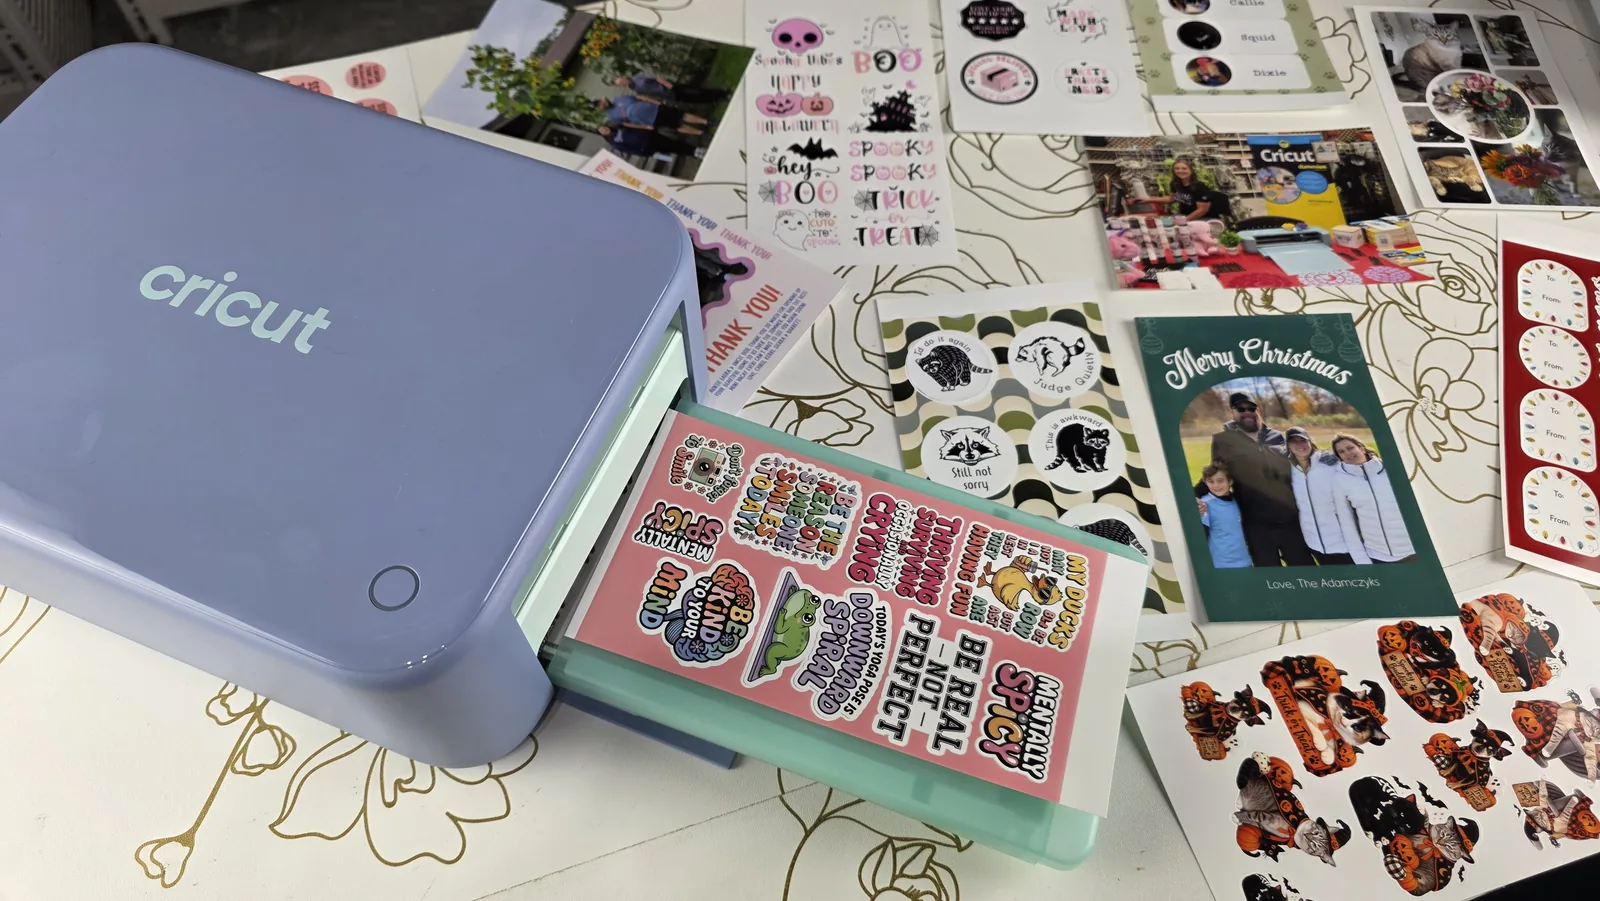

To make photo stickers, you turn your picture into a sticker design, add a white border around it, then print it on sticker paper and cut around the border. You can do all of it at home, either with a dedicated sticker printer like the Cricut StickerPix or with any Cricut and a regular inkjet printer.
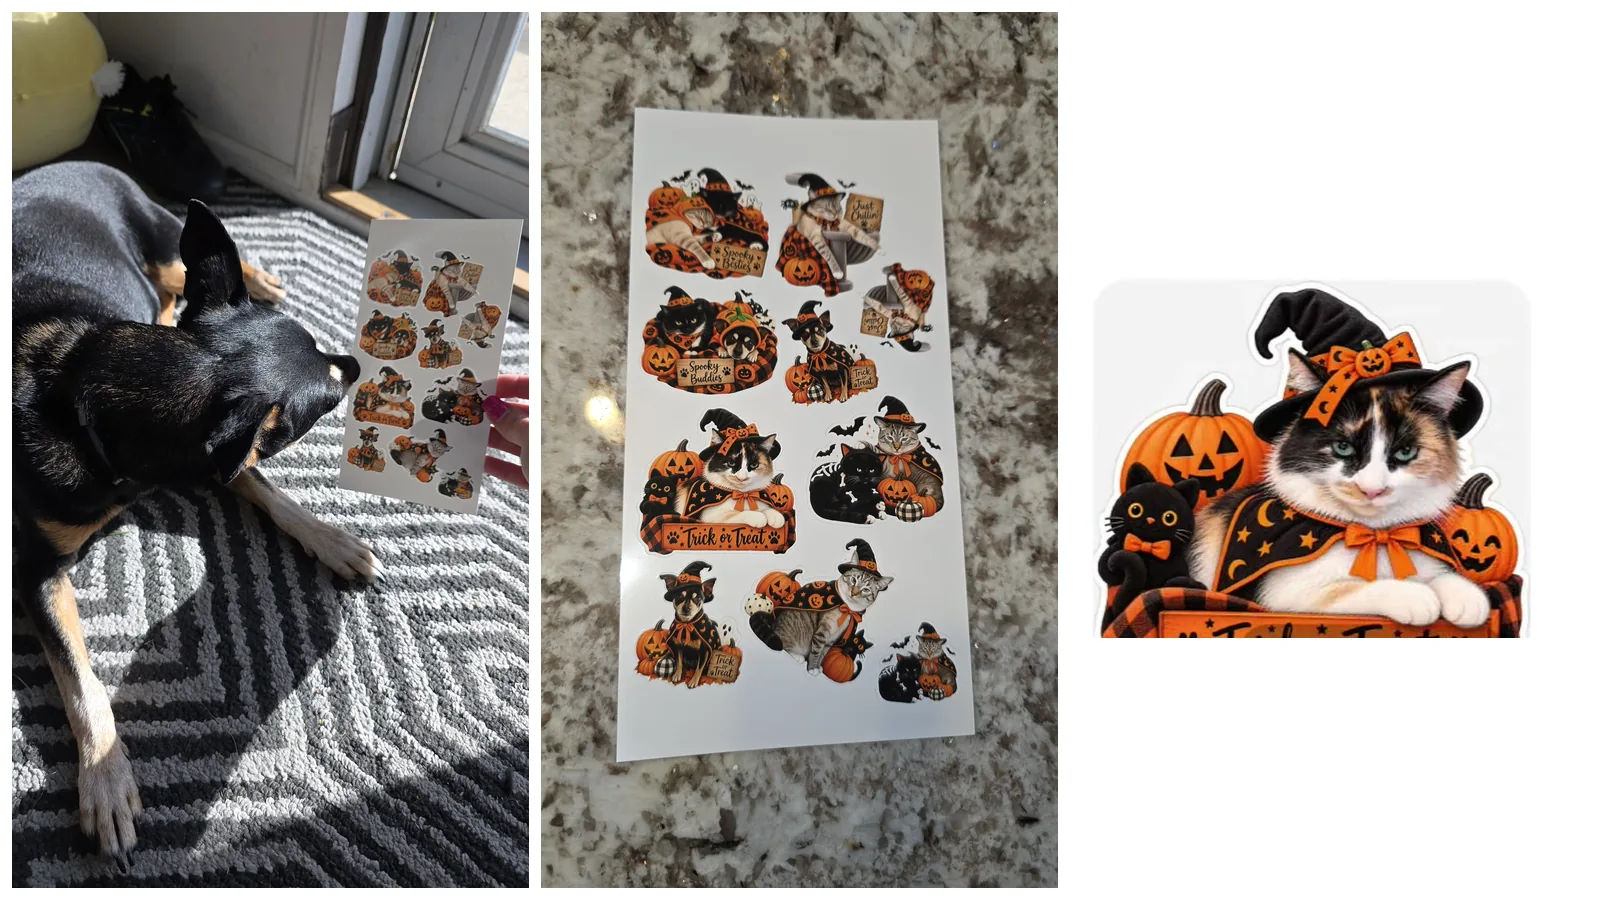
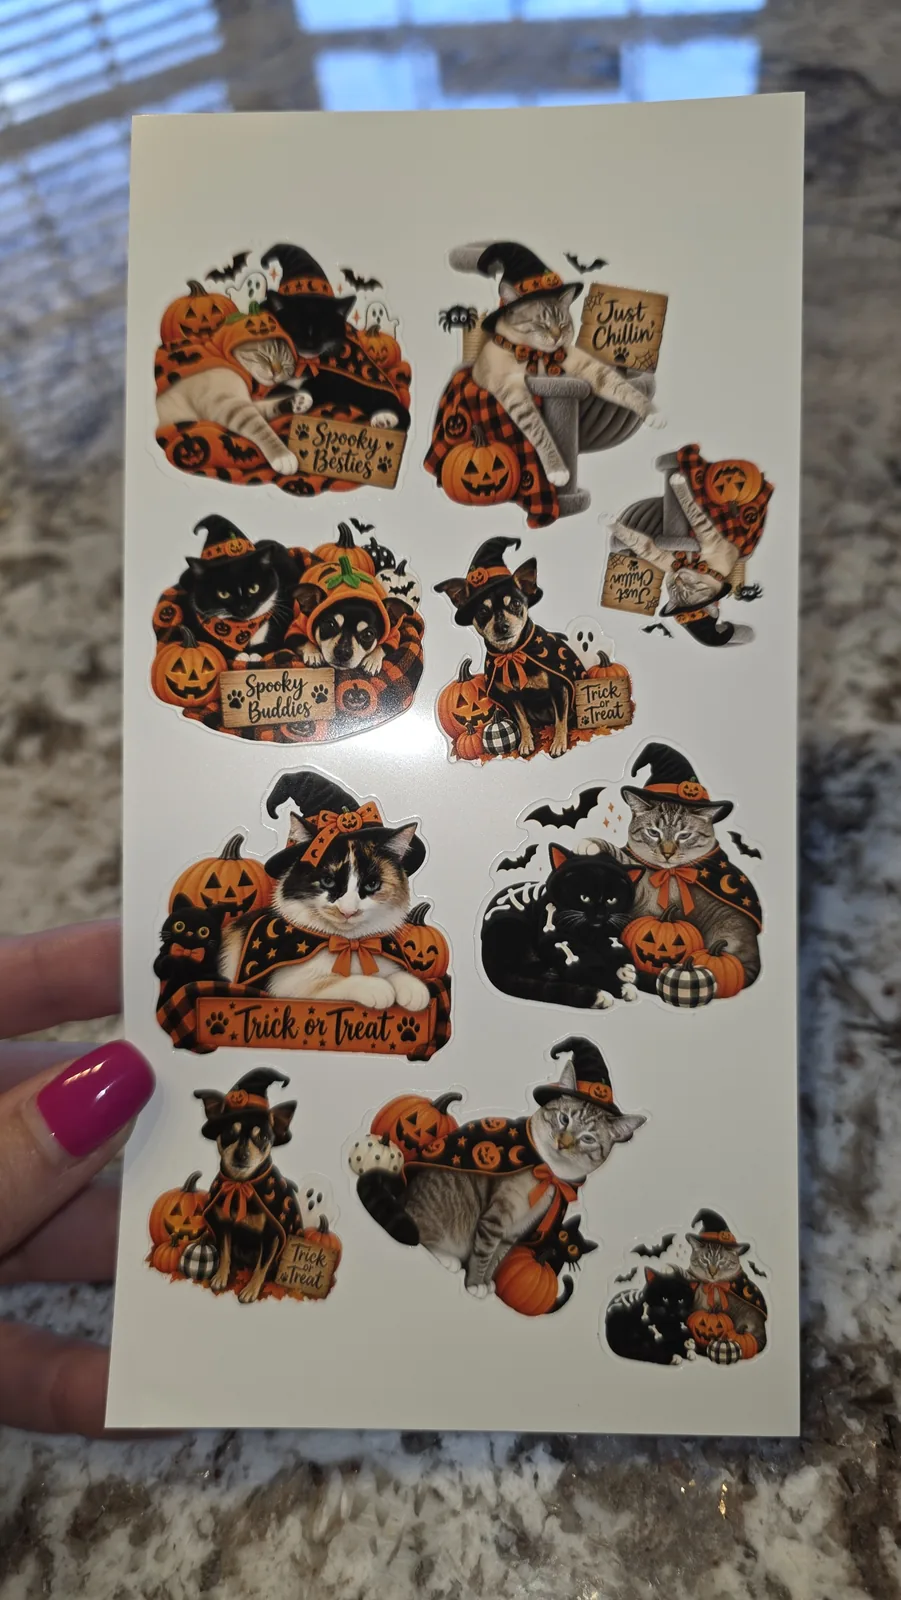
I just did this with pictures of my cats and my dog. I used ChatGPT to turn them into Halloween sticker designs, fit them onto one sticker sheet, and printed, laminated and cut them without ever leaving my kitchen. Here's exactly how I did it, including the prompts I typed, plus the way to do it with the Cricut you might already own.
Cost per sheet: about 50 to 70 cents | Difficulty: Beginner | You need: your phone and a StickerPix, or a Cricut plus an inkjet printer
This post contains affiliate links. If you buy through them, I may earn a small commission at no extra cost to you.
 18:35
18:35
Watch the full tutorial
Cricut Made a STICKER MACHINE?! Cricut StickerPix Review
Cricut just launched the NEW Cricut StickerPix Print and StickerPix Print + Cut, and I tested BOTH! 🤯 The StickerPix Print + Cut can print, laminate AND cut custom stickers all in one machine — no separate printer, cutting mat, or manually applying laminate.
Key Takeaways
- A photo sticker is just your picture with a white border, printed on sticker paper and cut around that border. Every method below follows those same three steps.
- ChatGPT can turn a pet photo into a sticker design with one sentence. I typed “Make this cat a Halloween sticker” and got a finished design with pumpkins and a Trick or Treat sign.
- On a Cricut StickerPix, photo stickers cost about 50 to 70 cents per sheet, including the laminate. The Print + Cut prints, laminates and cuts on a 4×7 inch sheet with no mat.
- With a regular Cricut, Print Then Cut handles sheets up to 9.25 by 6.75 inches on letter paper. You print on inkjet sticker paper, laminate by hand if you want them water-resistant, and cut on a mat.
- Every StickerPix print uses the same amount of ink ribbon, no matter how many stickers are on the sheet. Fill the whole sheet so none of it goes to waste.
Quick Links
- Key Takeaways
- What You'll Need
- Step 1: Pick Your Photos
- Step 2: Turn Your Photo Into a Sticker Design With ChatGPT
- Don't Want to Use AI? Use a Photo Sticker Template
- Step 3: Upload Your Design and Add a Border
- Step 4: Fill the Whole Sticker Sheet
- Step 5: Print, Laminate and Cut
- How to Make Round Photo Stickers Without a Cutter
- How to Make Photo Stickers With a Cricut (Print Then Cut)
- StickerPix vs Print Then Cut for Photo Stickers
- Tips & Troubleshooting
- FAQ
What You'll Need
There are two ways to do this. Pick the one that matches what you already have.
Option 1: A sticker printer (easiest)
- Cricut StickerPix Print + Cut – prints, laminates and cuts custom shapes
- Cricut StickerPix Print – same printing and laminating, pre-cut sticker shapes only
- StickerPix Print + Cut refill set, 36 prints – sticker sheets, photo paper and cartridge together
- Your phone with the Cricut Design Space app
Option 2: A Cricut cutting machine you already own
- Cricut machine – any model that does Print Then Cut
- Inkjet printer – I use an HP ENVY Inspire 7255e
- Joyeza printable vinyl sticker paper – my top pick when I tested five brands
- Blue LightGrip mat – holds the sheet while it cuts
- Clear laminate film – optional, for water resistance
Either way
- Photos of your pets, kids or favorite people
- ChatGPT – optional, to turn a photo into an illustrated sticker design
Some of the links above are affiliate links. If you buy through them I earn a small commission at no extra cost to you, and it helps me keep making these tutorials.
Step 1: Pick Your Photos
Start with the pictures you actually love. I have a gazillion photos on my phone that I never print, so this was a fun excuse to finally use some of them.
A few things make the job easier:
- The subject should be easy to see. A pet or person who fills most of the frame turns into a much better sticker than a tiny figure in a busy room.
- You can use more than one pet in a photo. One of my designs started as a picture of two cats together, and ChatGPT kept both of them.
- Keep the original handy. If the first design isn't quite right, you'll want the photo to try again.
Step 2: Turn Your Photo Into a Sticker Design With ChatGPT
This is the part that made me squeal. I uploaded pictures of my cats and my dog to ChatGPT and asked it to turn them into Halloween stickers.
- Open the ChatGPT app and tap + to attach a photo.
- Type a short request asking it to turn the photo into a sticker.
- Send it and wait for the design.
- Save the image to your phone. Repeat for each pet.
These are the exact prompts I used:
- “Edit this picture of my cat so he looks Halloween themed for a sticker”
- “Make these cats look like a Halloween sticker”
- “Make this cat a Halloween sticker”
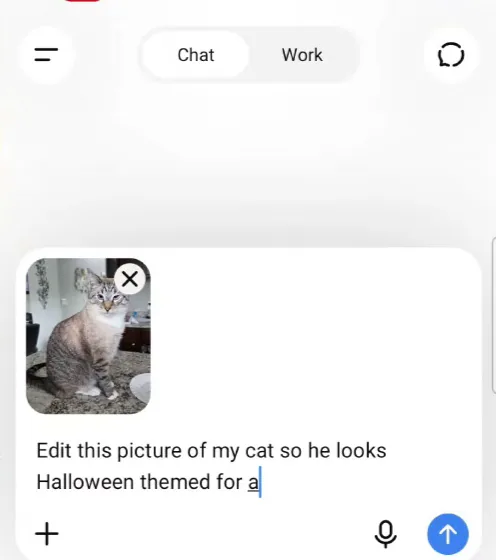
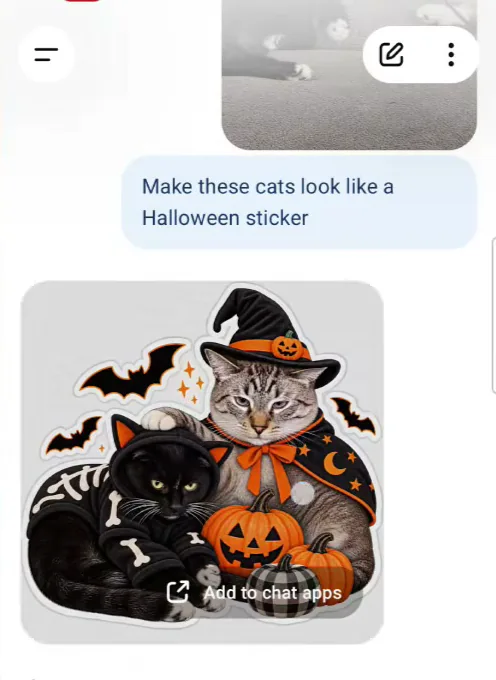
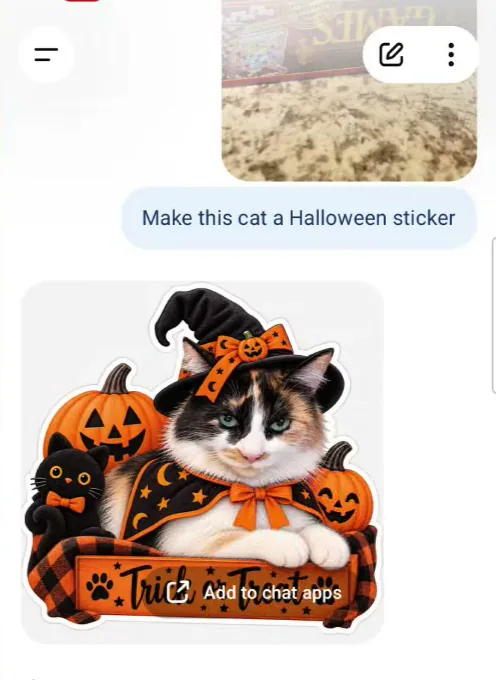
Look how freaking amazing these came out! Notice that the prompts don't have to be fancy. Short and specific worked every time, and ChatGPT added the white sticker edge on its own.
You can swap “Halloween” for anything: Christmas, a birthday party, back to school, or your favorite sports team.
Short on time? I also made a set of 24 free printable Halloween stickers, including a Spooky Pets set, that are ready to print as soon as you download them.
Don't Want to Use AI? Use a Photo Sticker Template
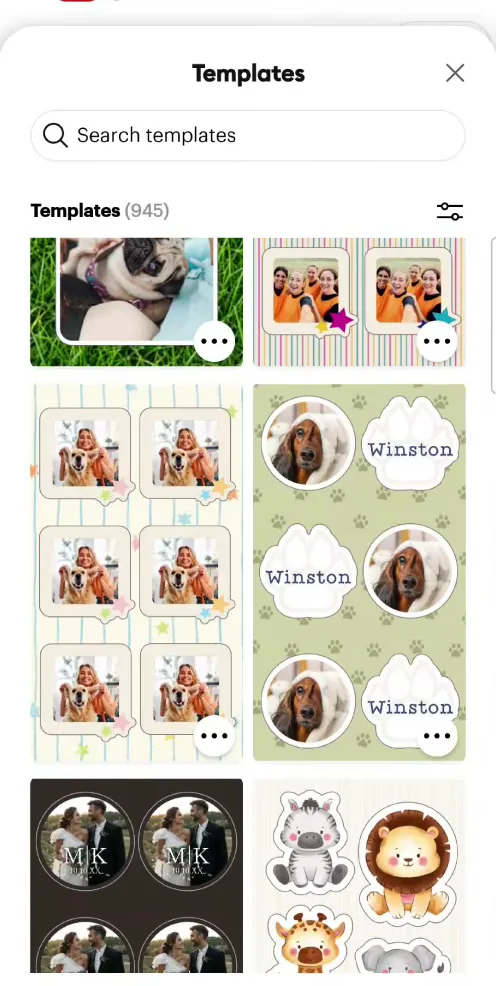
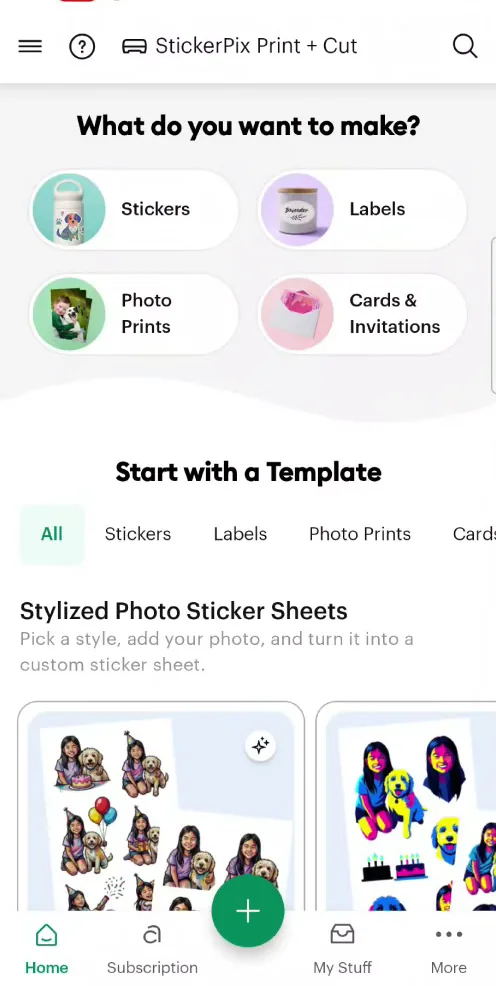
I know AI isn't everyone's cup of tea, and you don't need it. Cricut Design Space has a big library of photo sticker templates built in, including Stylized Photo Sticker Sheets. You pick a style, add your photo, and it turns it into a custom sticker sheet.
When I scrolled through them, there were pet photo sheets, round photo stickers, heart frames and name stickers. Just drop your own picture into the template and move on to Step 4.
Step 3: Upload Your Design and Add a Border
Now bring your designs into Cricut Design Space. I did all of this on my phone.
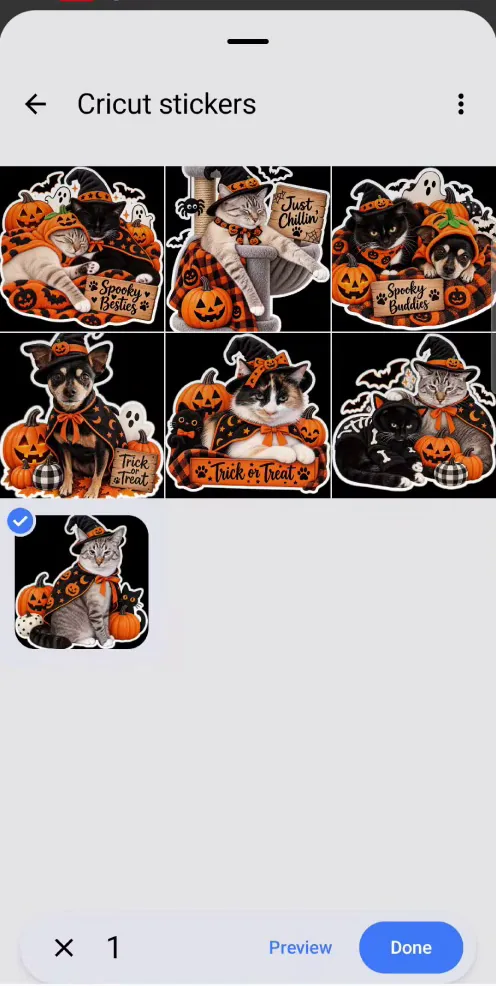
- Tap Upload, then Select from photo library. You can only upload one image at a time, so pick one and tap Done.
- Tap Border. This is the white outline that the machine cuts around. Mine started at 0.08 inch, and I dragged it much smaller. Tap the check mark when you like it.
- Drag a corner to resize the sticker. I made mine about 1.45 inches.
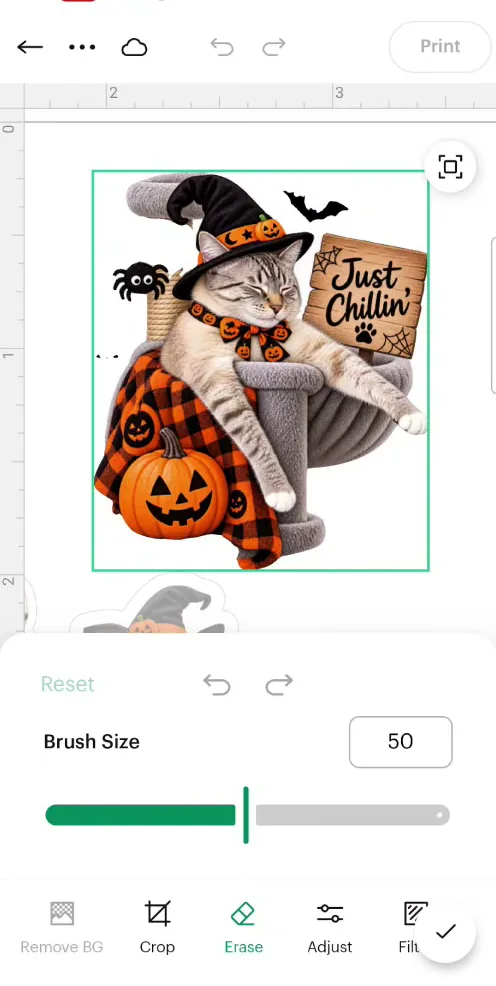
- If there's a stray bit you don't want, use the Erase tool. There's also a Remove BG button if your photo still has its background.
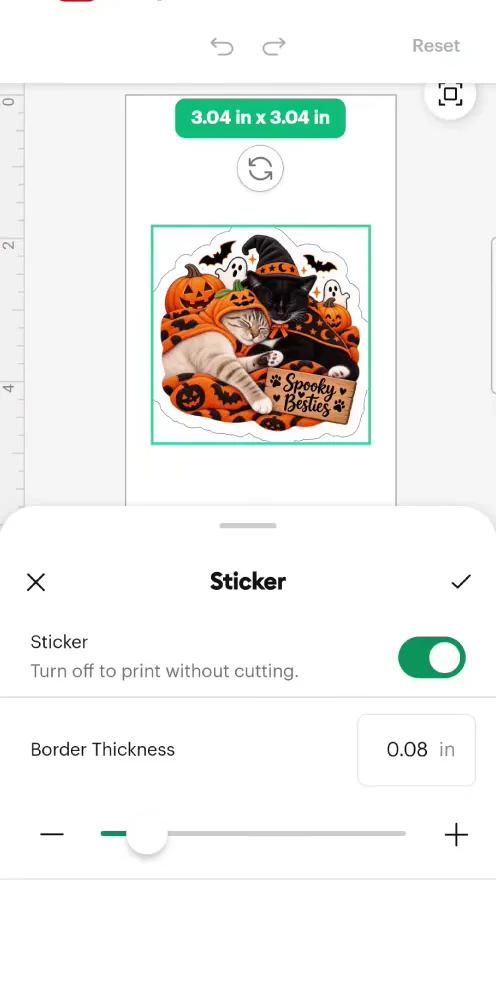
Tip: The same Border panel has a Sticker toggle. Turn it off and the design prints without being cut, which is handy for photo labels or cards.
Step 4: Fill the Whole Sticker Sheet
Keep uploading until the sheet is full. This matters more than you'd think.
The StickerPix doesn't use liquid ink. Every print uses one full panel of dye ribbon, whether you fill the whole sheet or print one tiny sticker in the middle. So if you're making stickers, fill the sheet.
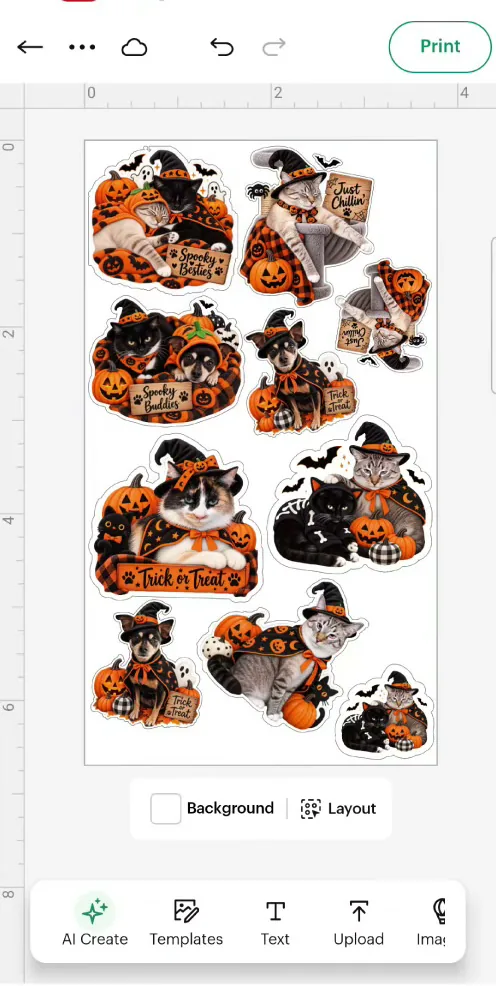
You also don't have to pick a material setting or a paper size. Design Space already knows what the StickerPix uses. When your sheet looks good, tap Make.
Step 5: Print, Laminate and Cut
This is the fun part to watch. The sheet moves back and forth through the StickerPix and builds your photo one color at a time: first yellow, then magenta, then cyan.
On the fourth pass, it adds a clear protective layer over the whole sheet. Cricut says that makes the stickers water-resistant, scratch-resistant and more resistant to fading. There's no laminate film to wrestle with, and if you've ever laminated stickers by hand, you know what a relief that is.
Then the Print + Cut moves the sheet straight into its built-in cutter and cuts around every border. No registration marks and no sticky mat.
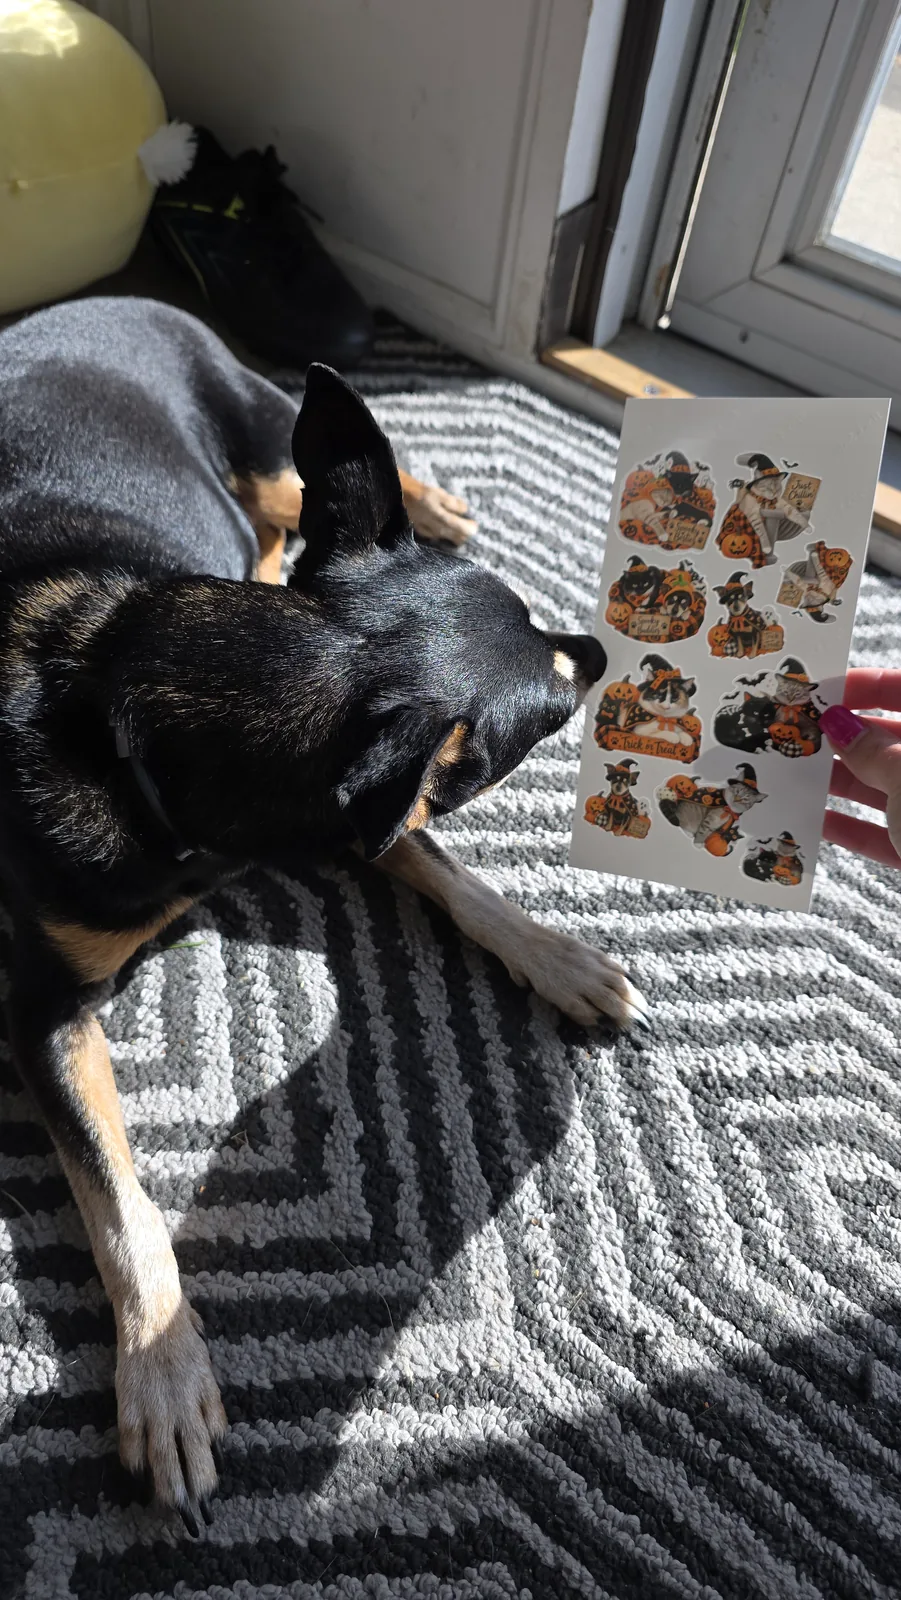
And that's it. We went from pictures on my phone, to Halloween sticker designs, to printed, laminated, custom-cut stickers.
One thing to know: the StickerPix makes kiss cut stickers. It cuts through the sticker but not the backing, so your stickers stay together on one sheet. If you want individual pieces, here's the difference between kiss cut and die cut stickers.
How to Make Round Photo Stickers Without a Cutter
The less expensive StickerPix Print doesn't have a cutter. It uses sticker sheets that are already cut, like 1.5 inch circles, and you just fill each circle with a photo.
- Load a pre-cut circle sheet into the tray.
- In Design Space, tap Stickers and choose the shape you're using.
- Pick a template, or close the templates for a blank sheet.
- Tap a circle, then Fill, Photos, Upload and Select from library. Choose a picture and tap Done.
- Double tap the circle to adjust how your photo sits inside it, then tap Make.
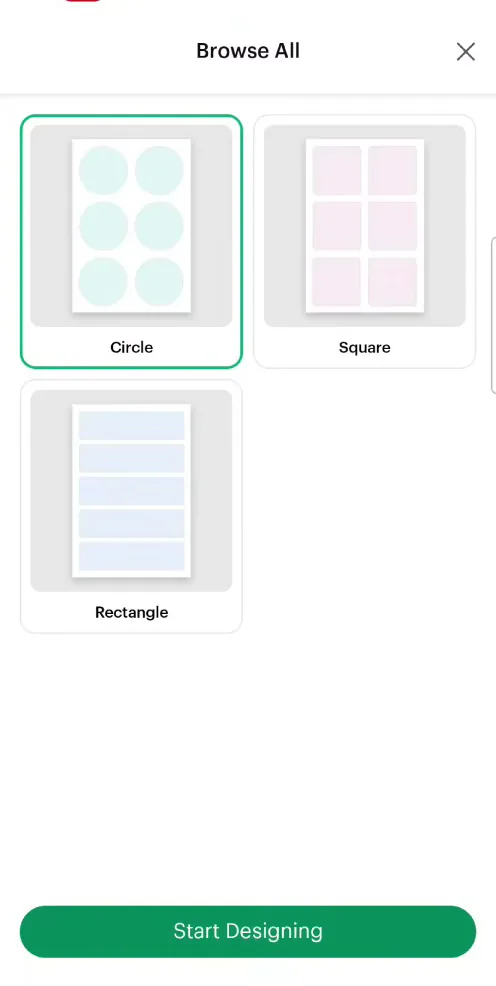
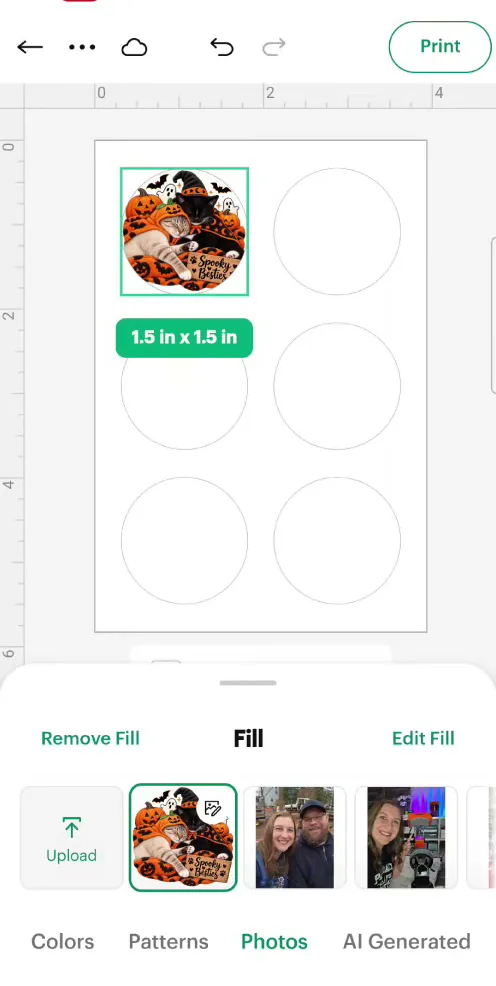
When it's done, the stickers pop right out and you can peel and stick them wherever your little heart desires. These are perfect for kids' binders, planners and water bottles.
How to Make Photo Stickers With a Cricut (Print Then Cut)
Already have a Cricut? You can make the same photo stickers with Print Then Cut. The design steps are the same, and the difference is that you print on your own inkjet printer and cut on a mat.
- Design the sticker the same way. Turn your photo into a sticker design with ChatGPT, or use a photo and remove the background in Design Space.
- Upload it and add an offset. In Design Space, the white border is called an offset. Set your image to Print Then Cut.
- Stay inside the print area. On letter paper, Print Then Cut handles up to about 9.25 by 6.75 inches.
- Print on printable vinyl or sticker paper. When I tested five sticker papers, Joyeza came out on top at about 56 cents a sheet.
- Laminate if you want them to last. Add clear laminate film before cutting. Keep it off the registration marks.
- Cut on a mat. Put the sheet on a LightGrip mat and let your Cricut read the marks and cut.
That's the short version. My full Cricut Print Then Cut sticker tutorial walks through every setting.
StickerPix vs Print Then Cut for Photo Stickers
| Feature | Cricut StickerPix Print + Cut | Cricut + Print Then Cut |
|---|---|---|
| Sheet size | 4×7 in | Up to about 9.25 x 6.75 in |
| Laminate | Automatic | By hand, optional |
| Cutting mat | Not needed | Needed |
| Registration marks | Not needed | Needed |
| Cut type | Kiss cut only | Kiss cut or die cut |
| Paper | StickerPix sheets only | Any printable vinyl or sticker paper |
| Cost per sheet | About 50 to 70 cents | About 56 cents for Joyeza, plus laminate |
If I just want some photo stickers quickly, the StickerPix is so much simpler. Print Then Cut wins when you want bigger sheets, true die cut stickers or your choice of paper. I tested both machines in my Cricut StickerPix review.
Tips & Troubleshooting
- Fill every sheet. On a StickerPix, one sticker costs the same as a full sheet.
- Don't touch the front of the sticker paper. Hold it by the edges. Fingerprints on the surface can show up in the finished print.
- Shrink the border if the stickers look chunky. A thin border looks more polished and fits more stickers on a sheet.
- Load StickerPix sticker sheets one at a time. Cricut recommends it for the best alignment.
- Water-resistant isn't waterproof. I wouldn't put a photo sticker on a tumbler and run it through the dishwasher over and over.
- Leave room behind a StickerPix. The paper moves in and out of the back while it prints.
FAQ
How do you turn a photo into a sticker?
Add a white border around your photo, print it on sticker paper, and cut around the border. A sticker printer like the Cricut StickerPix does the printing, laminating and cutting for you. With a regular Cricut, you use Print Then Cut.
How do I make stickers of my pet?
Upload your pet's photo to ChatGPT and ask it to “make this cat a Halloween sticker” or something similar. Save the design, upload it to Cricut Design Space, add a border, and print it. You can also drop the photo into one of Design Space's pet photo sticker templates.
Can I make photo stickers without a Cricut cutting machine?
Yes. The Cricut StickerPix is a small sticker printer, not a cutting machine, and it works from your phone. The Print + Cut version cuts custom shapes, and the StickerPix Print uses pre-cut sheets.
Aren't iPhone photo stickers the same thing?
No. The stickers you make from photos on an iPhone are digital stickers for messages. To get a sticker you can actually peel and stick, you need to print it on sticker paper.
Are homemade photo stickers waterproof?
StickerPix stickers are laminated automatically, and Cricut rates them as water-resistant, not waterproof. With Print Then Cut, printable vinyl plus laminate film gives you water-resistant stickers.
How much does it cost to make photo stickers at home?
On a StickerPix, about 50 to 70 cents per sheet, including the sticker paper, the dye and the laminate. With Print Then Cut, my favorite sticker paper is about 56 cents a sheet, plus ink and laminate if you use it.
What size should photo stickers be?
I made mine about 1.45 inches so I could fit more on a 4×7 sheet. The StickerPix Print's pre-cut circles are 1.5 inches.
Call to Action & Community Invite
Now it's your turn! Grab your favorite pet pictures and turn them into stickers. I'd love to see what you make, so share them in my Facebook group or tag me on Instagram.