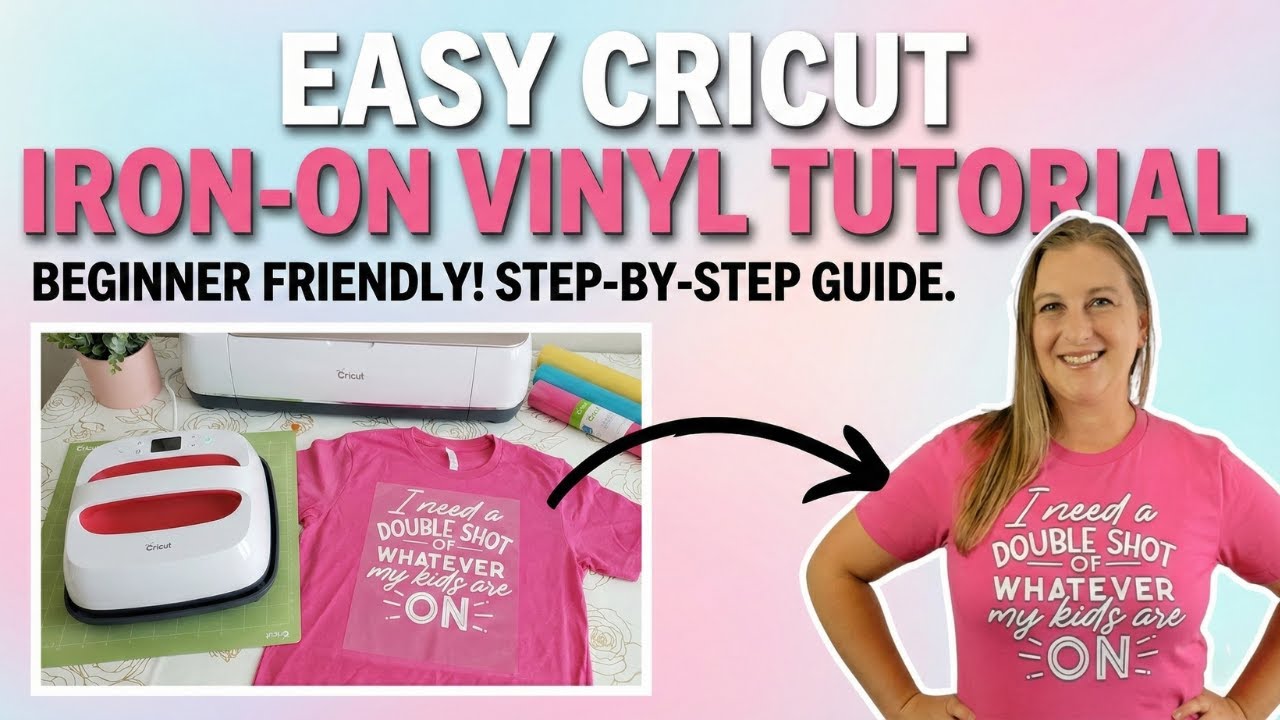
Want to make your own custom t-shirts with Cricut? You’re in the right place! In this beginner-friendly Cricut HTV tutorial, I’ll show you step-by-step how to use heat transfer vinyl (HTV) to create a shirt you’ll be proud to wear (or gift!). Not sure how big to make it? Decal sizes for every shirt includes a cheat sheet.
Don’t worry if you’re brand new to Cricut or vinyl cutting. I’ll walk you through everything from setting up your design in Cricut Design Space to pressing it onto your shirt with a heat press. By the end, you’ll know exactly how to make your own iron-on projects at home. If you are unsure which type to buy, here is how adhesive and heat transfer vinyl differ.
Table Of Contents
What You’ll Learn
In this tutorial, you’ll learn how to:
- Choose the right HTV for your project
- Set up your Cricut machine
- Create and apply your design with an easy step-by-step guide
- Prepare your design in Cricut Design Space
- Cut and weed your vinyl
- Apply the vinyl to your shirt
Step 1: Gather Your Materials
Before we jump into Cricut Design Space, let’s make sure you have everything ready. Having your materials laid out will make the whole process so much easier. One thing that trips up almost every beginner: which side of iron-on vinyl goes down.
Here’s what I used for this project:
- Cricut machine – I used the Cricut Maker but you can use the Explore, Joy, or Venture, too!
- HTV (Heat Transfer Vinyl) – I used the HTVRont bundle (42 sheets, 30 colors)
- Heat press machine – I used the HTVRont 10×10 press (similar to Cricut EasyPress)
- T-shirt – Bella + Canvas is a great choice
- Cricut Basic Tool Set (weeding tool, scraper, etc.)
- Green standard grip mat
- Lint roller
- Teflon sheet or parchment paper
- Cricut Trimmer or scissors
- Weeding tools
- Measuring tape
👉 Pro tip: Don’t skip the lint roller. Even a few little fibers can mess up how well your HTV sticks to the shirt.

Step 2: Find a Design
Unless you’re a graphic designer, you’ll probably want to use a ready-made SVG. One of my favorite sites is Creative Fabrica because they have tons of Cricut-friendly designs and fonts.
For this project, I used a design from the Sarcastic Mom SVG Bundle. (I have two kids, ages 8 and 10, so the “sarcastic mom” vibes felt perfect 🤣). If that’s not your style, don’t worry — there are thousands of options for every type of project.
When you download a design, it usually comes in a zip file. Just unzip it to your computer, pick your favorite SVG, and remember where you saved it so you can upload it into Cricut Design Space.
Step 3: Open Cricut Design Space
- Open Cricut Design Space on your computer or tablet.
- Click New Project.
- Upload your design by clicking Upload → Upload Image → Browse.
- Find your file and click Open.
Once it’s on your canvas, drag the corners to resize it. For a standard adult t-shirt, a design that’s about 8–10 inches wide usually looks great.
👉 If you’re not sure what size to make it, you can measure your shirt with a tape measure or use the built-in Templates in Cricut Design Space. Choose “Classic T-Shirt,” pick your size, and preview your design on it.

Step 4: Prepare and Cut Your Vinyl
Now for the fun part—cutting your vinyl!

- Place your vinyl on the cutting mat shiny side down.
- In Design Space, click Make It.
- Important: Turn on “Mirror” before cutting. (This flips your design so it presses correctly onto your shirt.)
- Select your material as Everyday Iron-On.
- Load the mat into your Cricut and press the flashing Cricut button.
Your machine will do its magic and cut your design.

Want to dive deeper into Cricut crafting?
👉 Check out my book Cricut For Dummies where I walk you through everything from beginner basics to advanced projects, with easy-to-follow tips and tricks.
Step 5: Weed Your Design
Weeding just means removing the extra vinyl around your design.
- Use a weeding tool or tweezers to carefully peel away the excess vinyl.
- Start from a corner and work slowly, especially around small letters or details.
- Double-check that no tiny vinyl pieces are left behind.
When you’re done, your design should be clear and ready to transfer.

Step 6: Prepare Your Shirt
Getting your shirt ready makes a big difference in how long your design lasts.
- Use a lint roller to pick up dust and fibers.
- Remove any tags or stickers.
- Pre-press your shirt with your heat press for 2–3 seconds. This removes wrinkles and moisture so the vinyl sticks better.

Step 7: Apply Your HTV with a Heat Press

Now we get to bring everything together!
- Set your heat press to 305°F for 15 seconds.
- Place your shirt on a heat-safe surface.
- Position your design about 3 inches below the neckline.
- Cover the design with a Teflon sheet or parchment paper.
- Press down firmly for 15 seconds. If your design is bigger than the press, do it in sections.
- Let the vinyl cool for 15–30 seconds before peeling off the carrier sheet.
Check if everything stuck. If not, press again for a few more seconds.

Step 8: The Big Reveal 🎉

Peel off the carrier sheet and admire your work—you just made your own Cricut t-shirt with HTV!
Try it on, show it off, and most importantly, enjoy the fact that you made it yourself. Once you do this once, you’ll want to make a whole stack of shirts for friends and family.

Final Tips
- Always mirror your design when cutting HTV.
- Practice on an old shirt if you’re nervous.
- Keep designs simple at first until you get the hang of it.
Ready to Try?
Making t-shirts with Cricut and HTV is so fun, and once you learn the basics, the possibilities are endless—shirts, bags, hats, and more.
If you want affordable designs to get started, check out Creative Fabrica.
Now it’s your turn—grab some HTV, fire up Cricut Design Space, and start crafting your first custom shirt!
Disclosure: Some of the links in this post are affiliate links. This means if you click and make a purchase, I may earn a small commission (at no extra cost to you). I only recommend products I use and love, and your support helps keep this blog going. Thank you!