
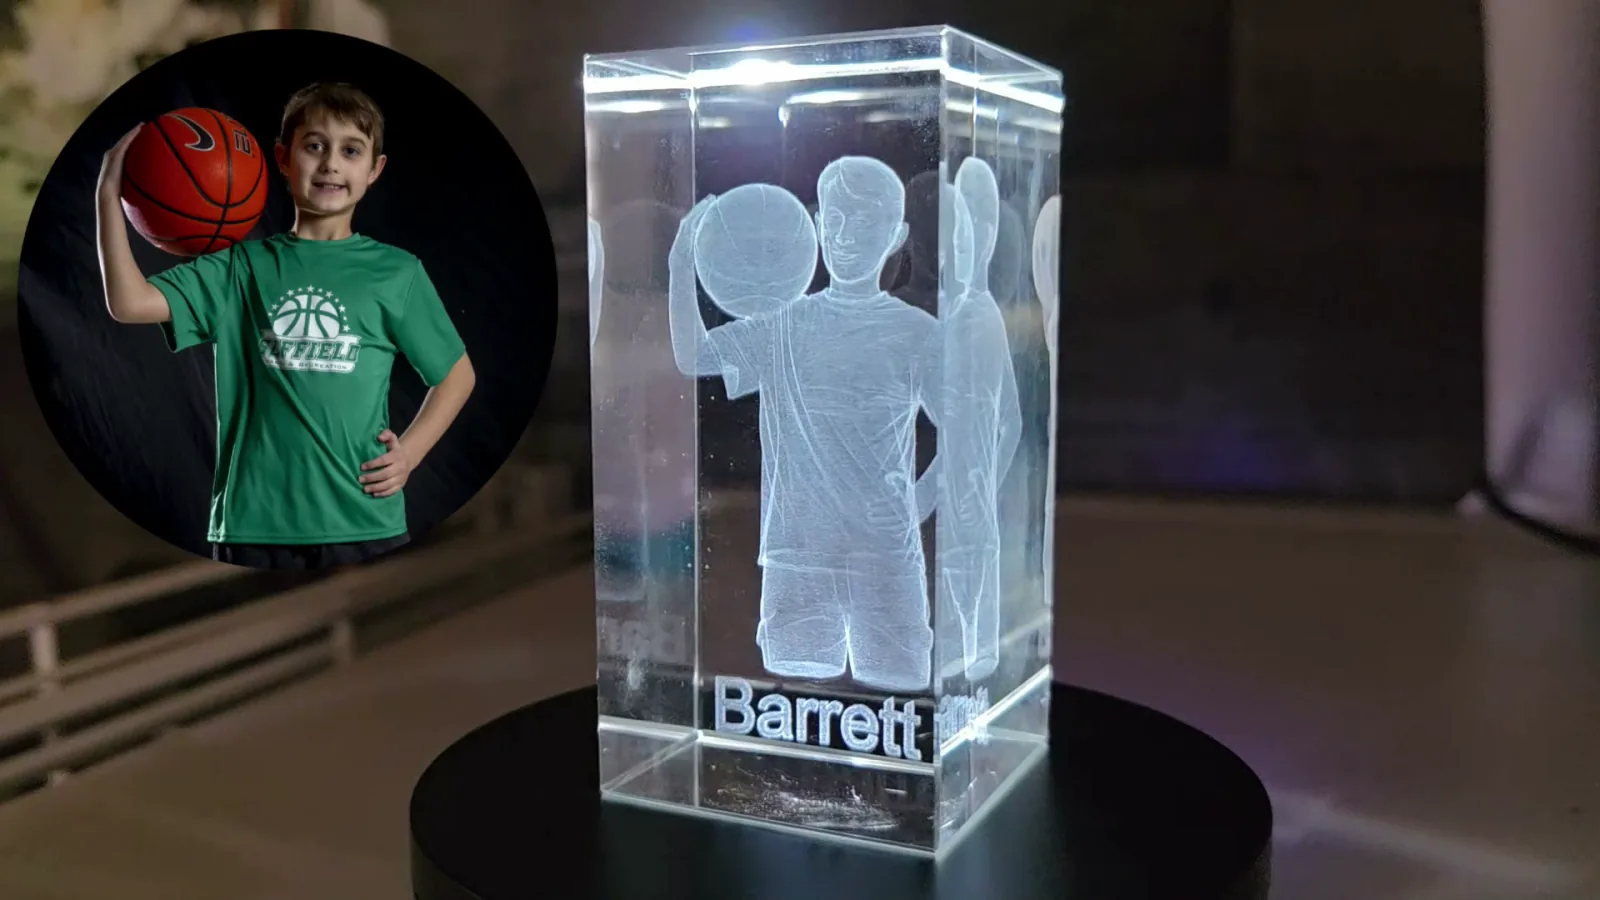
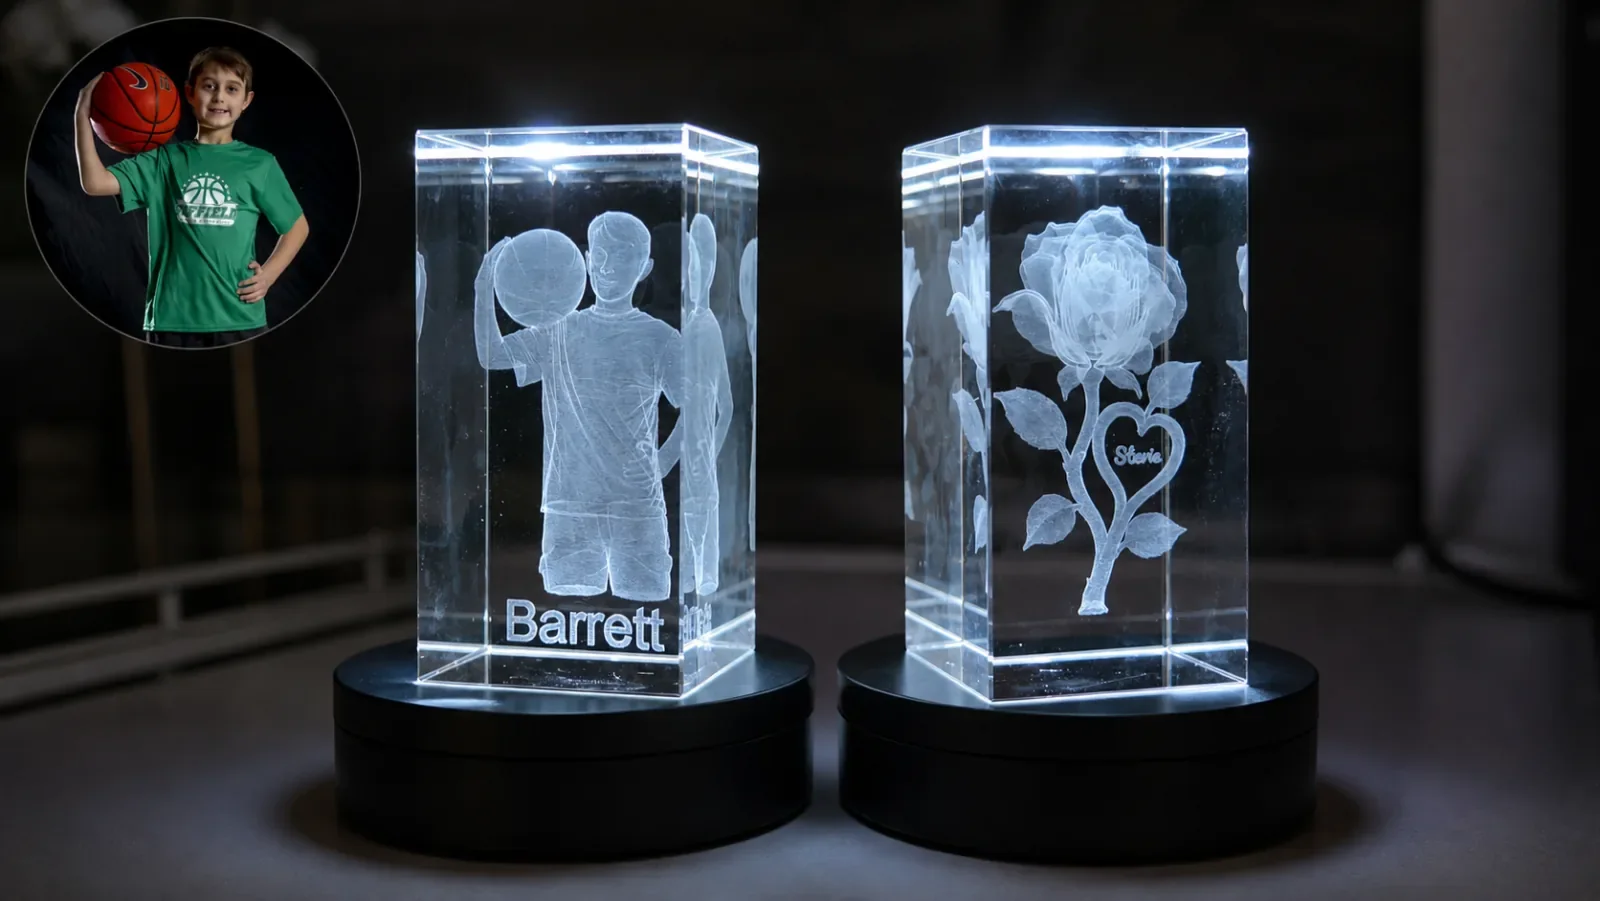
That is my son. And it is not printed on the glass or etched onto the front. It is inside it, floating in the middle of a solid block of crystal.
I made it on the WeCreat Lumos Ultra, and that photo is the reason this review exists.
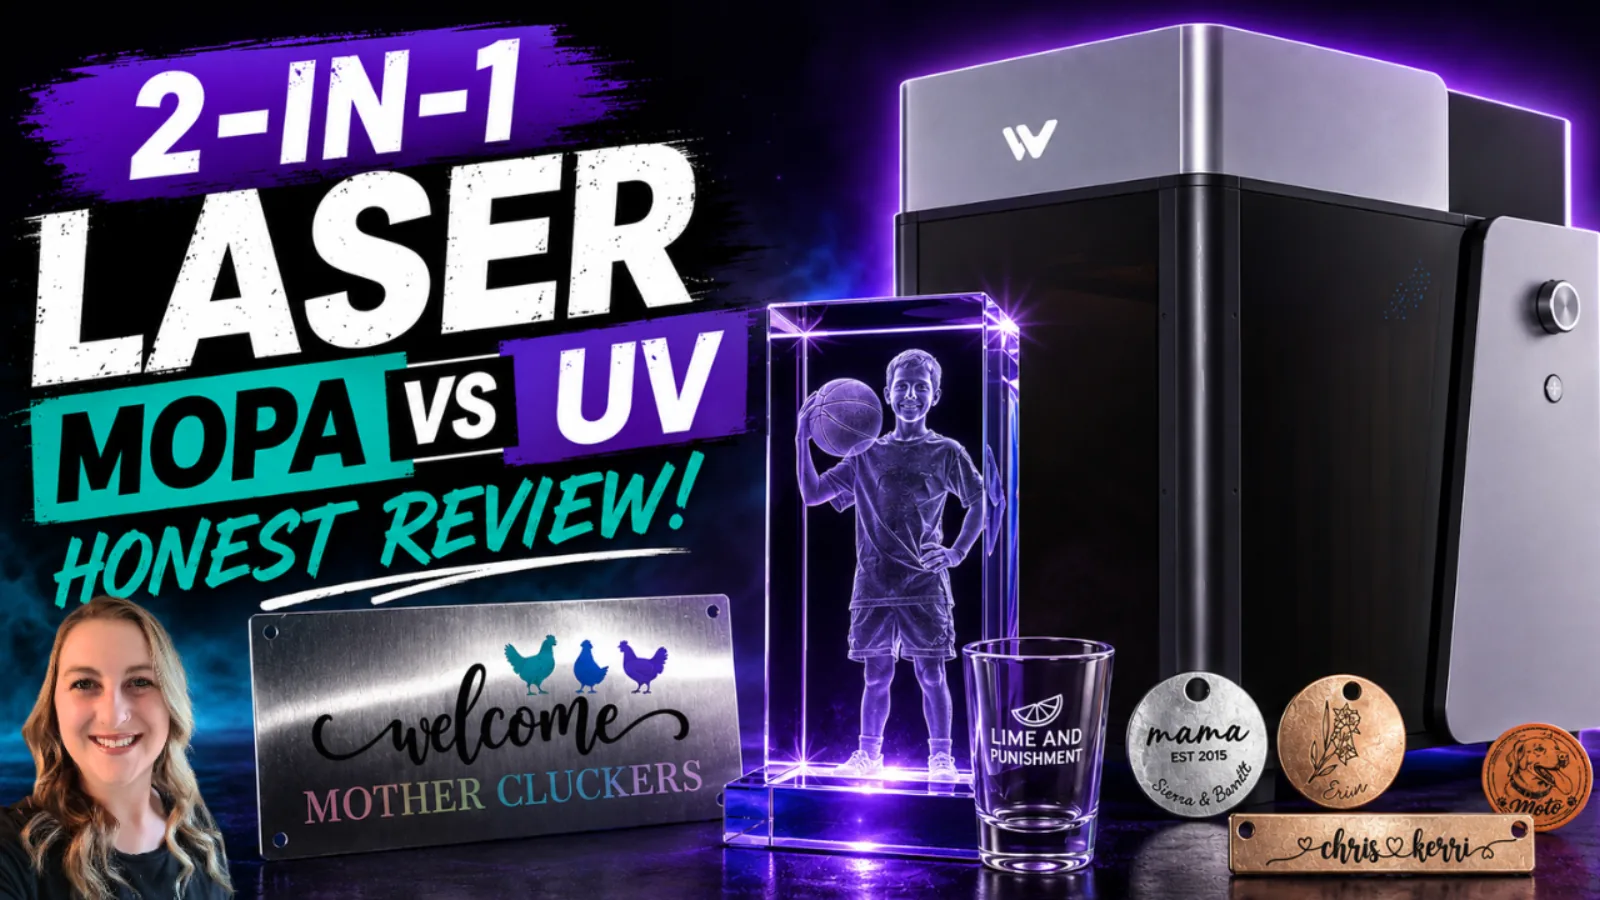
The Lumos Ultra puts two completely different lasers in one machine. A 6 watt UV laser that engraves inside crystal, glass and plastic, and a MOPA fiber laser built for engraving, coloring and cutting metal. I spent a month finding out how much one machine could actually do.
Here is the short version. The engraving genuinely impressed me, especially the 3D crystal work and the full color stainless steel. The camera and the AI 3D tools did more of the heavy lifting than I expected. It is also a beta machine running beta software, and I hit a few things worth knowing about before you spend this kind of money.
This post contains affiliate links. If you buy through them, I may earn a small commission at no extra cost to you.
WeCreat provided this beta Lumos Ultra and the accessories you see here at no cost, but they are not paying me for this review. Every project, test and opinion below is my own.
Quick Links
- What Is the WeCreat Lumos Ultra
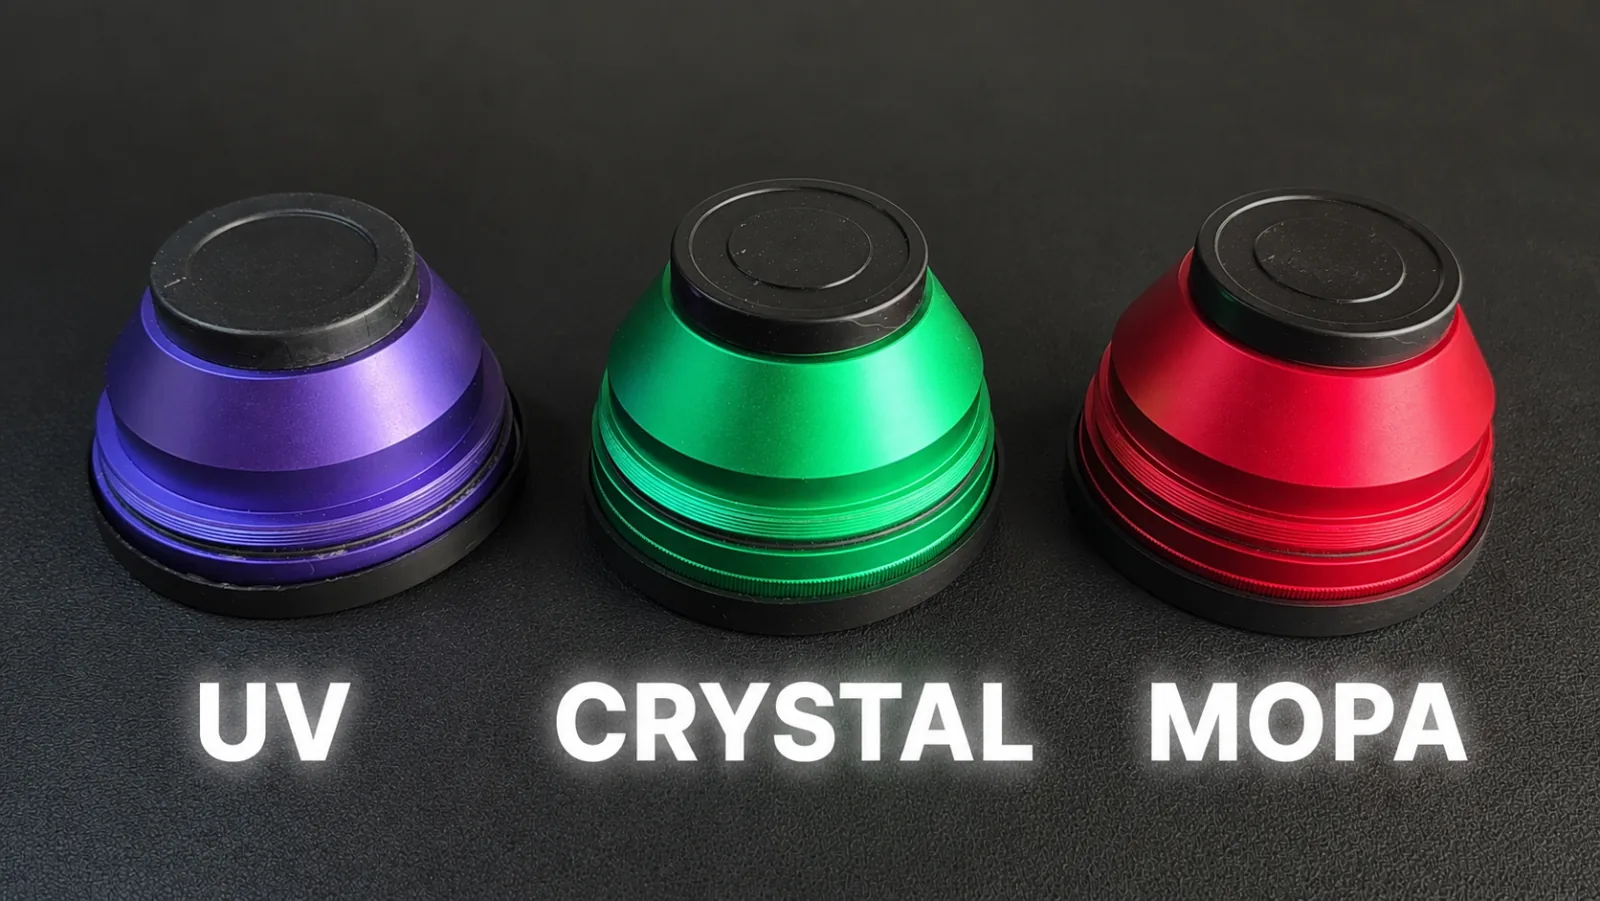
- Three Lenses, One Machine
- The Projects I Made
- MakeIt Software and the Beta Experience
- What I Love
- What Could Be Better
- 60W or 100W MOPA
- Who Should Buy the Lumos Ultra
- How It Compares
- FAQ
- Final Verdict
What Is the WeCreat Lumos Ultra
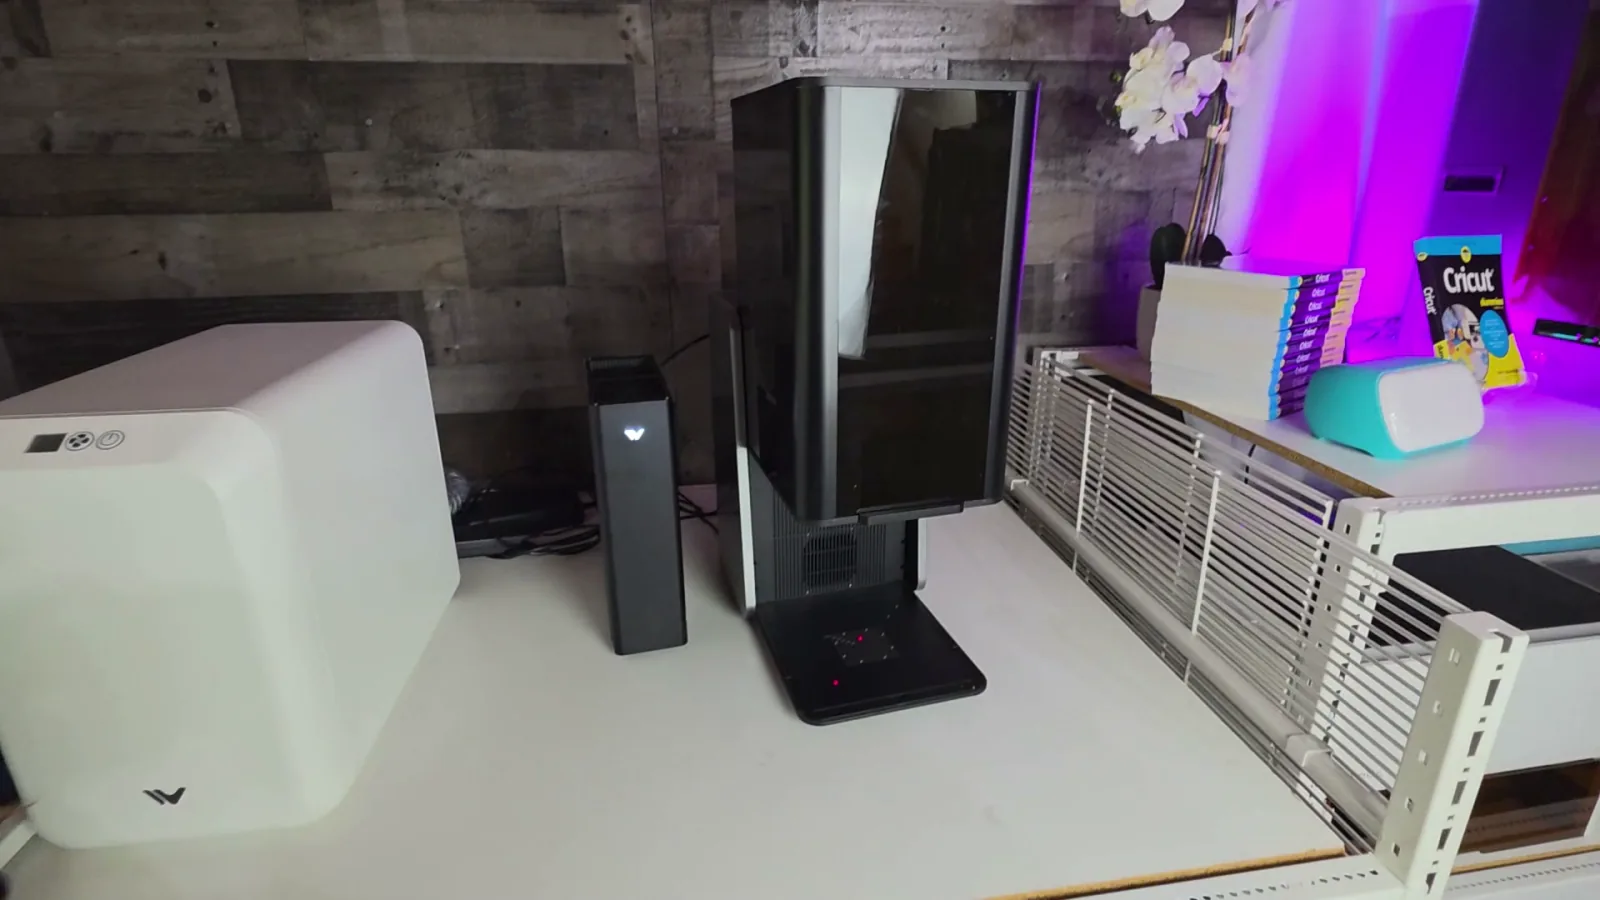
The Lumos Ultra is an enclosed desktop laser that holds two different laser sources. You can buy it with just the UV laser, or add either a 60 watt or 100 watt MOPA fiber laser. I tested the 100 watt version.
Those two lasers do genuinely different jobs. The UV laser handles crystal, glass, plastic, leather and other delicate materials. The MOPA fiber laser engraves, colors and cuts metal.
| Feature | WeCreat Lumos Ultra (as tested) |
|---|---|
| UV laser | 6W |
| MOPA fiber laser | 100W (60W also available) |
| Standard work area | 210 x 210 mm |
| With slide extension | 520 x 183 mm in one pass |
| With conveyor | 200 x 1000 mm |
| Lenses | 3, color coded (purple, green, red) |
| Camera | Built in, full size preview |
| Software | WeCreat MakeIt |
| Enclosure | Fully enclosed |
If you are new to laser engraving generally, my guide to laser engraving is a better starting point than this review. This is a machine for people who already know what they want to make.
Three Lenses, One Machine
Everything on the Lumos Ultra runs through three color coded lenses, and picking the right one is most of the learning curve.
- Purple is the standard UV lens for engraving surfaces
- Green is for engraving inside crystal
- Red is for MOPA metal projects
Setup itself took me about 15 to 20 minutes from box to first project, and that was working it out on my own, since the setup videos were not live yet on my beta unit.
Switching lenses takes less than a minute and needs no tools. I turn the machine off, unscrew the lens, put the protective covers on the one I removed, screw the next one in, turn it back on, and choose the matching mode in the software.
The machine also checks that you installed the right lens. Every single time I forgot to switch, the software caught it and would not let me start. That is a genuinely good safety feature, and it matters for a story further down.
The Projects I Made
I made eight projects across both lasers. Here is what each one actually took.
Two Leather Memorial Patches (UV)
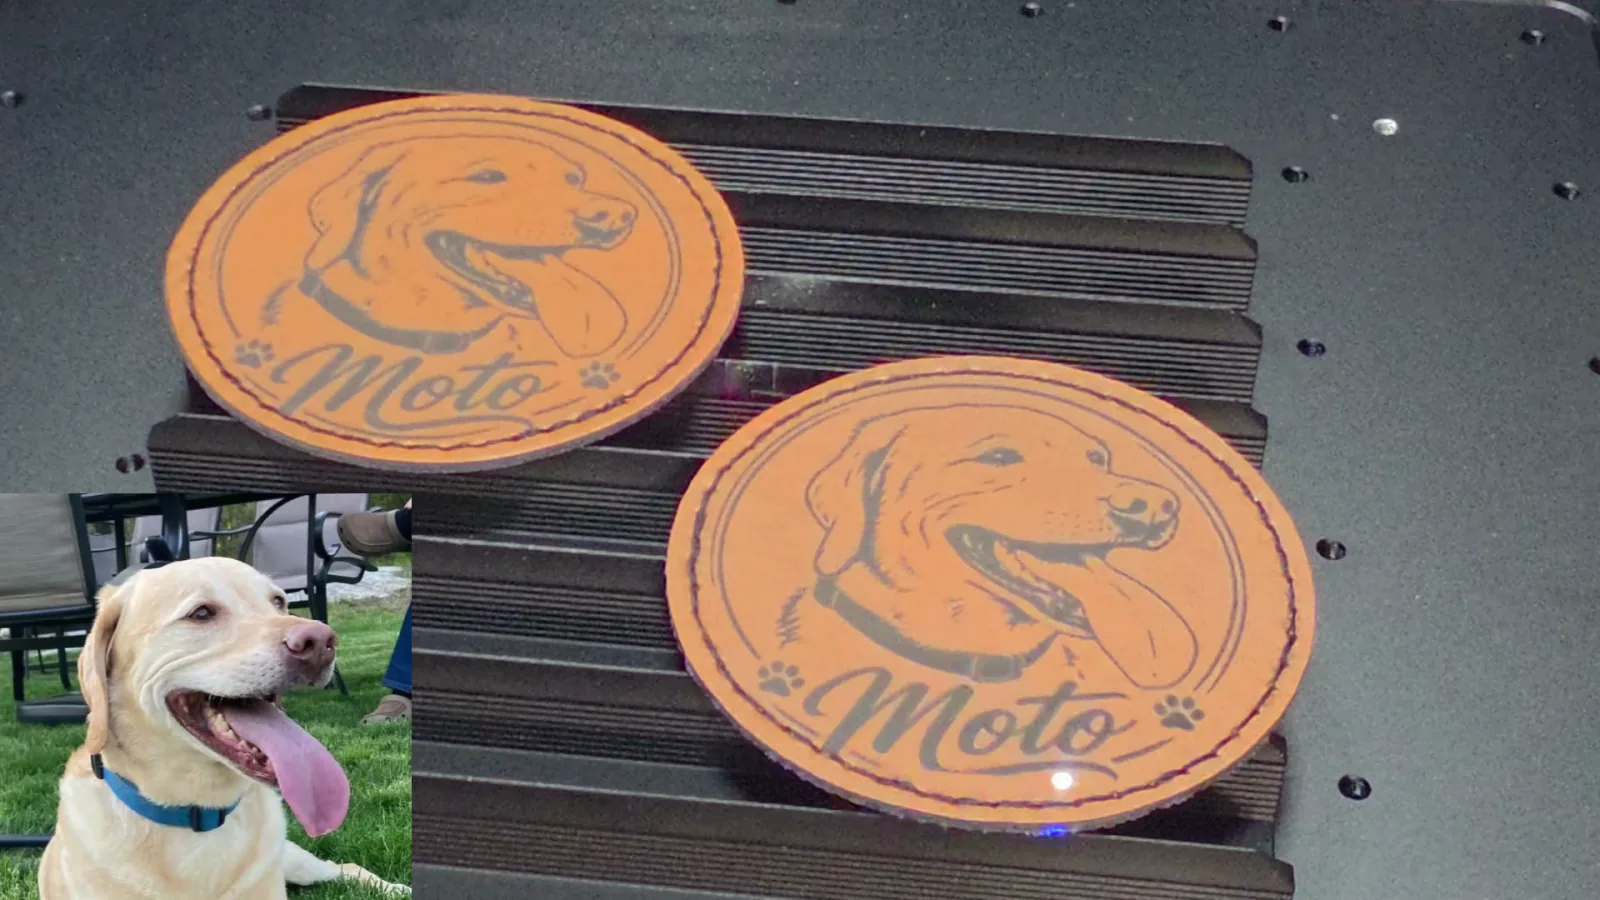
My first project turned a photo of my friend's dog into two leather memorial patches. I positioned both with the camera, duplicated the design, and engraved them at the same time.
I focused the laser manually by overlapping the two projected dots, then lined everything up in the full size camera preview. The machine starts in UV laser flat mode, so nothing needed changing.
Settings I used: power 100%, speed 100 mm/s, frequency 100 kHz, line density 100.
Each patch finished in about 4 minutes, and this was my first attempt. The detail came out dark, crisp and much clearer than I expected.
A Transparent Shot Glass on the Rotary (UV)
Can a UV laser engrave clear glass with no paint or coating? This was the test I was most curious about.
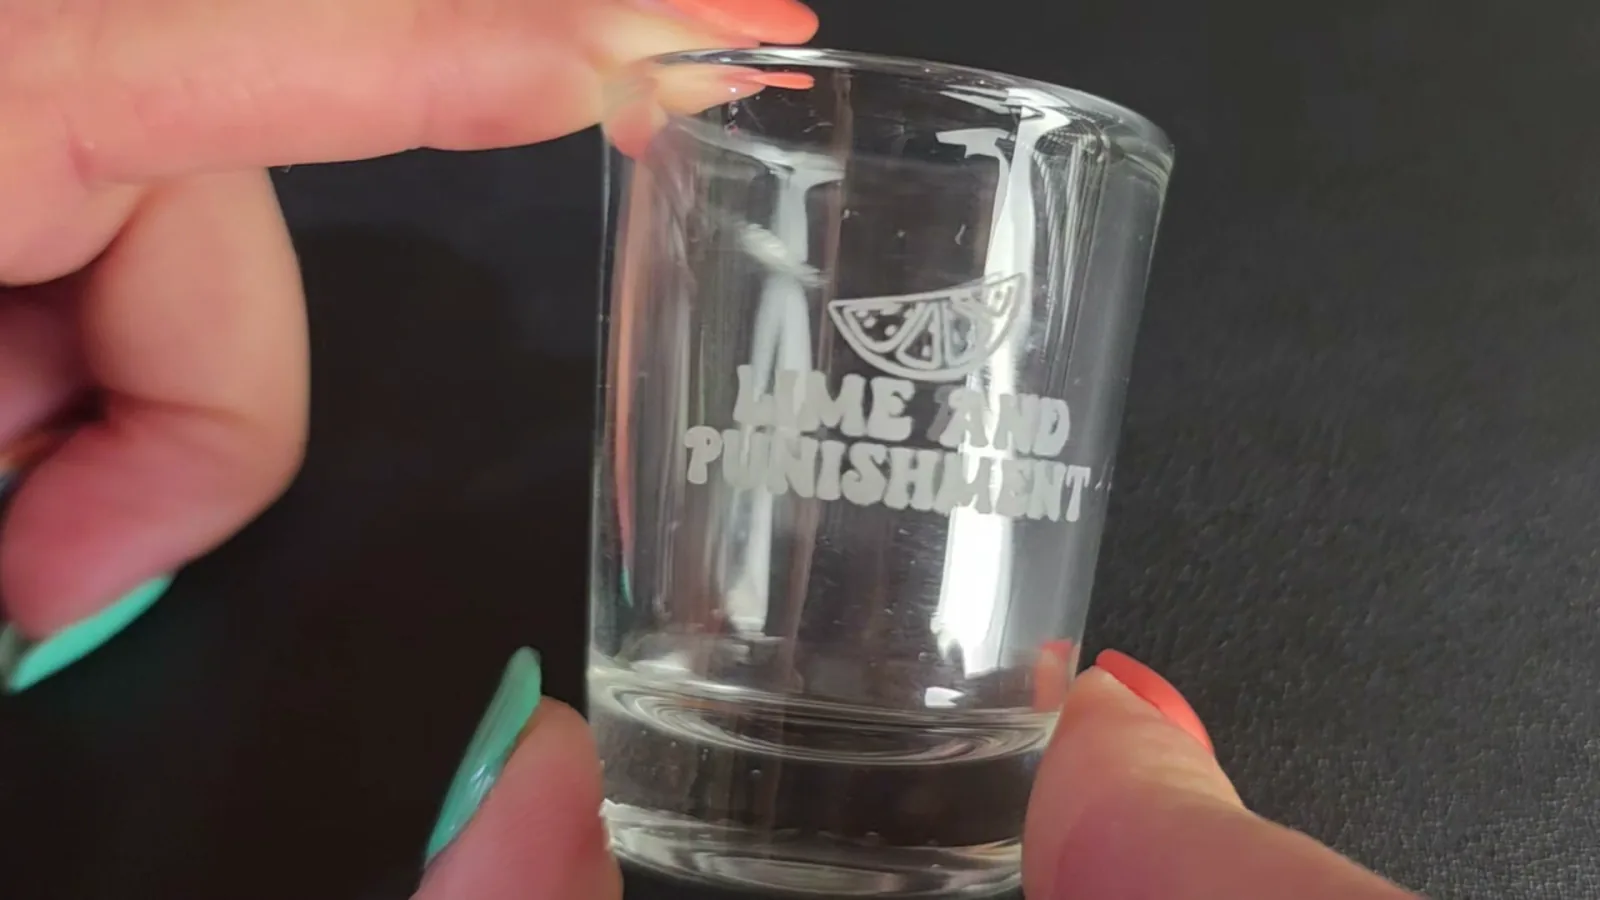
I put the shot glass on the Lumos Ultra rotary and added a piece of masking tape so I could see the focus dots through the glass. Then I chose Laser Cylindrical mode, entered its 34 mm diameter, refreshed the camera and aligned the design to the center line. The software warned me to check for collisions before starting.
I used a “Lime and Punishment” design from Creative Fabrica, resized it to fit, and lined it up with the green center line. Their subscription includes a commercial license, which matters if you plan to sell what you make.
Settings I used: power 100, speed 100, 1 pass, frequency 40, line density 800.
It finished in under 4 minutes. Bright white, crisp, easy to read, first try.
Here is why that works. UV lasers use a shorter wavelength that glass absorbs far more efficiently, and they produce much less heat. A diode laser normally needs paint or another coating on glass to give the beam something to grab.
Plastic Diving Slates (UV)
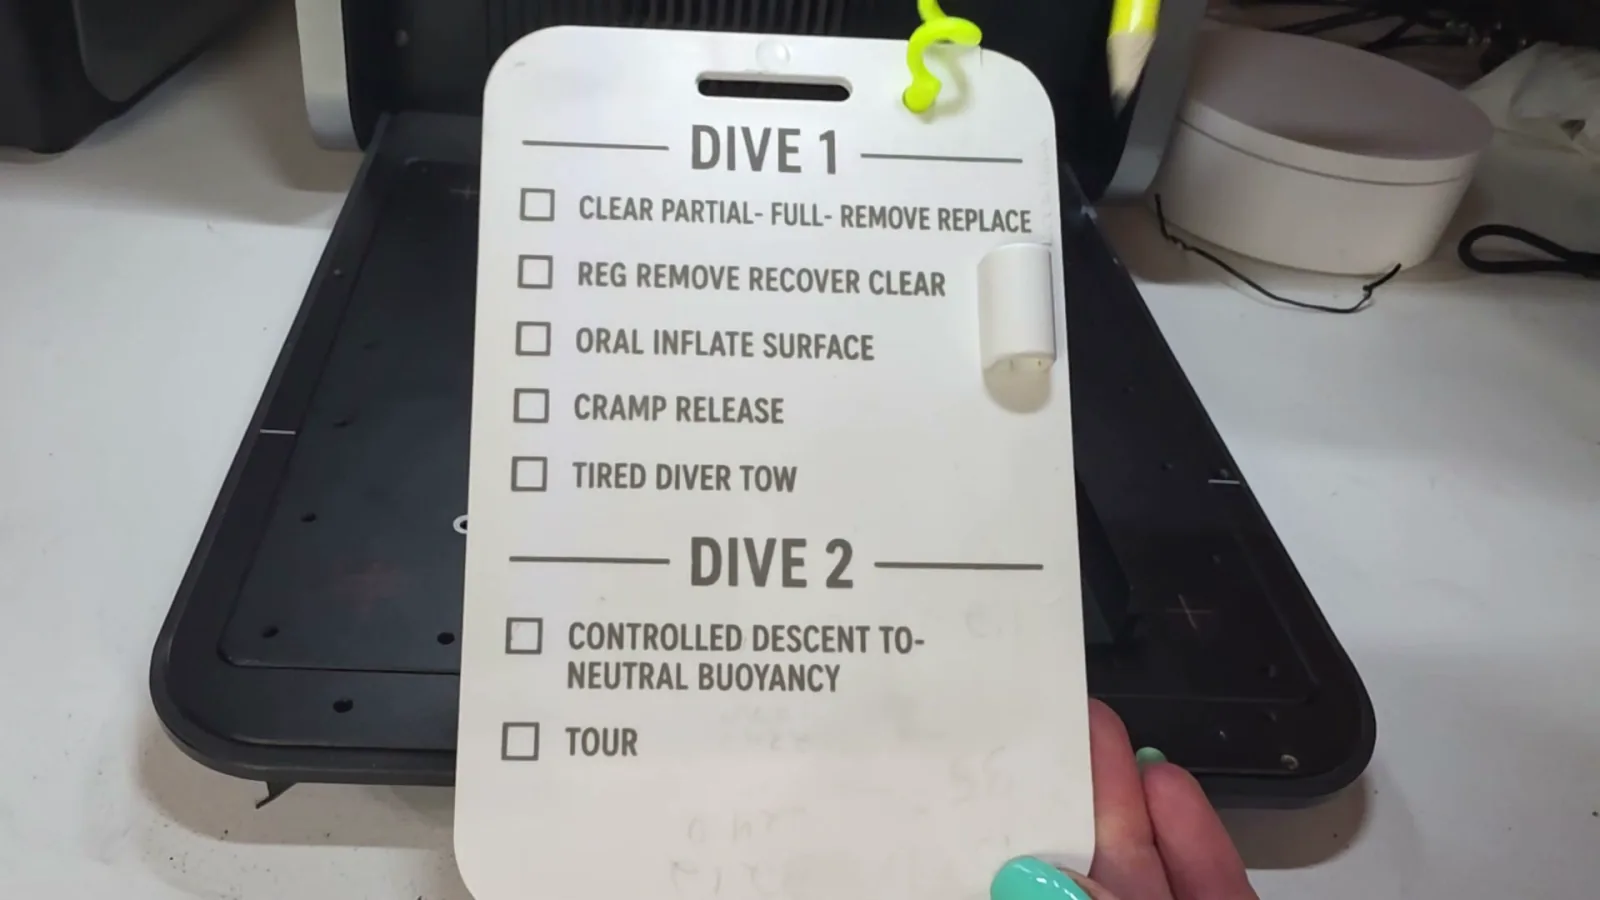
I engraved plastic diving slates for a customer. They are small underwater clipboards that scuba divers use for notes and checklists.
This is exactly the kind of niche order I like being able to say yes to. Most people have no way to personalize this type of plastic, and that is what makes odd little jobs like this valuable for a small business.
Each side of the 4 by 6 inch slate took under 2 minutes. Dark, crisp and easy to read.
⚠️ Always confirm a plastic is laser safe before you engrave it. Some plastics release genuinely dangerous fumes.
A Full Color Stainless Steel Sign (MOPA)
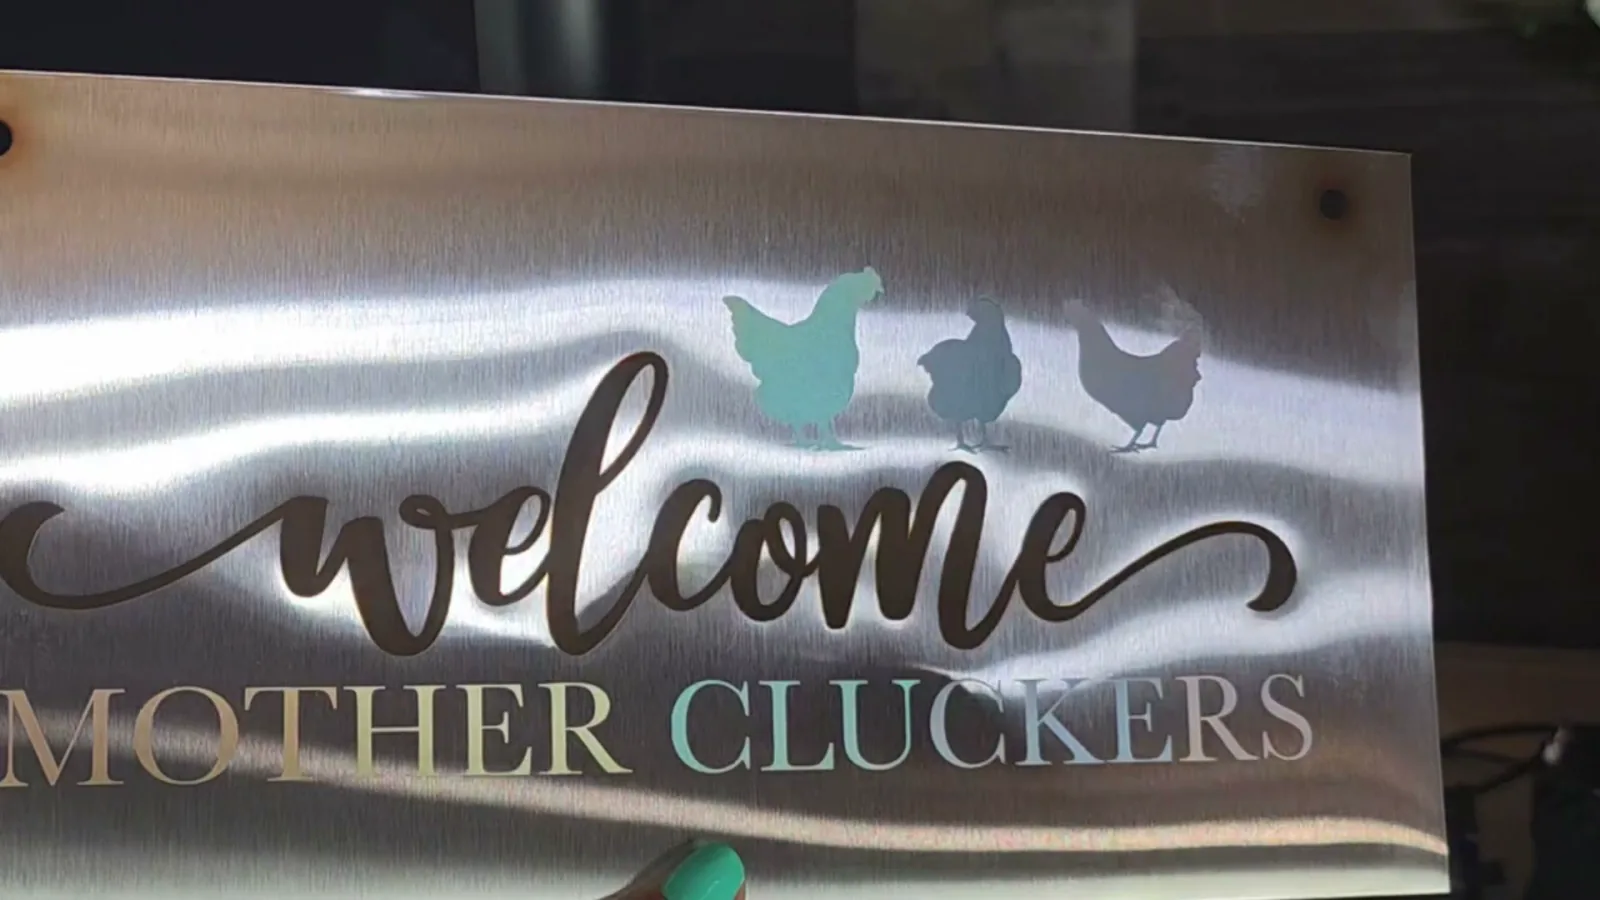
None of the colors on this sign are paint, vinyl or ink. They were made directly on stainless steel with the 100 watt MOPA laser. Changing power, speed, frequency and pulse width makes the laser produce completely different colors on the metal surface.
I ran an automatic test grid to find settings for black, orange, yellow, teal, blue and purple. WeCreat sent me suggested settings for about ten materials, but nothing for color engraving, so I found every one of these colors myself.
Then I made a “Welcome Mother Cluckers” sign for my chicken coop from 0.8 mm 304 stainless steel, using another Creative Fabrica design.
The pattern was simpler than I expected. Speed, passes and pulse width stayed the same across all five bright colors. Only frequency and power changed, so once you have one color dialed in you are most of the way to the rest.
The sign was bigger than the 210 by 210 mm bed, so I used the slide extension to get 520 by 183 mm in a single pass. In Auto Slider mode the camera photographs each half of the work area and stitches them together. Leave plenty of room beside the machine, because the slide travels a long way out.
The color engraving took about 2 hours, and the colors came out really well.
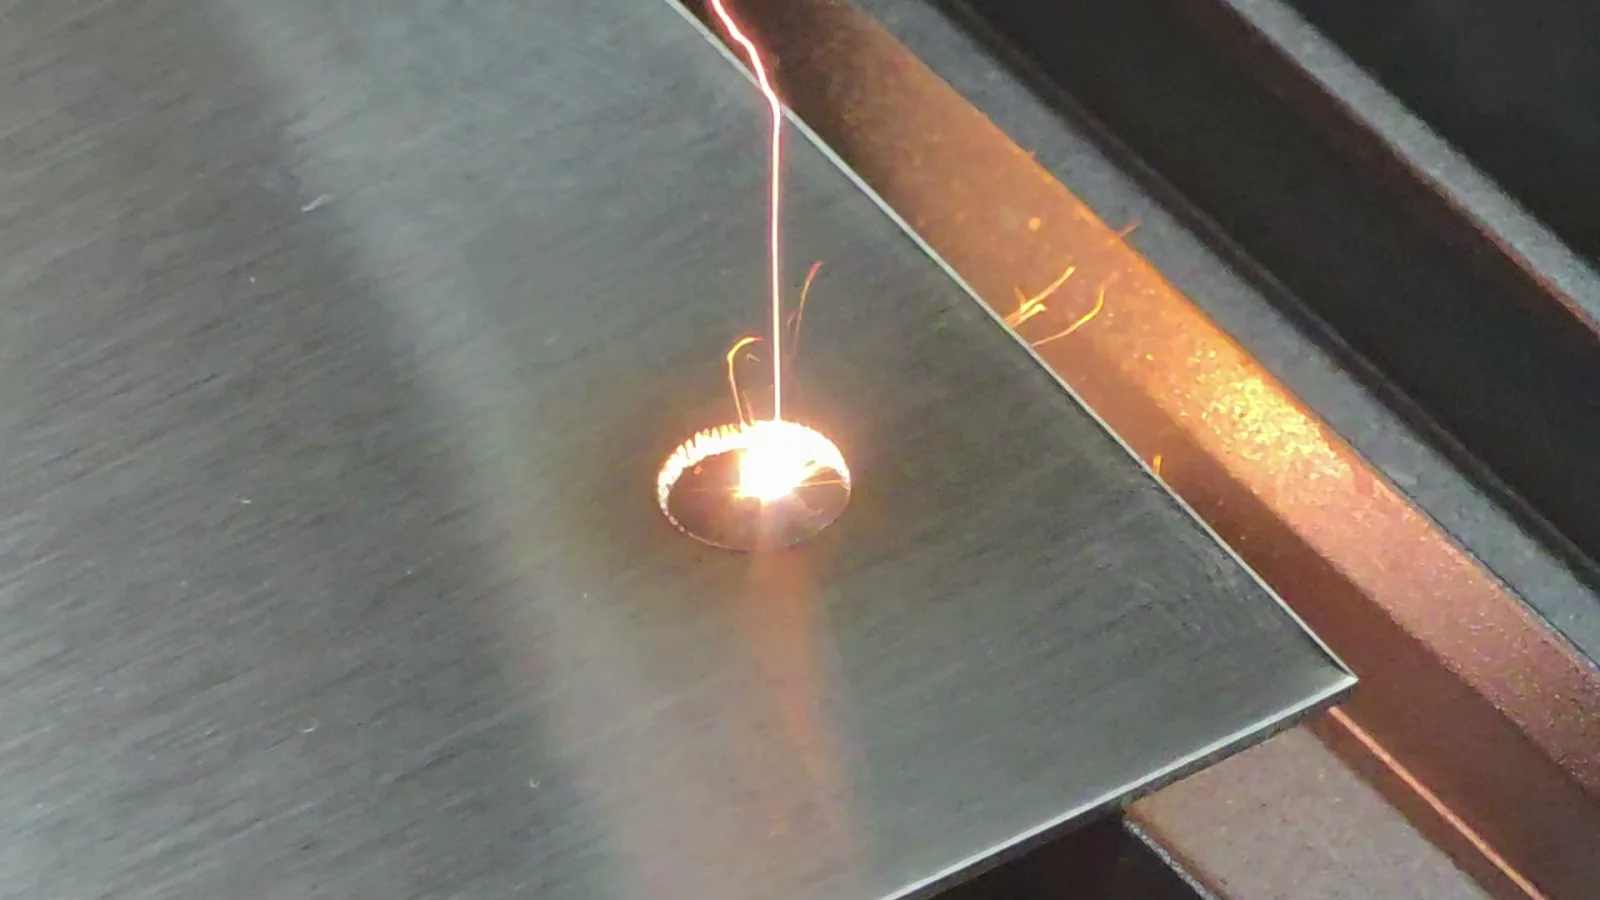
The sign also needed two small hanging holes, which meant cutting all the way through the stainless rather than engraving it. Both holes cut completely through with clean edges. That is worth pausing on. Cutting small shapes out of 0.8 mm stainless is not something anything else I own in this size class can do at all, and it took five passes. There was some discoloration on the back around the holes, which I think I could reduce with setting changes.
Silver and Rose Gold Jewelry Pendants (MOPA)
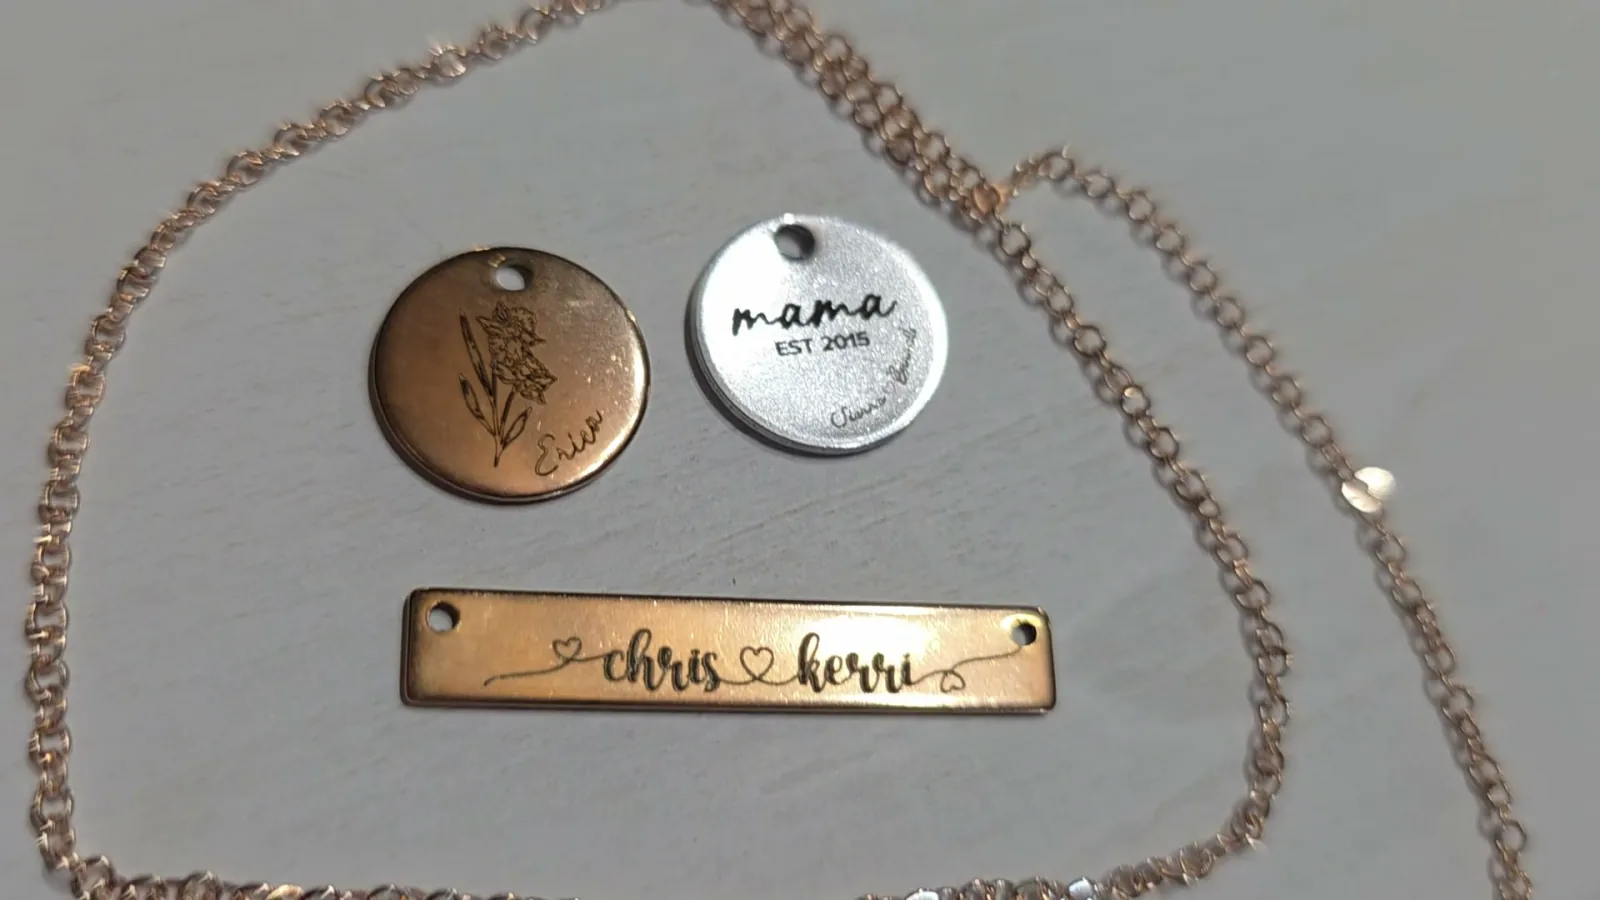
After the big sign I wanted to see the opposite end of the scale, so I engraved names on tiny round pendants in silver and rose gold finishes.
The names were too small for fill mode to look good, so I used line mode instead. Even at that size the text came out dark and easy to read.
Each pendant took about 15 seconds. At that speed, personalized jewelry is a quick way to make a few extra dollars. I would make the names slightly larger next time.
Batch Engraving on the Conveyor (MOPA)
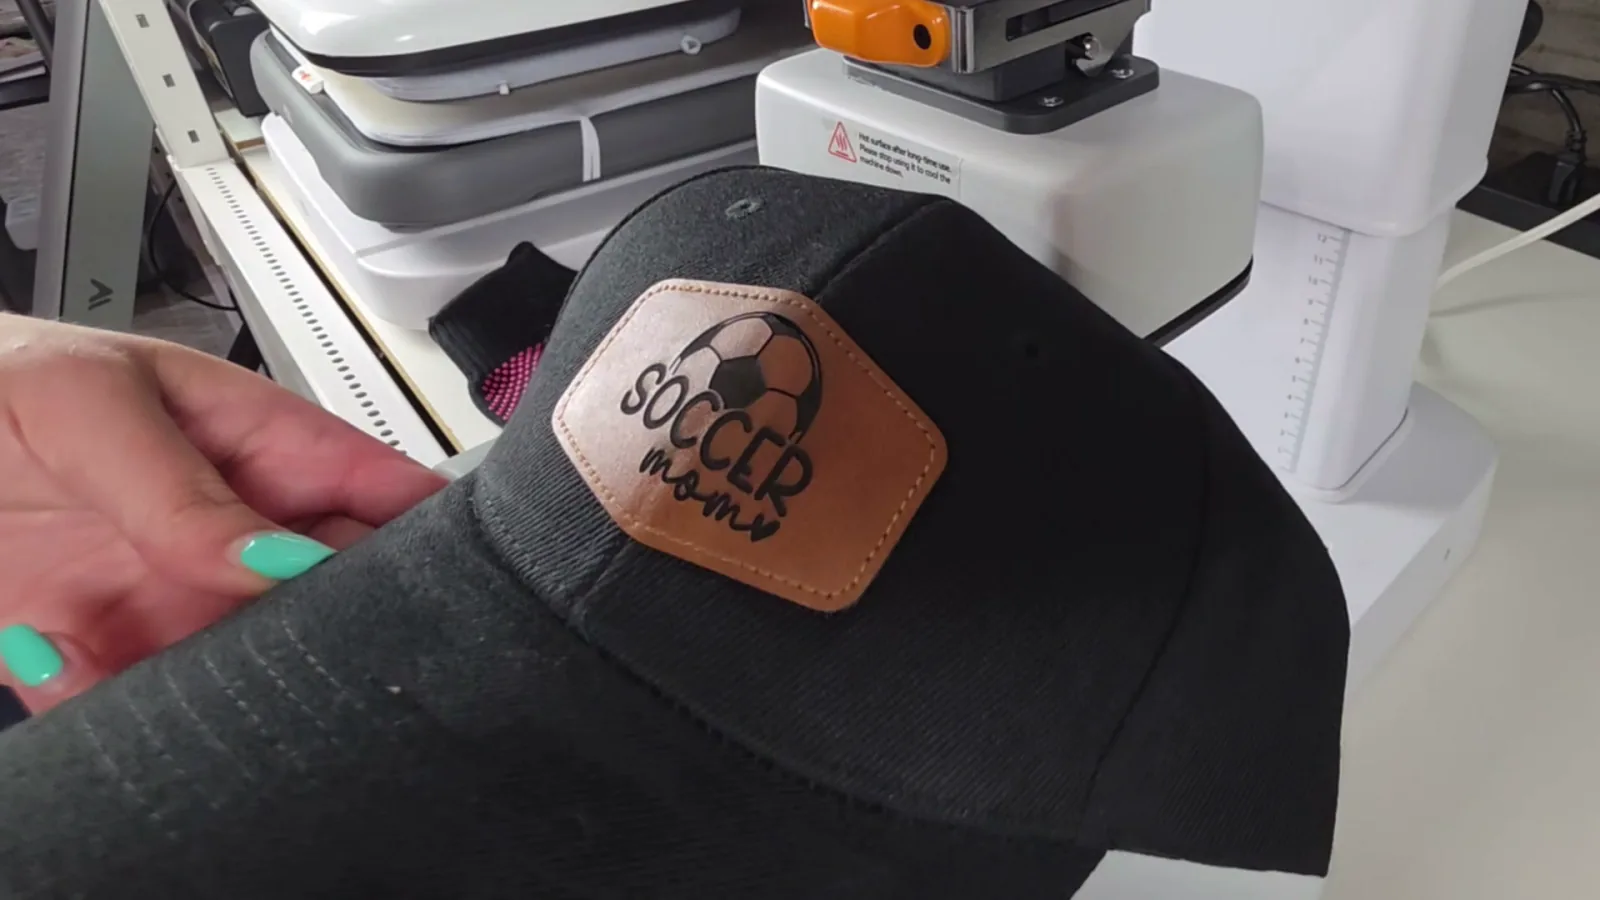
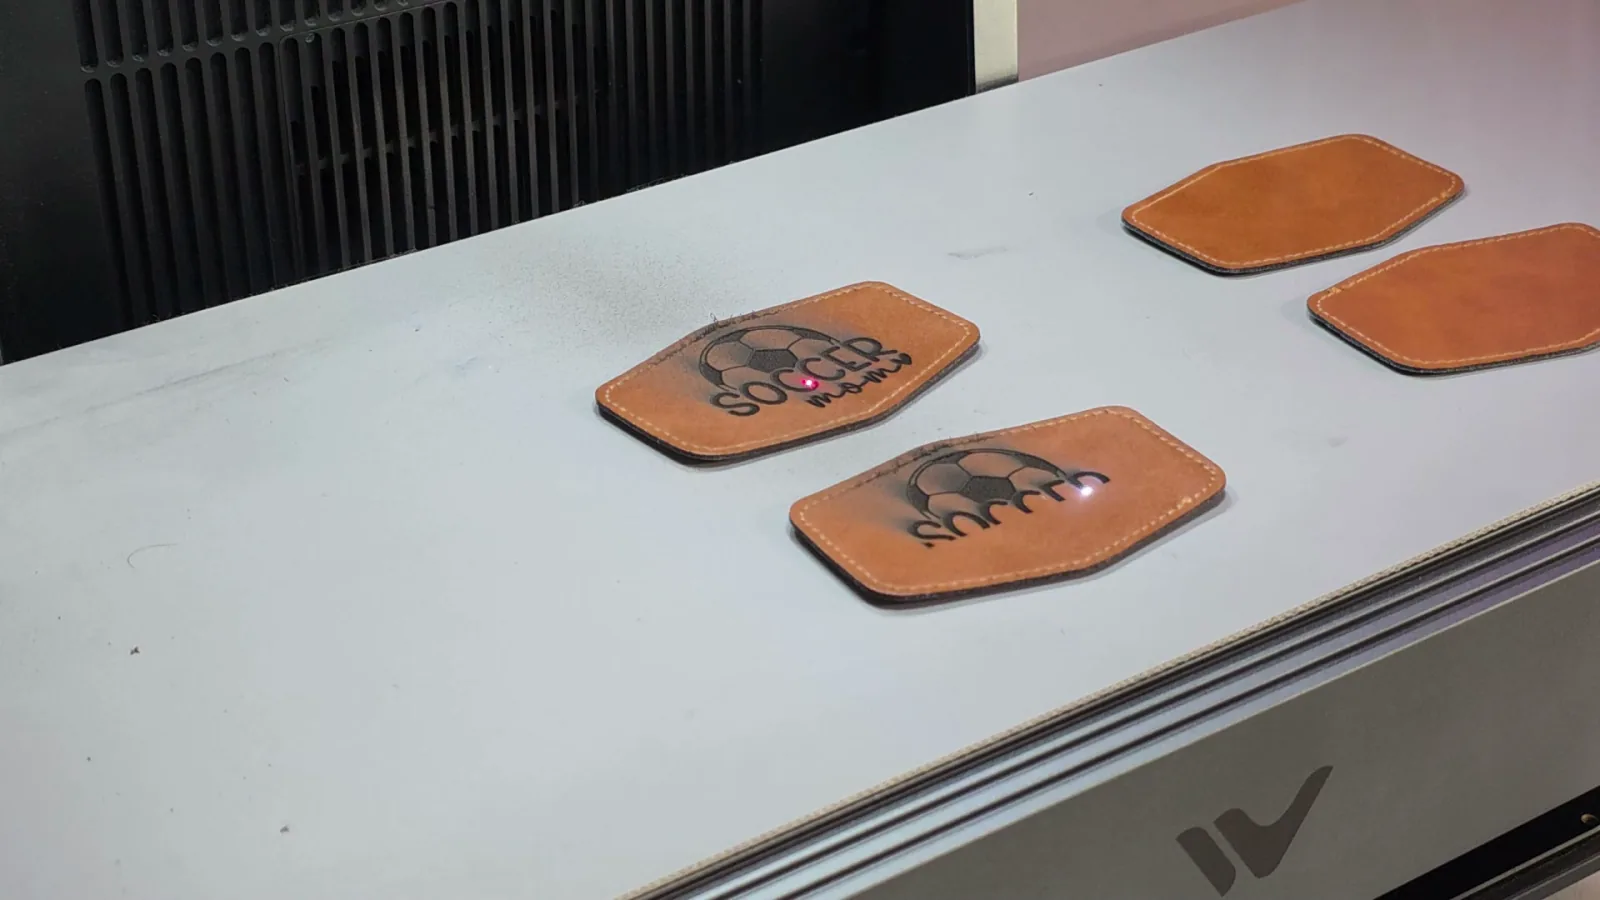
I batch engraved six Soccer Mom leather patches on the conveyor. Honestly I did not need the conveyor for six small patches, but I wanted to see how it worked.
It takes you from the standard 210 by 210 mm bed up to 200 by 1000 mm, which is the longest I am aware of on a machine this size. I spaced the patches out, and the camera found the matching shapes and engraved the same design on each one.
Here is the number that surprised me. The 100 watt MOPA took about 37 seconds per patch. The 6 watt UV took around 4 minutes for a similar patch earlier in my testing. On one patch that hardly matters. On a fifty piece customer order it changes your whole day.
A 3D Portrait Inside Crystal (UV)
This is the project I was most excited about, and it turned out to be my favorite laser project I have ever made.
I installed the green crystal lens, flipped the removable base plate, added the riser and positioning fixture, and entered my crystal measurements into MakeIt. Mine was roughly 49 x 49 x 100 mm.
Finding good files for this kind of engraving is usually the hard part. WeCreat's built in AI tool handled it. I uploaded a basketball photo of my son, chose AI 3D Portrait Stylization with the American Comic style, and the software built the model on the first try. Then I positioned it in the 3D preview and added his name.
I engraved the name first so I could confirm the placement before committing to the portrait, which is a habit worth copying on a 30 minute job.
Settings I used: the defaults, which were 100% power, dotting duration 70, frequency 80, Z-DPI 508 and XY-DPI 508. I chose omnidirectional 3D so the model uses its full depth rather than being flattened toward the front.
The name took about 2 minutes and the portrait took around 30 minutes. It worked beautifully on the first attempt.
I liked it so much I immediately made another. That one used MakeIt's separate 3D generator, which builds a model from a text prompt or a reference image. I made a 3D rose with a name inside the heart, as a memorial for a friend who recently passed away from breast cancer. Being able to rotate the whole design in the software made it much easier to place the name exactly where I wanted it.
This is only one of five glass modes. There is internal 2D, 2.5D and 3D engraving, surface engraving, and a textured 3D mode I have not tried yet.
If 3D crystal work is what is pulling you toward this machine, my guide to the best STL files for 3D crystal engraving covers where to find models that actually engrave well.
MakeIt Software and the Beta Experience
MakeIt was easy to learn. It has editing tools, a full size camera preview, framing, automatic test grids, accessory modes, intelligent nesting, built in QR and barcode generation, and the AI tools for generating or converting 3D files. It never crashed on me and firmware updates installed easily.
It was not perfect, and I was on beta software, so some of this may already be fixed.
- There was no built in material library. WeCreat sent a PDF of tested settings covering the basics, but not everything I wanted to make. The automatic test grids filled some of those gaps.
- A cutting preset wiped my color layers. I had entered separate settings for every color on the stainless sign, then picked a metal cutting preset for the two small hanging holes and it reset all of them. Nothing engraved when I started. I caught it, re entered everything and restarted. I am very glad I noticed before the machine ran for hours engraving nothing.
- The green crystal lens gave a false warning. The machine told me the lens was wrong when it was not. Restarting did not help, so I physically checked the lens, confirmed it was correct, and temporarily disabled that part of the detection to continue. Using the wrong lens can cause damage, so I only carried on because I had verified it by hand.
- The camera preview was slightly off out of the box. Running the camera calibration tool fixed it, and it has been extremely accurate since, even on tiny pendants.
- Several instructional links were not live yet.
If your preview looks slightly off, run the calibration before assuming the machine is faulty. I still use red light framing to double check placement on small items.
Running into odd behavior on a WeCreat machine is not unusual, and my top 10 WeCreat problems and fixes covers the ones that come up most.
What I Love
- 3D crystal engraving. My favorite feature by a mile, and the AI portrait tool made it achievable rather than fiddly.
- Two machines in one footprint. A UV laser and a MOPA fiber laser would normally be two purchases, two sets of accessories and two spots on your bench.
- The camera. After a month I would not want to work without the full size preview.
- Speed on metal. 15 seconds for a jewelry pendant and 37 seconds for a leather patch.
- Clear glass with no coating. No paint, no dish soap, no masking.
- Lens detection. It caught me every time I forgot to swap.
What Could Be Better
- No fume extractor at launch. The official one was not available during my testing.
- No material library in the beta. More test grids than I would like.
- The color layer reset bug. Frustrating and easy to miss.
- The false lens warning. A safety feature working against me.
- No color engraving settings supplied. WeCreat's sheet covers about ten materials and none of them are color, so every color on that sign came from my own test grids.
🔴 Plan your ventilation before the machine arrives. Engraving and cutting metal, glass and plastic creates fumes and fine particles you should not breathe. WeCreat had previously sent me a fume extractor for another machine so I had one available, and they have said they plan to send the official Lumos Ultra extractor once it exists. Do not wait until the machine is on your bench to think about this.
60W or 100W MOPA
I only tested the 100 watt, so most of this is WeCreat's guidance rather than my own testing.
WeCreat says both produce similar results on many engraving projects, but the 100 watt finishes faster and has greater metal cutting capability. Their example is that a job taking around 30 minutes on the 100 watt would take about an hour on the 60 watt.
Their current specs list cutting capacity up to 2 mm stainless with the 60 watt and 3 mm with the 100 watt. Your real results will depend on material, settings and design.
One real number from my own testing. While cutting the hanging holes in my stainless sign, I looked up what a 60 watt would need for the same job and the guidance suggested around 20 passes. My 100 watt did it in five, and I think three or four would have been enough. Power mostly buys you time here, not capability.
The 60 watt costs less and should still give you most of the MOPA capability. The 100 watt makes more sense if speed matters to your business, or you plan to do a lot of deep engraving and metal cutting.
Who Should Buy the Lumos Ultra
This makes sense for you if:
- You are an experienced maker or small business that will genuinely use both lasers
- You want to sell 3D crystal keepsakes, color metal signs or personalized jewelry
- You are already turning down jobs because your current laser cannot do glass, metal or odd plastics
- Bench space matters and two separate machines is not realistic
Look elsewhere if:
- You mainly cut wood or make basic leather projects. A diode or CO2 laser makes far more sense, and my best laser engraver for beginners guide is a better place to start
- You need a large cutting bed. The standard work area is 210 by 210 mm, and the extensions widen it rather than making it deeper
- You are new to lasers. This is not a first machine
One thing worth knowing: the UV laser has real advantages on wood, paper, fabric and denim too, because it produces much less heat than a diode or CO2 laser. That means cleaner engraving with less scorching.
How It Compares
If it is specifically the xTool F2 Ultra you are weighing this against, I have written that one up separately: how the Lumos Ultra lines up against the xTool F2 Ultra, including what it costs to match this machine with xTool's two.
The strongest argument for the price is that this is two specialized machines in one.
For comparison, the ComMarker Omni X UV laser I reviewed starts at $3,499 for the UV machine alone. At the time I filmed this, the UV only Lumos Ultra was $3,799, which is close to the same money, and the Lumos Ultra includes an enclosure and a built in camera. The Omni X has no camera, and after a month of working with one I would not want to give it up.
Adding the 60 watt MOPA brought it to $6,490, and the 100 watt version I tested was $7,690.
If you want a fiber laser without the UV side, my ComMarker B6 review covers a standard fiber galvo at a very different price point. And if you are choosing between WeCreat's own machines, my WeCreat model comparison walks through which one fits which kind of work.
💰 Save $200 on the WeCreat Lumos Ultra with code KERRICRAFTSIT at wecreat.com.
FAQ
What is a MOPA laser and how is it different from a regular fiber laser?
A MOPA fiber laser lets you adjust pulse width as well as power, speed and frequency. That extra control is what makes color engraving on stainless steel possible. A standard fiber laser cannot change pulse width the same way, so it cannot produce the same range of colors.
Can a UV laser engrave clear glass without paint or coating?
Yes. I engraved a transparent shot glass directly with no paint, coating or masking. UV lasers use a shorter wavelength that glass absorbs much more efficiently, and they produce far less heat than a diode laser.
Can the WeCreat Lumos Ultra cut metal?
Yes. I cut two hanging holes clean through 0.8 mm 304 stainless steel in five passes with the 100 watt MOPA, with clean edges. WeCreat lists cutting capacity up to 2 mm stainless with the 60 watt and 3 mm with the 100 watt. Bear in mind this is a machine built primarily for engraving, so cutting is a capability rather than its main job.
How long does 3D crystal engraving take?
My 3D portrait took about 30 minutes in a 49 x 49 x 100 mm crystal block, plus about 2 minutes for the name. It worked on the first attempt.
Do you need to switch lenses on the Lumos Ultra?
Yes. There are three color coded lenses: purple for standard UV, green for crystal, red for MOPA metal. Switching takes under a minute and needs no tools, and the machine checks that you installed the right one.
Is the WeCreat Lumos Ultra good for beginners?
Not really. It is an excellent machine, but it makes the most sense for experienced makers and small businesses who will use both lasers. A diode or CO2 laser is a better first machine.
Final Verdict
After a month of testing, this is one of the most unique lasers I have ever used. I have never tested another enclosed machine that could make full color metal signs and 3D portraits inside crystal.
The crystal work is genuinely special, the color metal engraving is something almost nothing else in this class can do, and the speed on small metal parts is excellent. A UV laser and a MOPA fiber laser would normally mean two separate purchases, two sets of accessories and two machines taking up your bench.
At $3,799 for the UV only version, $6,490 with the 60 watt MOPA and $7,690 for the 100 watt I tested, this is a serious investment. It genuinely feels like you are getting two professional machines in one, and whether that is worth it comes down to whether you will really use both halves.
Remember that I tested a beta machine with beta software, so some of the issues here may be fixed before the final version ships.
💰 Save $200 with code KERRICRAFTSIT: WeCreat Lumos Ultra
Watch the full hands on review:
 12:35
12:35
Watch the full tutorial
NEW WeCreat Lumos Ultra Review: The Most Versatile Laser Yet?
💰 SAVE $200 ON THE WECREAT LUMOS ULTRA UV+MOPA package! Code: KERRICRAFTSIT
More Reviews You'll Love
- WeCreat vs xTool: Which Laser Engraver Should You Buy
- How to Engrave Photos on Metal With the 2W Infrared Laser
- WeCreat Vista: The 90 Degree Flip Laser
- Best Laser Engraving Blanks
- How to Laser Engrave Tumblers
Have you tried a UV or MOPA laser yet? Which project would you make first, the color metal sign or the 3D crystal portrait? Let me know.