Engraving Photos on Metal Made Easy
What happens when you mix an adorable kitten, a laser, and a little creativity? You get one-of-a-kind custom keychains.
In this tutorial, I used the WeCreat Vista 2W Infrared Laser Engraver to etch a photo of my kitten Goose onto stainless steel keychains. The results blew me away. Every little detail of his fur and whiskers showed up beautifully.
The Vista makes it possible to engrave photos and designs directly onto shiny metal surfaces like jewelry, flasks, plaques, and trophies — all from your desk. No sprays, no complicated prep, just clean and professional engraving. Wondering which model you need? Compare the Vista and Vision here.
👉 Watch the full tutorial on YouTube:
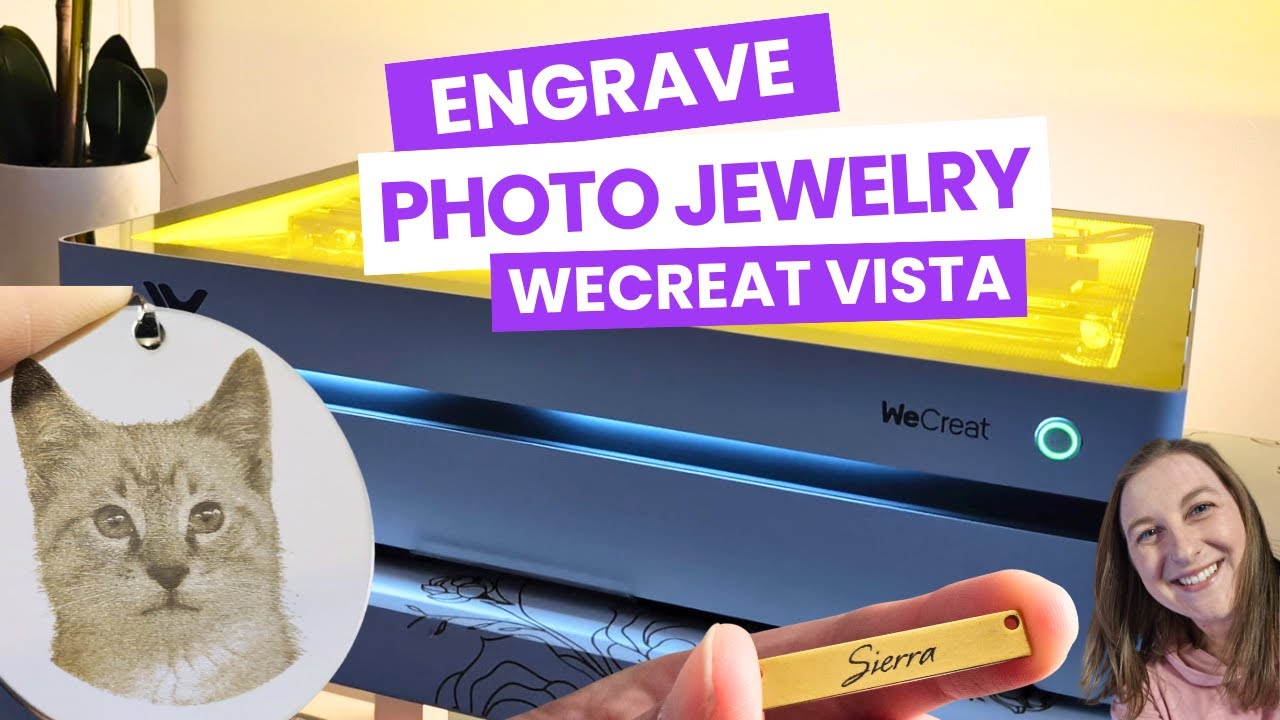
Table of Contents
- What You'll Need for Photo Metal Keychains
- Step-by-Step: How I Made Kitten Photo Keychains
- Technical Specs & Why the WeCreat Vista Stands Out
- Creative Project Ideas with the WeCreat Vista
- From Hobby to Side Hustle: Monetizing Your Laser Projects
- About Kerri Crafts It
- Final Thoughts
- Share Your Projects!
- FAQs
What You'll Need for Photo Metal Keychains
Here’s everything I used:
WeCreat Vista 2W IR Laser (available in white, pink, or blue)
Stainless steel keychain blanks (round, square, or any shape you prefer)
Computer with WeCreat MakeIt software
Photo or design file (I used Goose 🐾)
Optional: A sheet of paper for autofocus on reflective surfaces
👉 Check the current price for the WeCreat Vista 2W IR Laser (affiliate link)
- Affiliate note: I include a purchase link in my video description. If you buy through that link I may earn a small commission at no extra cost to you.

Step-by-Step: How I Made Kitten Photo Keychains
- Place your metal blanks inside the Vista. Arrange the keychains so at least one sits under the red dot used for autofocus. This helps the machine measure and focus correctly.
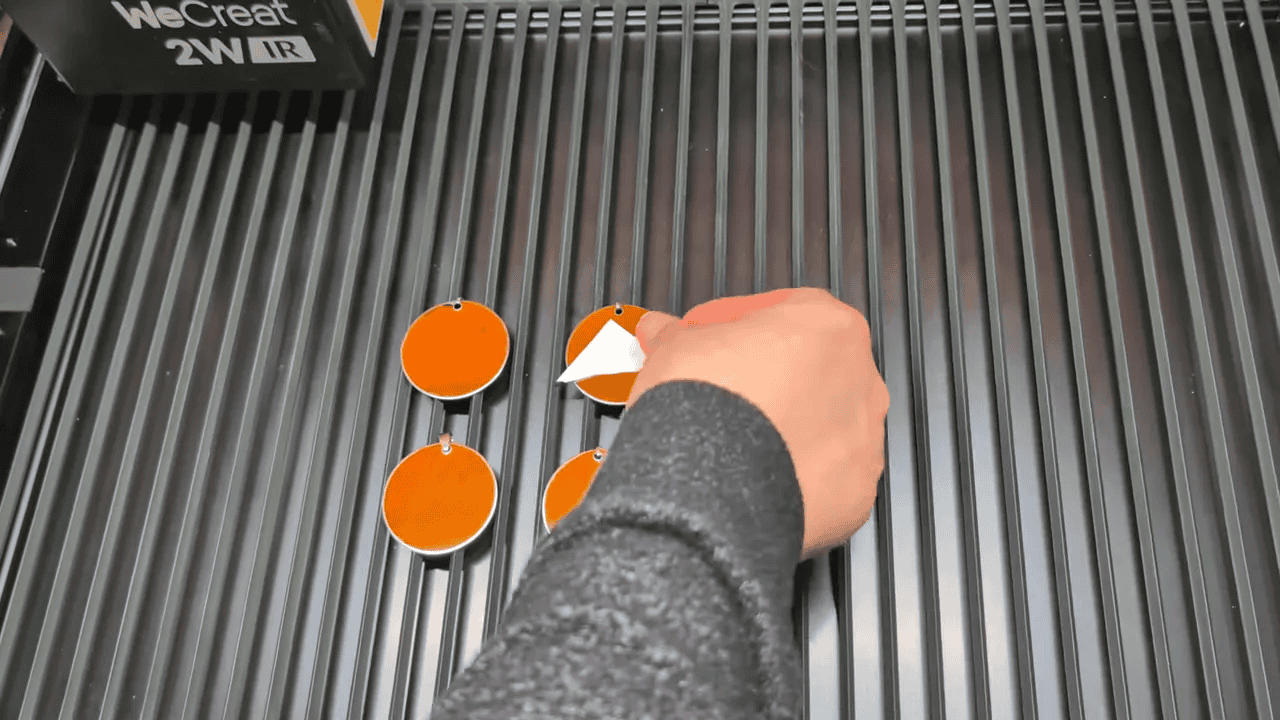
- Autofocus workaround for shiny metal. If autofocus fails due to shine, place a small piece of plain paper over the items, run autofocus, then remove the paper and refresh the camera preview.
- Import your photo into the WeCreate MakeIt software. Drag and drop the image or use the import button. Resize and place the image on one pendant, then copy it to other blanks.
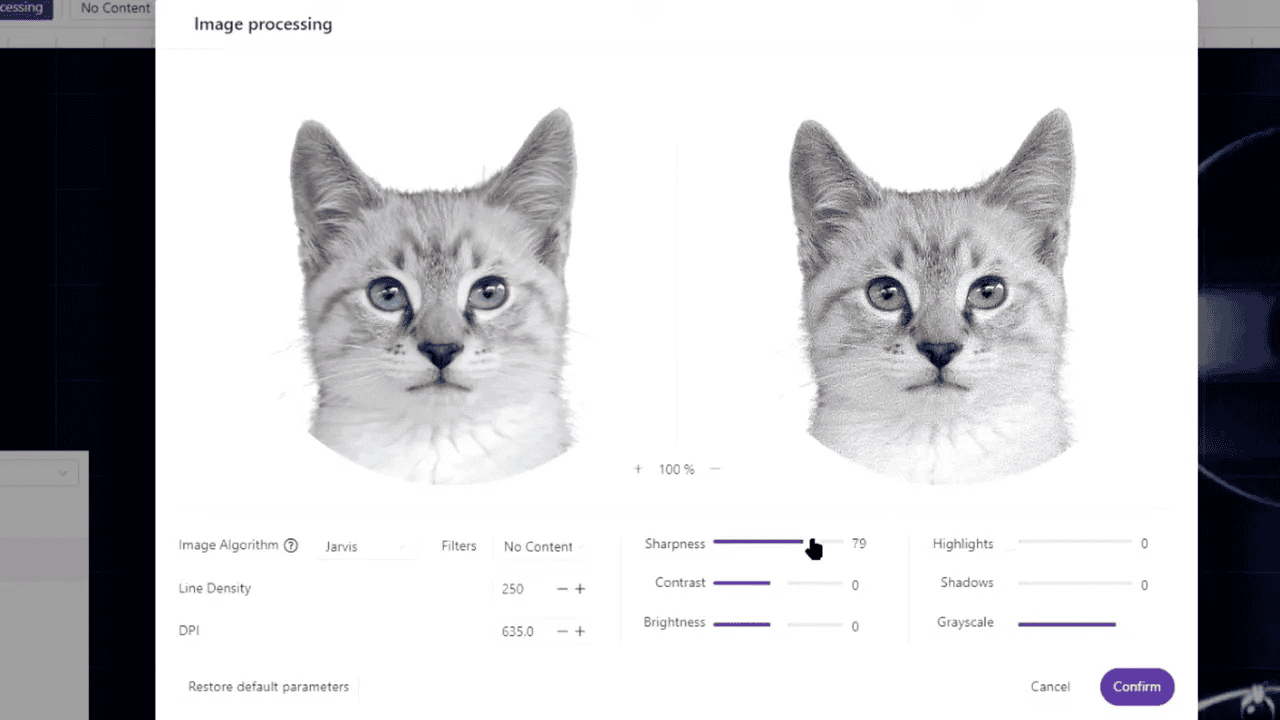
- Adjust image processing settings for metal. For my stainless steel keychains, these are the settings that gave me the best results:
Line density: 250
Sharpness: 80
Power: 100
- Speed: 10
You can adjust these slightly depending on the level of detail in your photo.
- Use the HD camera to align each design. The Vista’s camera shows a workspace preview so you can drag each copy into the exact center of each pendant. Confirm placement in the full preview before sending.
- Start engraving. Close the machine, press the lid button when prompted by the software, and watch the laser carve sharp detail into the metal. The fine laser point captures every strand of fur and facial detail, even on the tiniest surfaces.
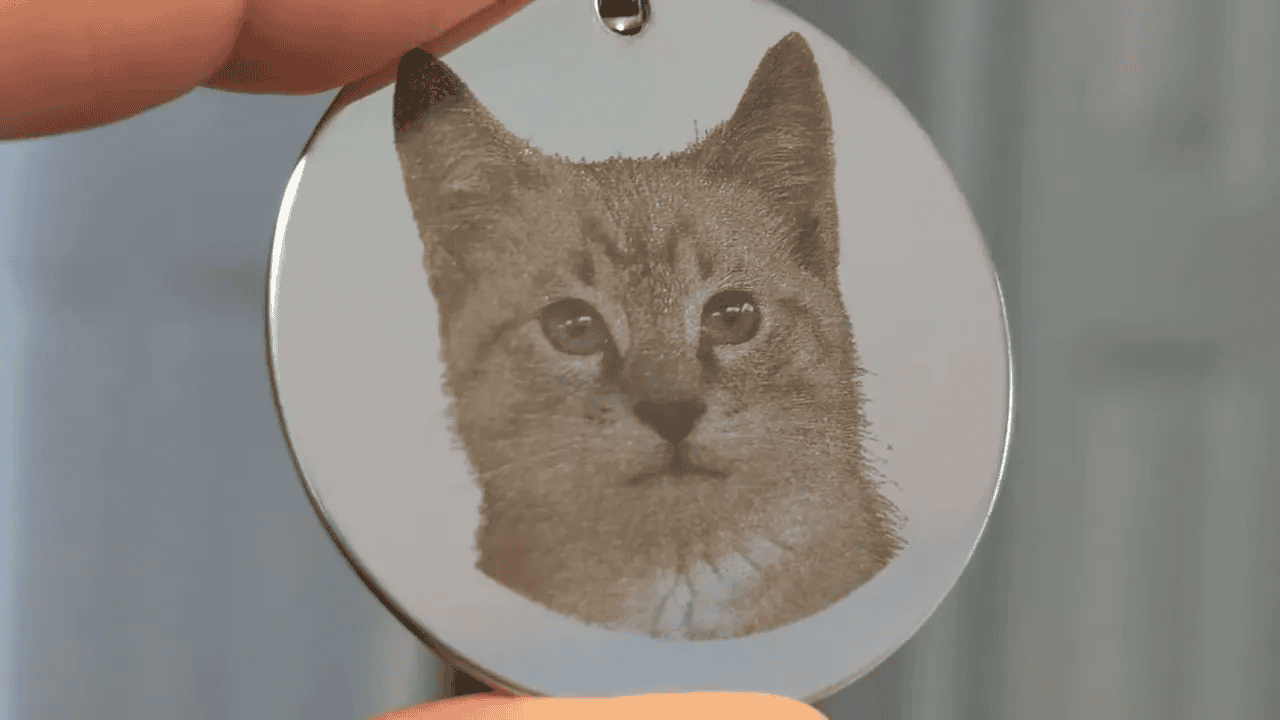
- Remove and inspect. Once finished, remove the pieces and check detail. If you plan to produce more, save the job to speed up batch runs.
- Clean and Polish Your Engraving
After you’ve checked the detail, give your piece a quick clean. Metal engravings can collect a little residue or dust during the process. I like to keep lens wipes on hand since they’re lint-free and safe for delicate surfaces. A simple wipe brings back the shine and makes the finished piece look polished and gift-ready. If you don’t have lens wipes, a microfiber cloth or a cotton pad with rubbing alcohol works well too.


Technical Specs & Why the WeCreat Vista Stands Out
Here’s why this machine has become one of my go-to tools:
- Laser power: 2-watt infrared laser module works on stainless steel, brass, jewelry, and more.
- Engraves shiny metals directly: No sprays or coatings needed
- Interchangeable modules: Swap the IR module (metal) for a diode laser for cutting or engraving wood and other materials (wood, acrylic, leather).
- Flip laser design: Engraves from the side so you do not need extra vertical clearance. Great for engraving tall objects like 40 oz tumblers without extra clearance. I even shared a full tumbler engraving tutorial here.
- Precision camera: Displays a workspace preview for exact alignment and batch engraving.
- Ultra-fine laser spot size: The Vista produces professional-level detail on even the smallest projects like pendants, rings, or delicate designs. You can see the precision in Goose’s whiskers on my keychain and in this pencil I engraved with tiny lettering.

Creative Project Ideas with the 2w IR WeCreat Vista
- Stainless steel photo portrait keychains (like my Goose keychains)
- Brass name charms and tiny engraved pendants for necklaces
- Engrave original artwork onto slate coasters for family gifts.
You can watch my tutorial here: WeCreat Vista Tutorials: How To Laser Engrave Slate Coasters. If you want to try this yourself, I recommend these 4 Inch Black Stone Coasters which make great engraving blanks.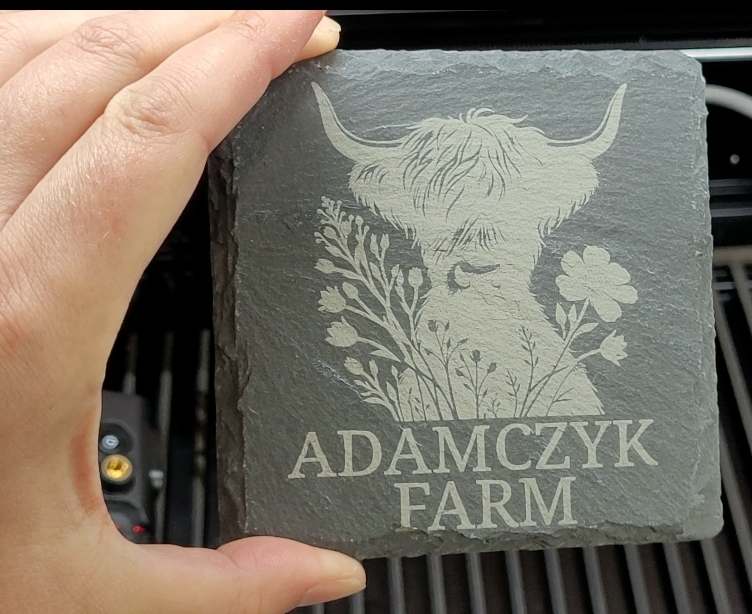
- Personalized flasks, name plates, and small trophies
- Small batch custom orders: wedding favors or event keepsakes

I cut black 3mm acrylic into bat-shaped earrings for Halloween using my WeCreat Vista. Watch the video tutorial here.

From Hobby to Side Hustle: Monetizing Your Laser Projects
After making a few engraved keychains and pendants, it hit me. This could actually be more than just a fun weekend project. With the right blanks and some creativity, laser engraving can turn into a solid side hustle.
Here’s what I’ve learned so far:
Profit margins are solid. Metal blanks don’t cost much, and the Vista doesn’t take long to run. People are willing to pay extra for something personalized, which gives you room for healthy pricing.
There is real demand. Pet portrait keychains, custom jewelry, and one-of-a-kind gifts are always popular on Etsy, Instagram, and at craft fairs. Shoppers love items that feel meaningful and unique.
Batching saves time. The built-in camera makes it easy to engrave several blanks in one run. I also save my settings so I do not have to start from scratch when repeat orders come in.
Plenty of selling options. Etsy is an easy first step. Platforms like Shopify, Instagram, and local craft shows are also great places to showcase your work.
If you are already engraving for fun, it does not take much to start selling. And it feels pretty amazing when someone pays you for something you created.
About Kerri Crafts It
Hi, I’m Kerri. My channel started as Cricuter focusing on Cricut machines. Over the years I expanded into sublimation, DTF printing, and laser engraving. I recently rebranded to Kerri Crafts It and I just finished writing Cricut For Dummies. My goal is to help crafters learn tools and build small businesses from home.
Final Thoughts
The WeCreat Vista 2W IR laser is compact, beginner friendly, and packed with features like interchangeable modules and a precision camera. I was blown away by the level of detail I could get on tiny metal surfaces. If you want to make professional-looking jewelry or turn unique photo gifts into products, the Vista is a strong choice. If you outgrow it, the Lumos Ultra runs a MOPA fiber laser that engraved a jewelry pendant in 15 seconds.
Share Your Projects!
Try these ideas and share your results with my Facebook group or tag me on Instagram. I love seeing how other crafters use the tools and turn ideas into products.

FAQs
- Can the Vista engrave metal without special spray?
Yes. The 2W infrared laser engraving module can engrave directly onto stainless steel and brass without extra sprays or prep. - Will it work on tiny pendants and rings?
Yes. The Vista has a very small laser spot and a camera for precise alignment, so it can engrave fine detail on small jewelry pieces. If you want to engrave rings or other curved items, you will also need the rotary pro for Vista tool attachment. - What settings work for stainless steel photos?
I used image processing with line density set to 250, sharpness around 80, and the material grid at power 100 with speed 10. These settings worked really well for my round stainless steel keychain blanks. You may need to tweak them slightly depending on the detail in your photo and the type of blank you are using. If you are not sure which blanks to start with, check out my guide to the best laser engraving blanks. - What if autofocus doesn't show up on shiny metal?
Place a small piece of plain paper over the items, run autofocus, then remove the paper and refresh the camera preview. - Can this machine cut wood?
Yes. Some packages include a diode laser module that is designed for cutting and engraving wood.
The interchangeable modules let you switch between metal engraving and wood cutting without needing a second machine. I used the diode module to cut basswood for Halloween door corner decor. You can watch the full YouTube tutorial here or read the step-by-step guide on my blog: How to Cut Basswood with the WeCreat Vista.