
Sublimating a mug is one of the easiest wins in the whole craft world. You print a design, tape it to a mug, press it, and you have a personalized gift that looks store bought.
The part nobody tells you is that a few small numbers decide whether it comes out beautiful or blotchy. The press temperature. The time. And the mug size, which trips up more people than anything else.
I have made a lot of these, and this guide is the version I wish someone had handed me on day one.
Project at a glance: About 30 minutes | Roughly $3 to $5 per mug in materials | Beginner friendly
This post contains affiliate links. If you buy through them, I may earn a small commission at no extra cost to you.
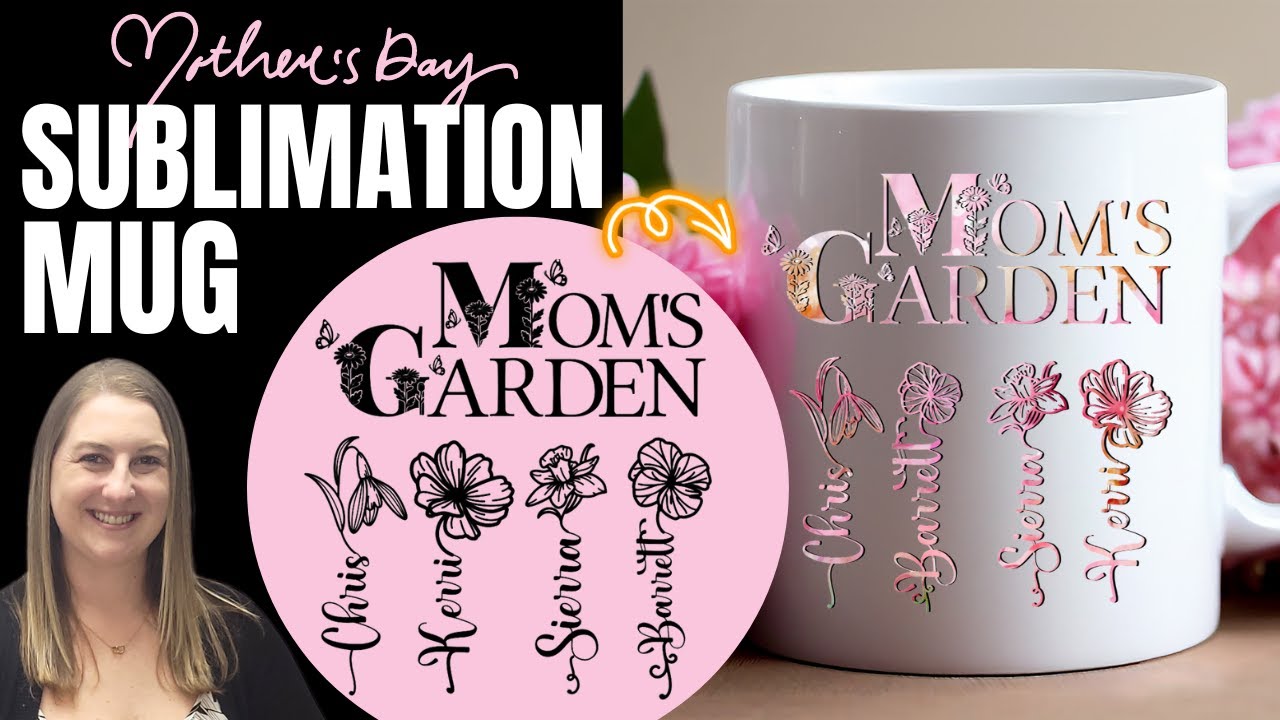
Watch the full tutorial:
 15:06
15:06
Watch the full tutorial
☕ Personalized Cricut Mug Tutorial | Family Name Birth Flower Design
Looking for a meaningful and easy Cricut project? In this tutorial, I’ll show you how to make a personalized sublimation mug featuring family names and birth flowers using Cricut Design Space and the HTVRont tumbler press. You’ll learn how to connect names to flowers, slice colorful backgrounds into...
Why Sublimation Beats Vinyl on Mugs
You can absolutely put permanent vinyl on a mug, and it looks great. But there are two problems with vinyl on something you drink out of every day.
Vinyl should not go in the microwave. I am the kind of person who reheats the same cup of coffee about five times before I finish it, so a mug that cannot go in the microwave is useless to me.
Vinyl also needs hand washing. I do not love hand washing dishes, and neither does anybody I would give a mug to.
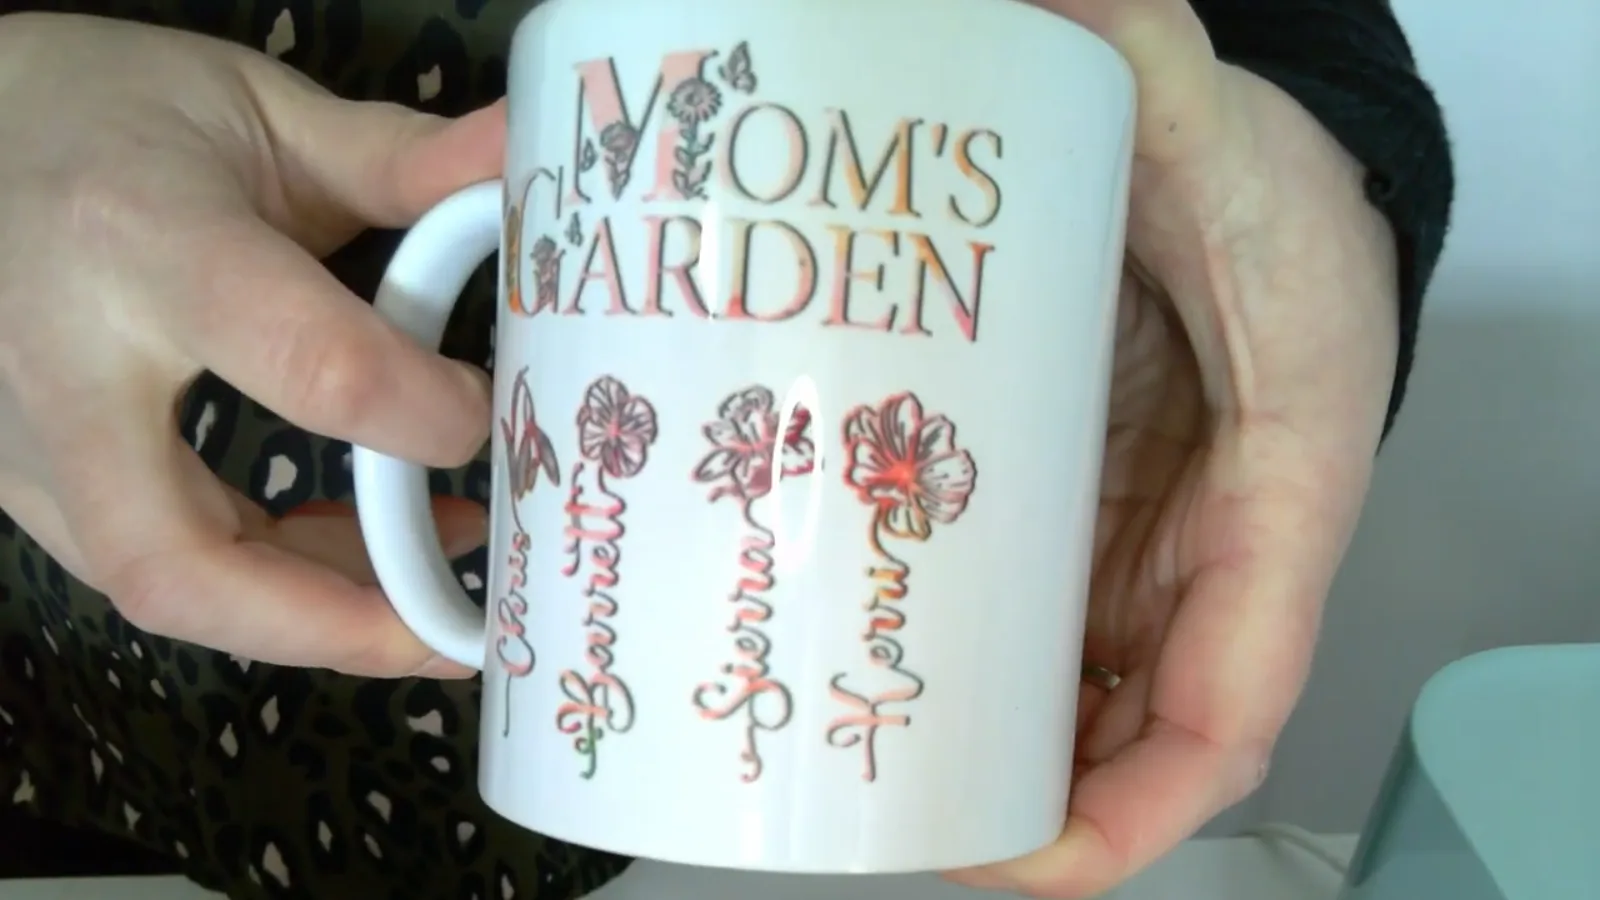
Sublimation ink infuses into the mug's coating instead of sitting on top of it. Nothing peels, nothing lifts, and the mug goes in the microwave and the dishwasher like a normal mug. For anything that holds a drink, that is the whole ball game.
If sublimation is brand new to you, start with what sublimation actually is and come back.
Quick Links
- Why Sublimation Beats Vinyl on Mugs
- What You Need
- Mug Size Matters More Than You Think
- Step 1: Design and Size Your Artwork
- Step 2: Add Real Color With the Slice Trick
- Step 3: Print It
- Step 4: Clean and Tape the Mug
- Step 5: Press It
- Step 6: Cool, Then Peel
- Sublimation Mugs vs Infusible Ink Mugs
- Tips and Troubleshooting
- Frequently Asked Questions
What You Need
A sublimation printer. Mine is an Epson WorkForce 7210 that I converted years ago. Most people now convert an Epson EcoTank instead, and I have a full EcoTank conversion walkthrough if you are starting from scratch.
Sublimation ink. I use Hiipoo. The bottles are easy to fill and the colors come out rich.
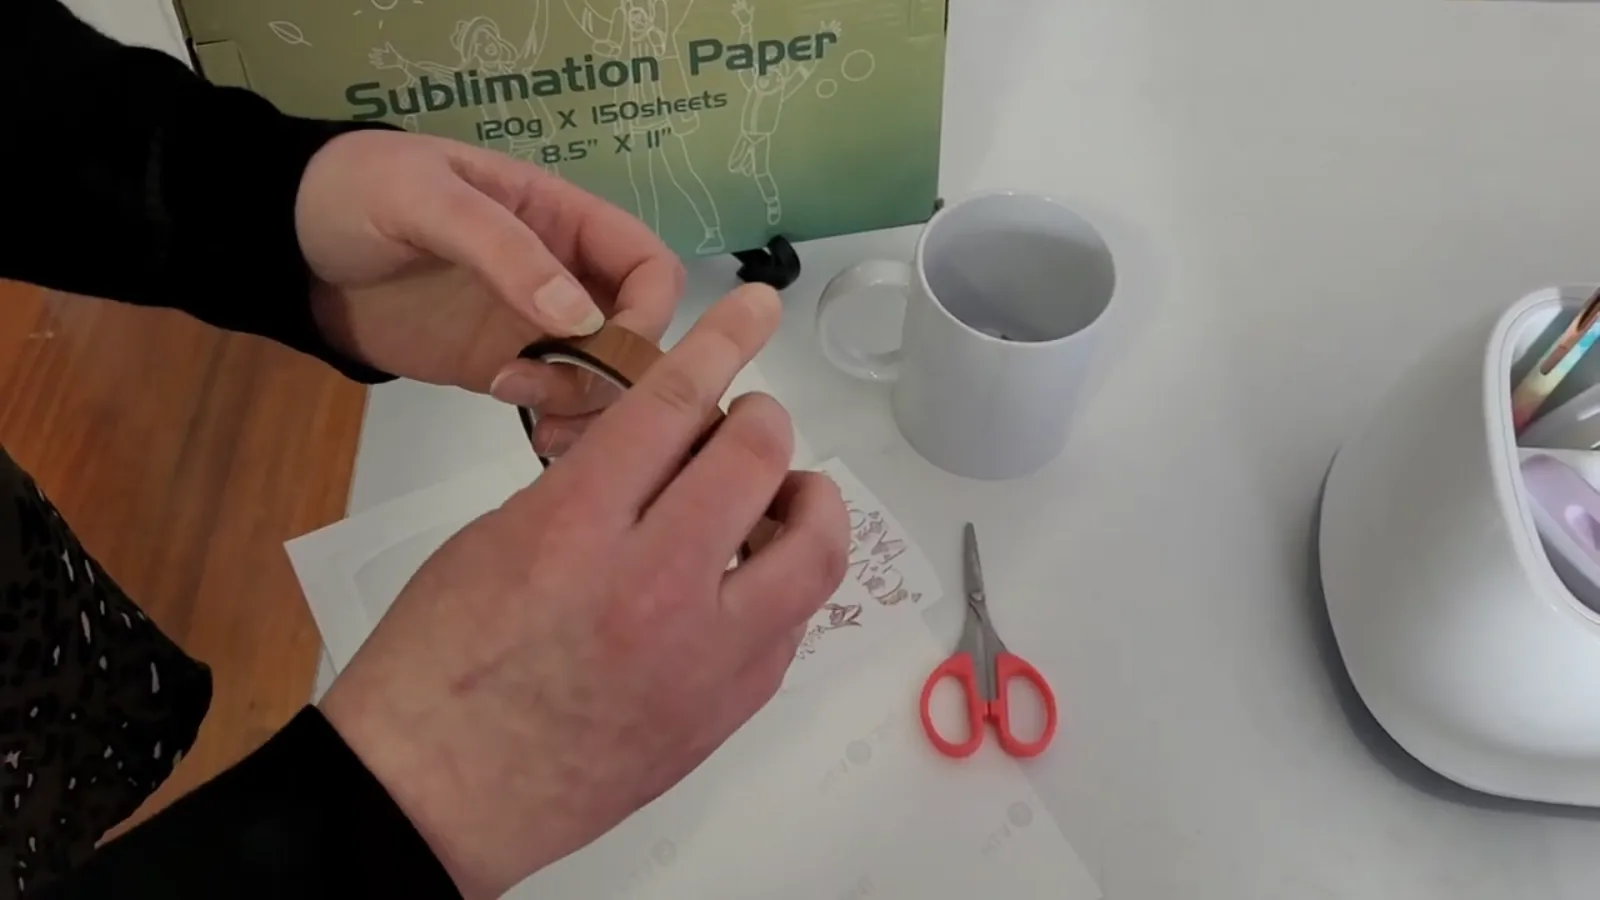
Sublimation paper. I use HTVRont, and I also love A-SUB.
Sublimation mugs. These are not optional and you cannot substitute. A sublimation mug has a special polymer coating that lets the ink infuse into it. A regular mug from the cupboard has nothing for the ink to bond to, so your design will simply wipe off. I use HTVRont 11 oz blanks.
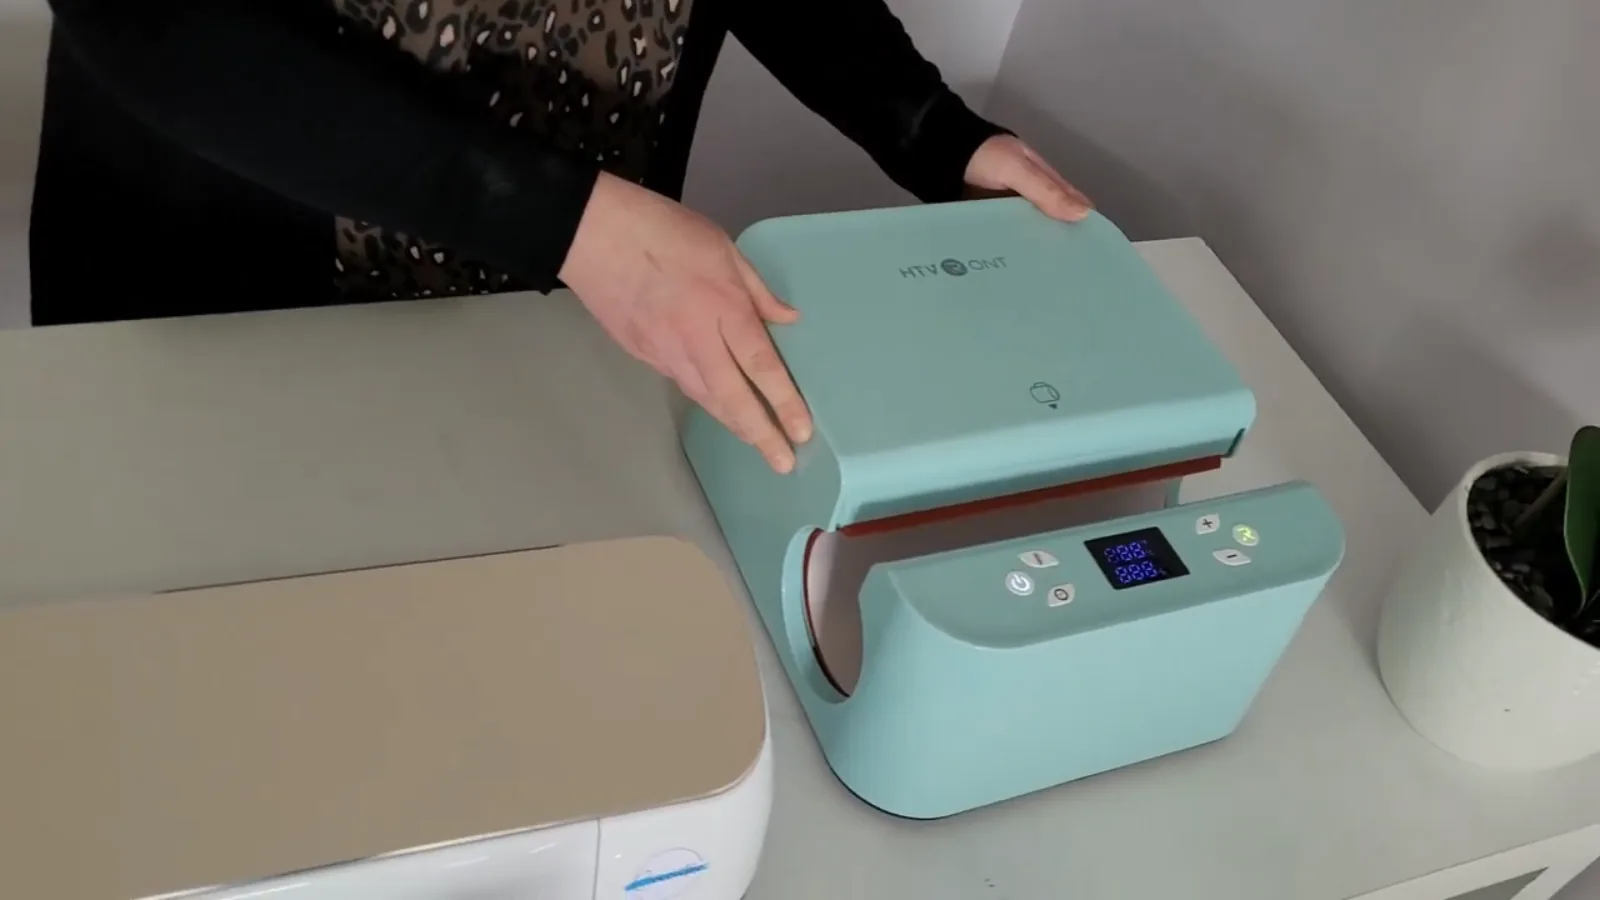
A mug press. I use the HTVRont Auto Tumbler Heat Press. It is sold as a tumbler press but it handles mugs just as happily, and it will do two at once, which cuts your working time in half if you are selling. Cricut makes its own Mug Press too.
Thermal tape. Regular tape melts. Heat resistant tape does not.
Heat resistant gloves. These. The mug comes out genuinely dangerous to touch.
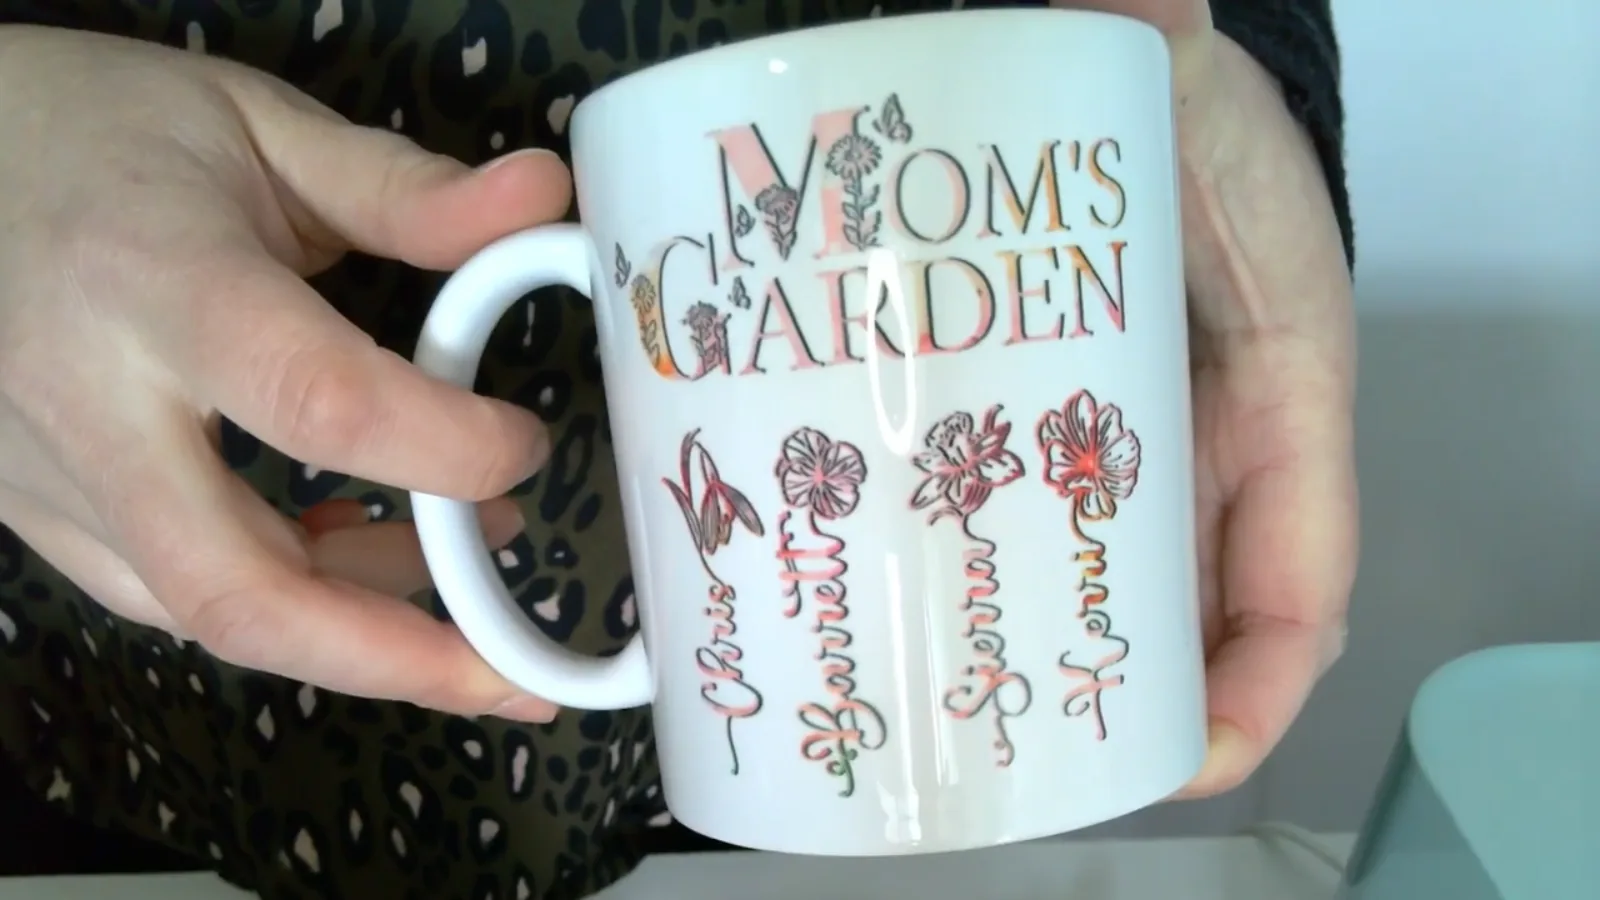
A design. The mug in these photos uses my birth flower SVG bundle from my Etsy shop, which pairs each family name with its birth month flower. The colorful pattern I slice into the lettering comes from Creative Fabrica, where the all access subscription runs about $5 a month for unlimited downloads with a commercial license included. That commercial license matters if you plan to sell what you make.
Mug Size Matters More Than You Think
This is the single most useful thing in this post, so I am putting it near the top.
Use 11 oz mugs. I made one of my Christmas mugs on a 15 oz stoneware mug and it just barely fit in the press. It came out great, but it was a squeeze, and a squeeze is where problems start. The 11 oz mugs fit properly with room to spare, and they press more evenly because of it.
Cricut For Dummies makes the same point from the other direction in Chapter 4: pick a mug press that handles a wide range of cup sizes, so you are not locked out of half the blanks on the market. If you already own a press, work within what it comfortably fits rather than what it technically fits.
Both sizes are easy to find: 11 oz ceramic blanks come in bulk cases if you are making a batch, and 15 oz stoneware comes in sets of six if your press has the room.
Step 1: Design and Size Your Artwork
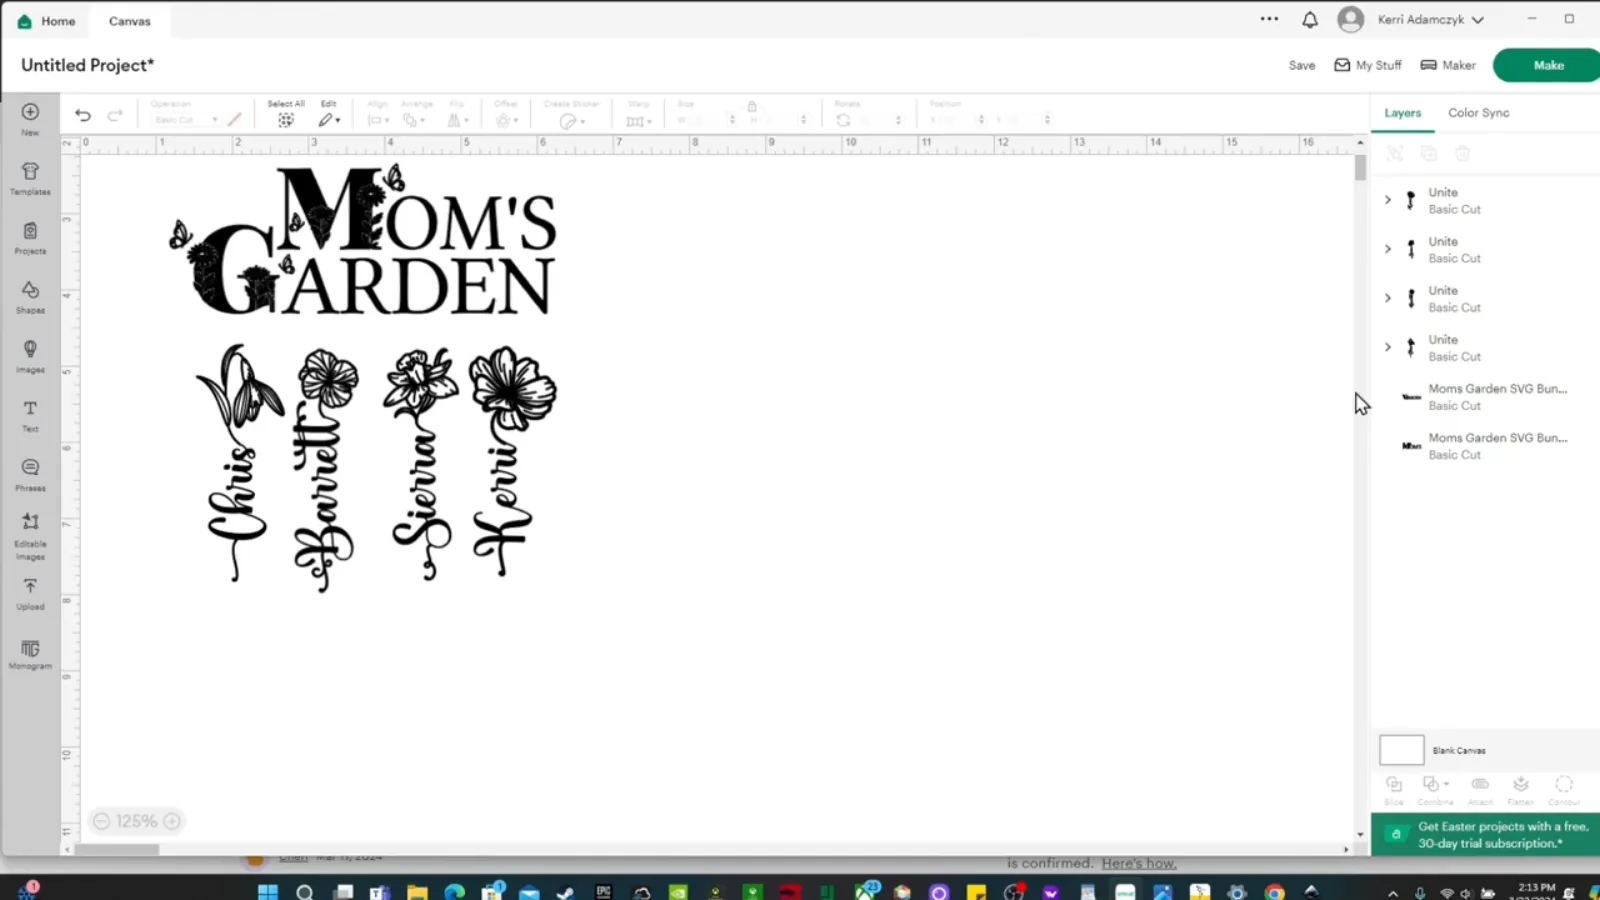
I design mugs in Cricut Design Space, though you can use whatever you are comfortable in.
If you want to watch the file handling rather than read it, the video covers both parts. Downloading the bundle starts at 2:39, and uploading and arranging the pieces in Design Space starts at 3:13.
Start at about 2.5 inches wide by 3.25 inches tall. That is the size I use for a standard mug and it sits nicely on the side without crowding the handle.
Measure your own mug before you commit, though. Mug shapes vary more than you would expect, and a design that looks perfect on an 11 oz can look lost on a 15 oz.
Once you are happy with the layout, flatten the design. In Design Space, flatten turns your layers into a single printable image, which is exactly what you want for a print then cut style job.
Step 2: Add Real Color With the Slice Trick
Here is the thing that makes a sublimated mug look expensive instead of homemade.
If you are used to vinyl, you probably think in solid colors, because that is what vinyl gives you. Sublimation has no such limit. You can put a full color pattern inside your lettering, and it costs nothing extra.
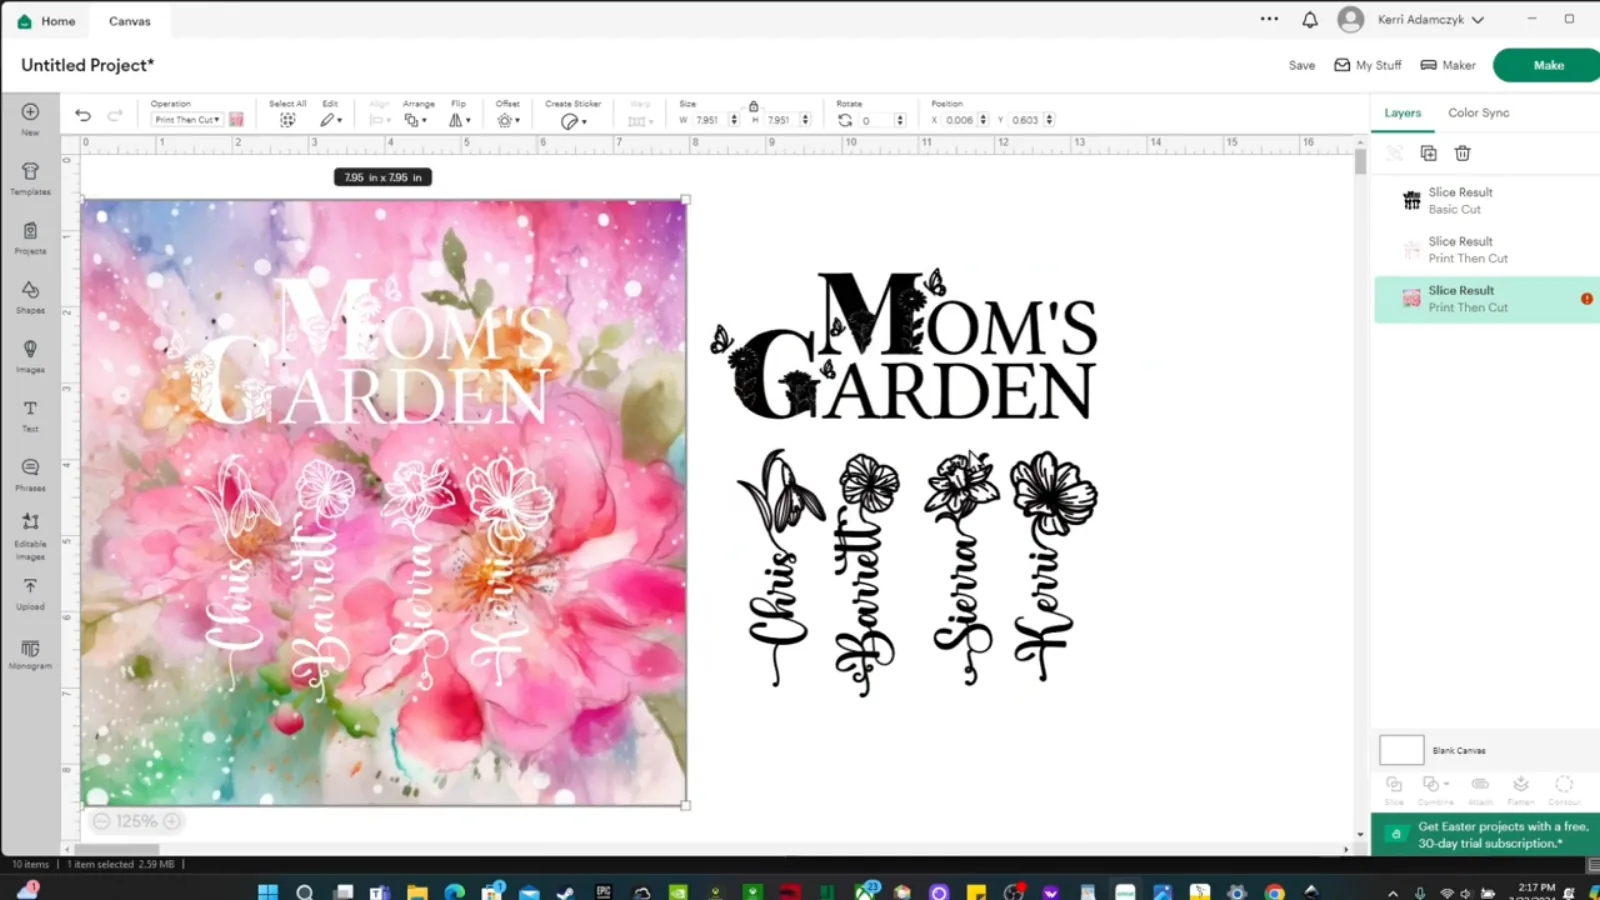
Grab a patterned background from Creative Fabrica, something floral or textured with a lot going on. Upload it to Design Space as a complex image and make sure you select print then cut image on the upload screen.
Then:
- Drag the pattern on top of your design and right click to move it to the front.
- Select your design pieces and combine, then unite so they behave as one shape.
- Highlight the pattern and the united design together and click slice.
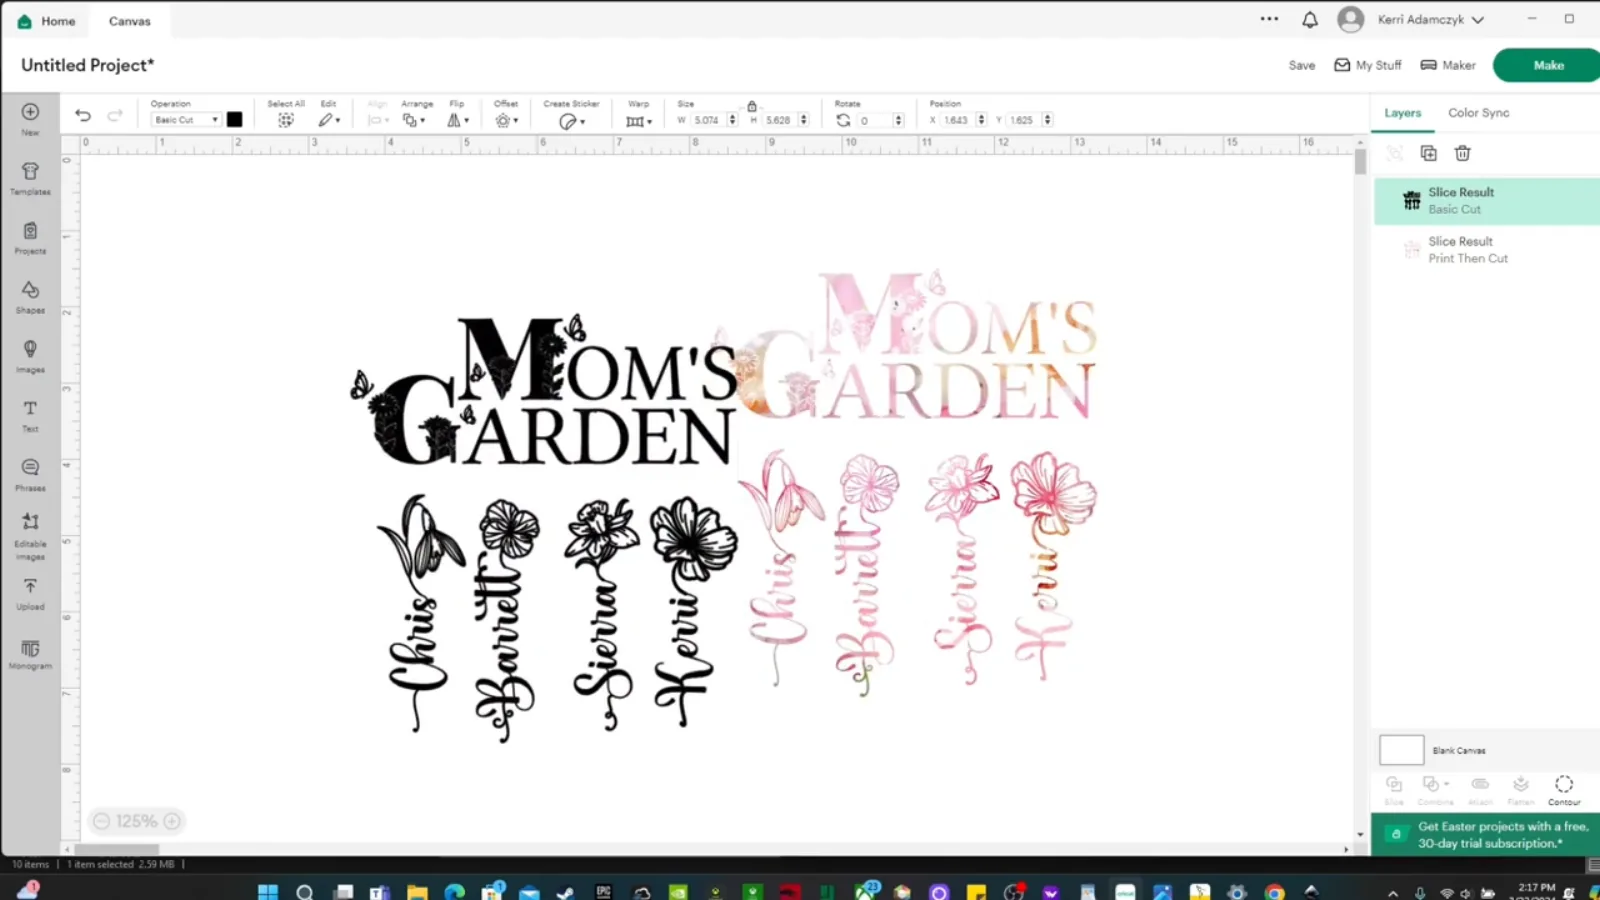
- Drag away and delete the leftover pieces, and you are left with your design filled with the pattern.
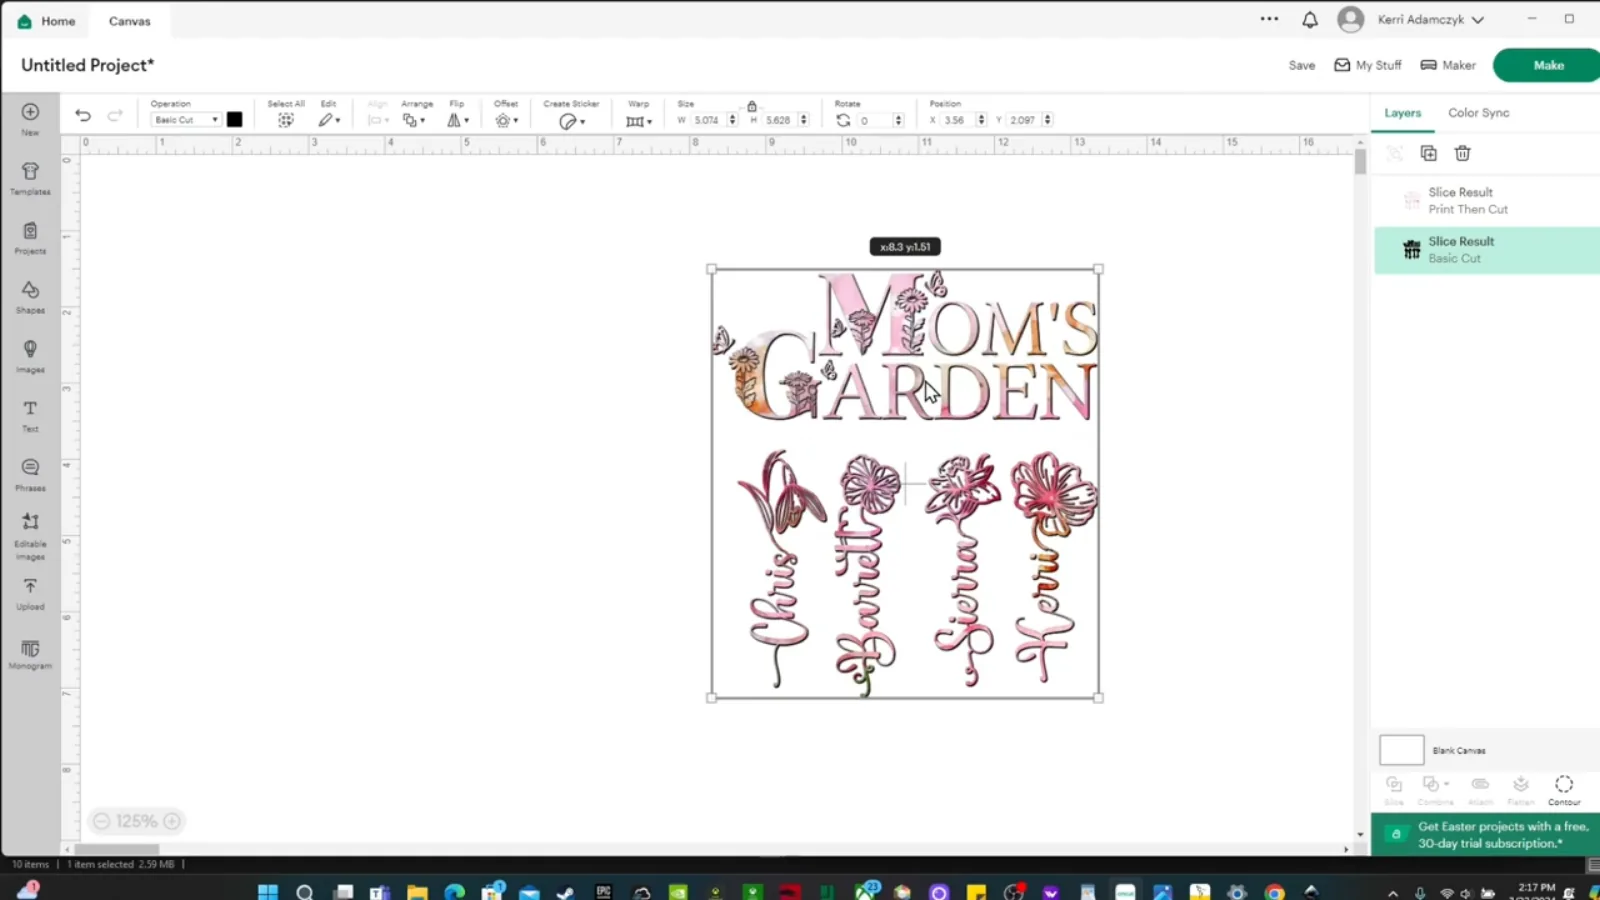
One extra step that makes a real difference. Instead of deleting the leftover black layer, send it to the back and sit your patterned design on top of it. It acts like an outline and makes the whole thing pop. Once you have seen the two side by side you will not go back.
Finish by highlighting everything and flattening it.
Step 3: Print It
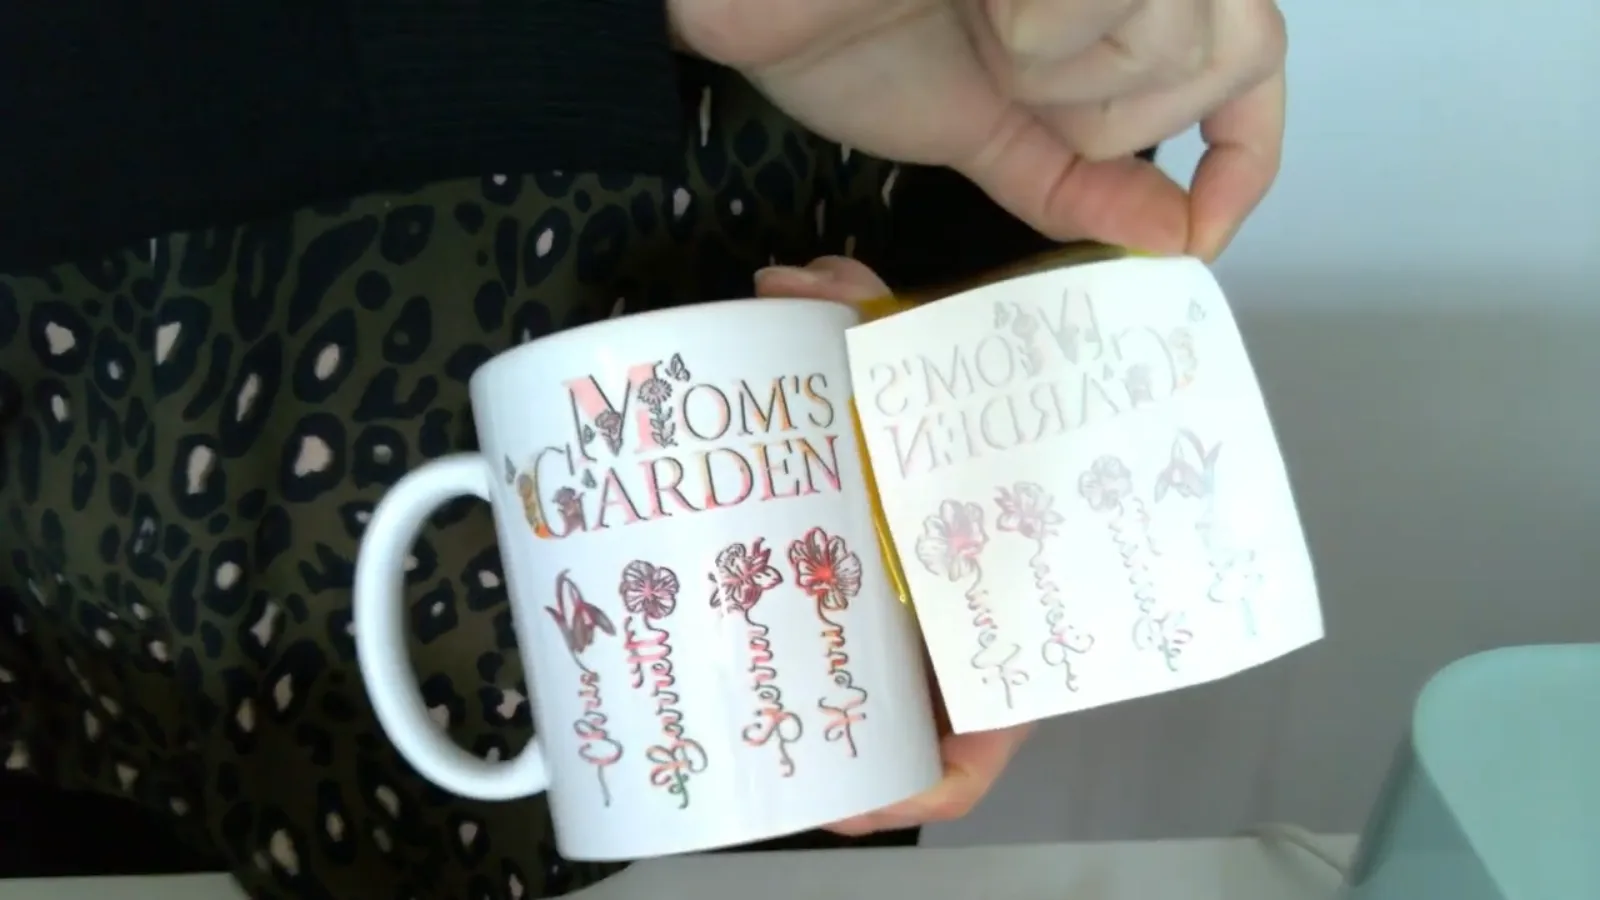
Click Make It, and before anything else, mirror the design. Sublimation transfers in reverse. Skip this and your text prints backwards, and you will not notice until it is baked into a mug.
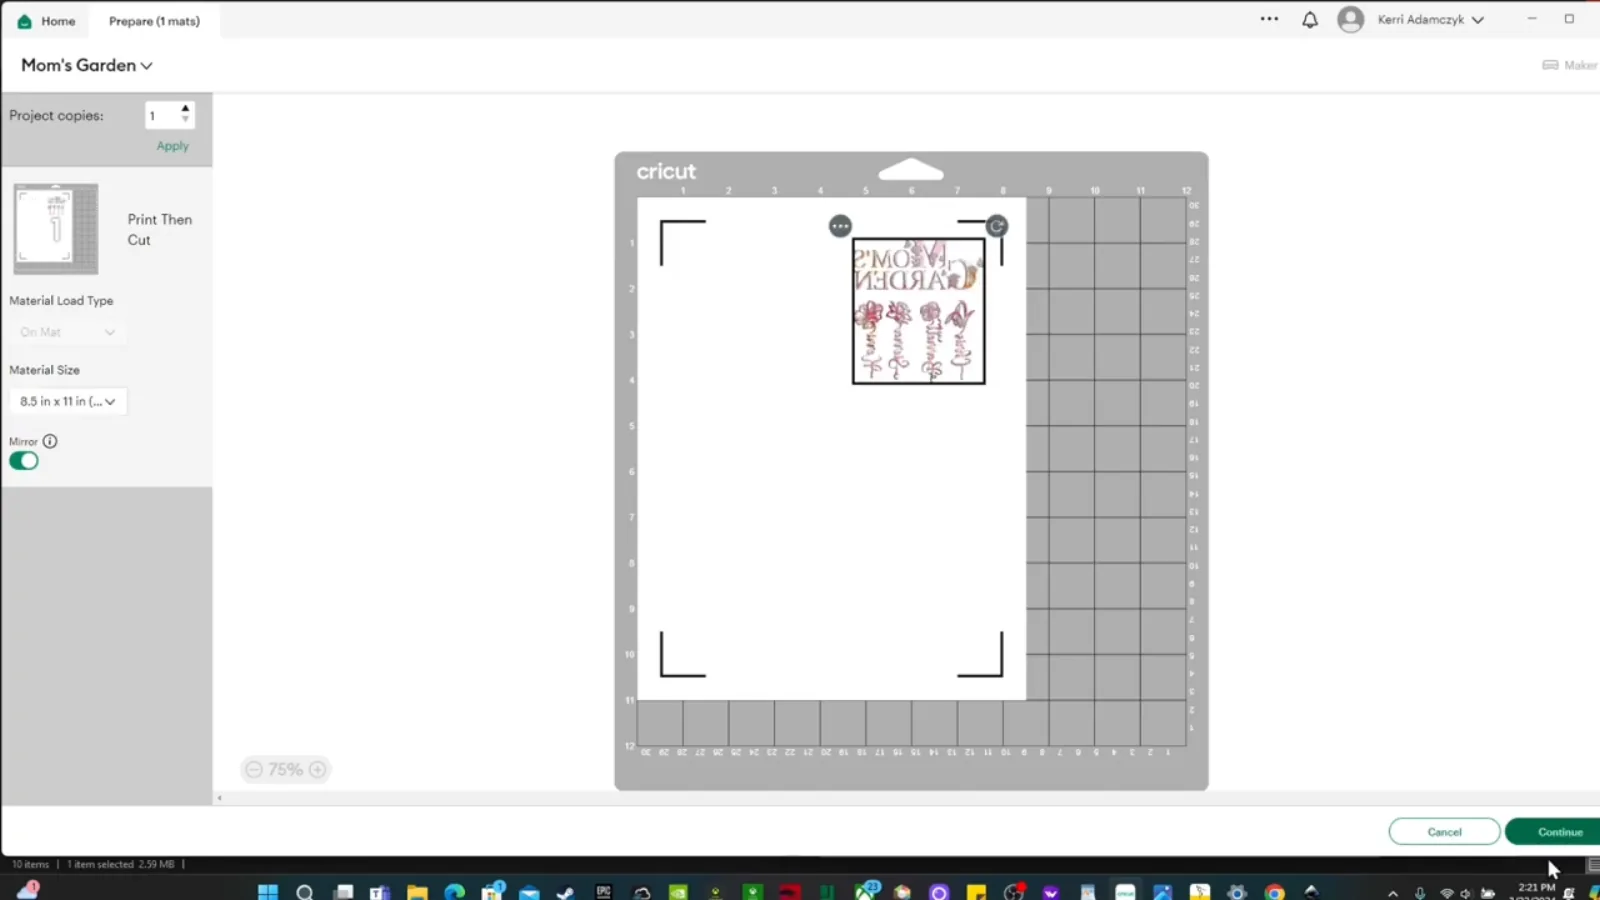
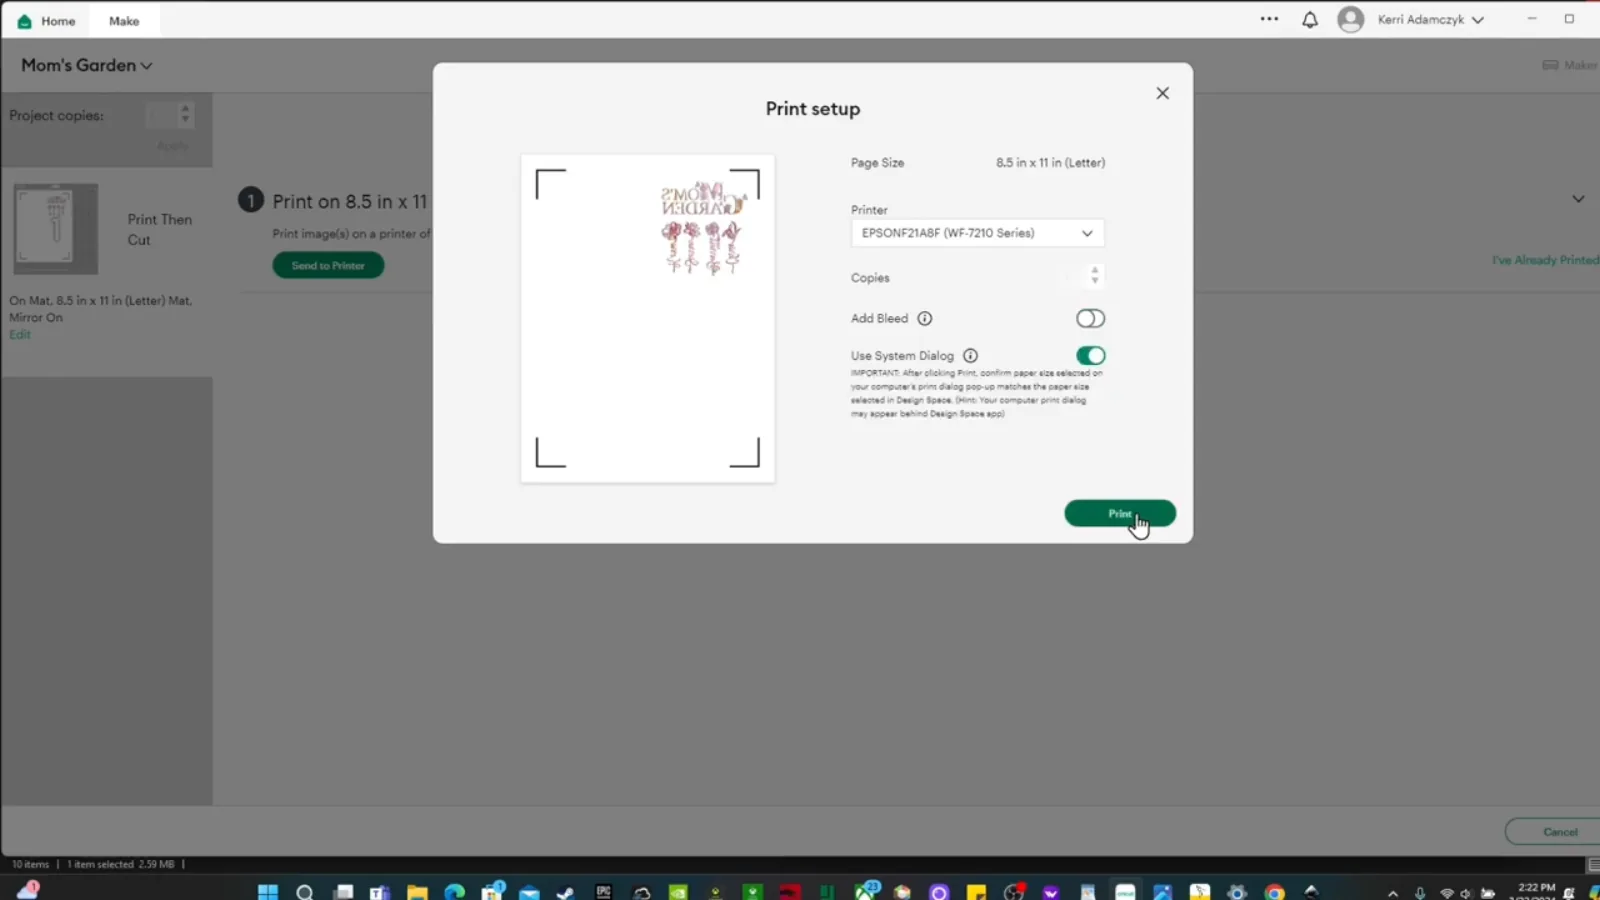
Then in the print dialog:
- Bleed off, System Dialog on.
- Double check the printer that is actually selected. Mine likes to flip itself back to the wrong printer at the last second, and I have wasted paper on that more than once.
- Under preferences, set paper type to a high quality option like premium photo paper glossy.
- Set quality to high.
- Make sure your sublimation paper is loaded before you hit print.
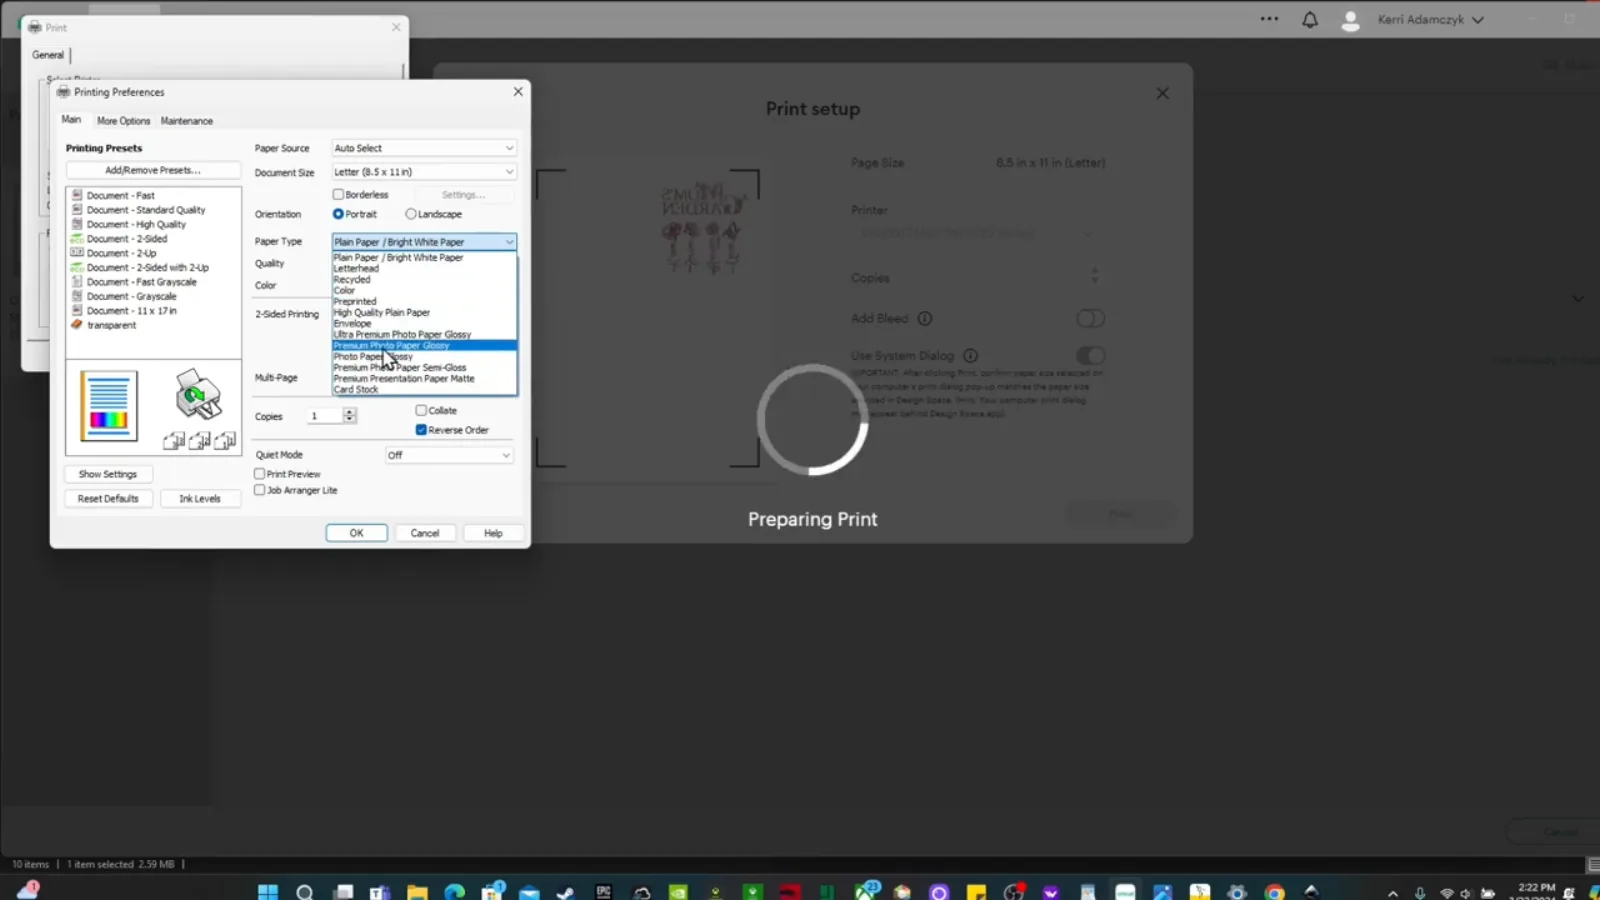
Your print will look dull and washed out coming off the printer. That is normal and it is not a mistake. Sublimation ink only develops its real color under heat.
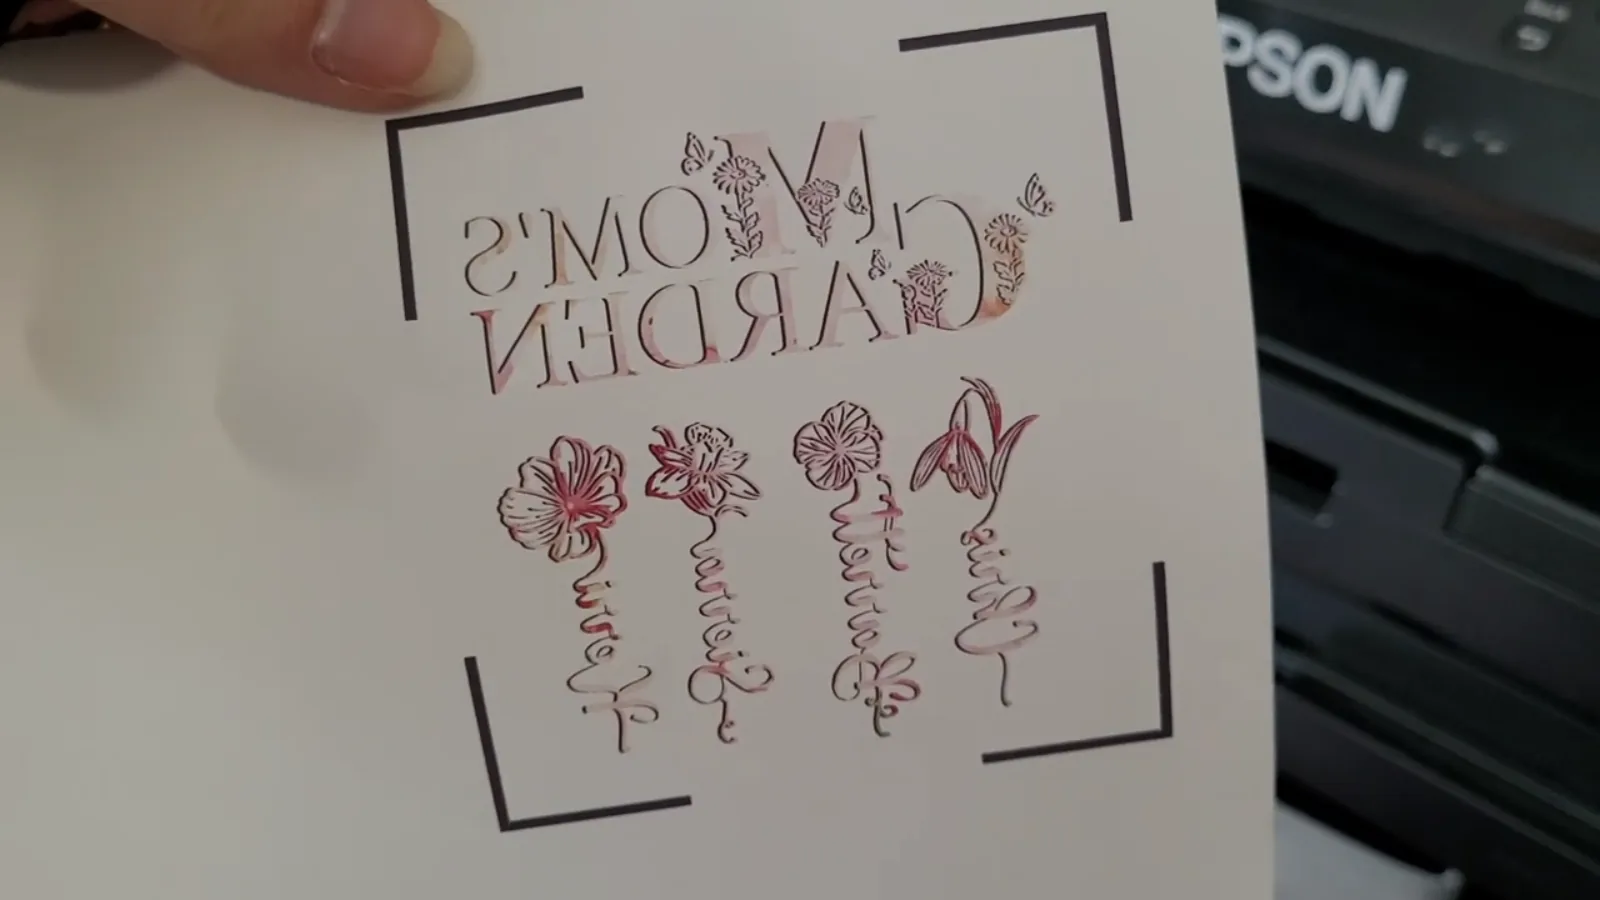
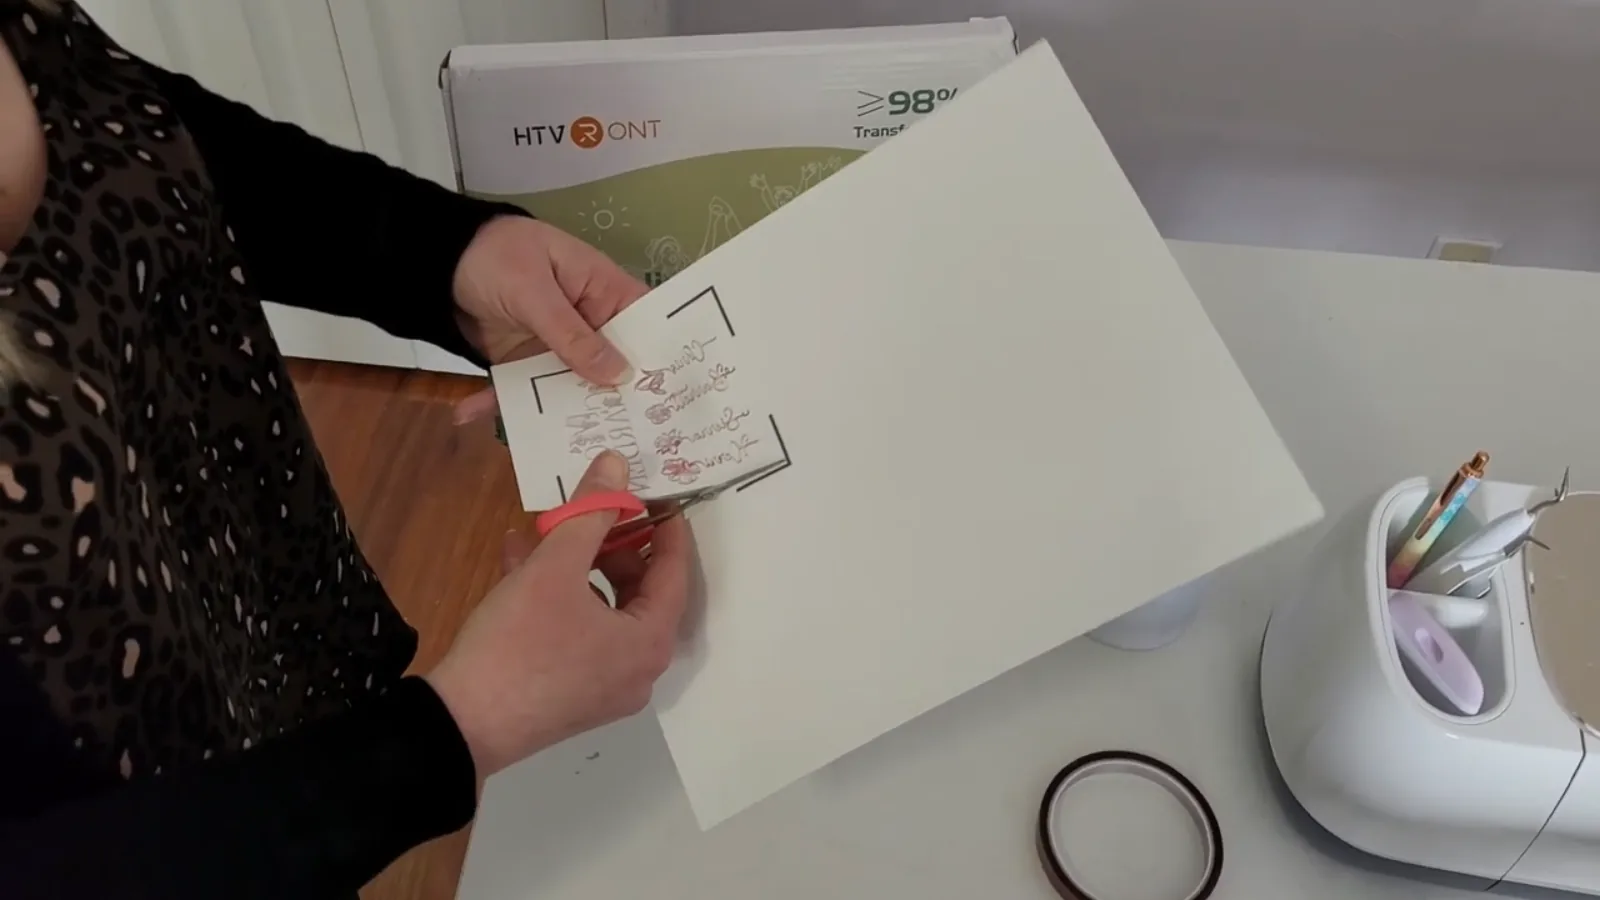
The design is small enough that you can just cut it out with scissors. No need to involve your Cricut for a shape this simple.
Step 4: Clean and Tape the Mug
Wipe the mug down with isopropyl alcohol and a lint free cloth. Fingerprints, lotion, and dust all leave marks that show up permanently once you press.
Use coffee filters as your lint free cloth. They are cheap, easy to find, and genuinely lint free. Paper towels and tissue leave behind fibers that can transfer into the design.
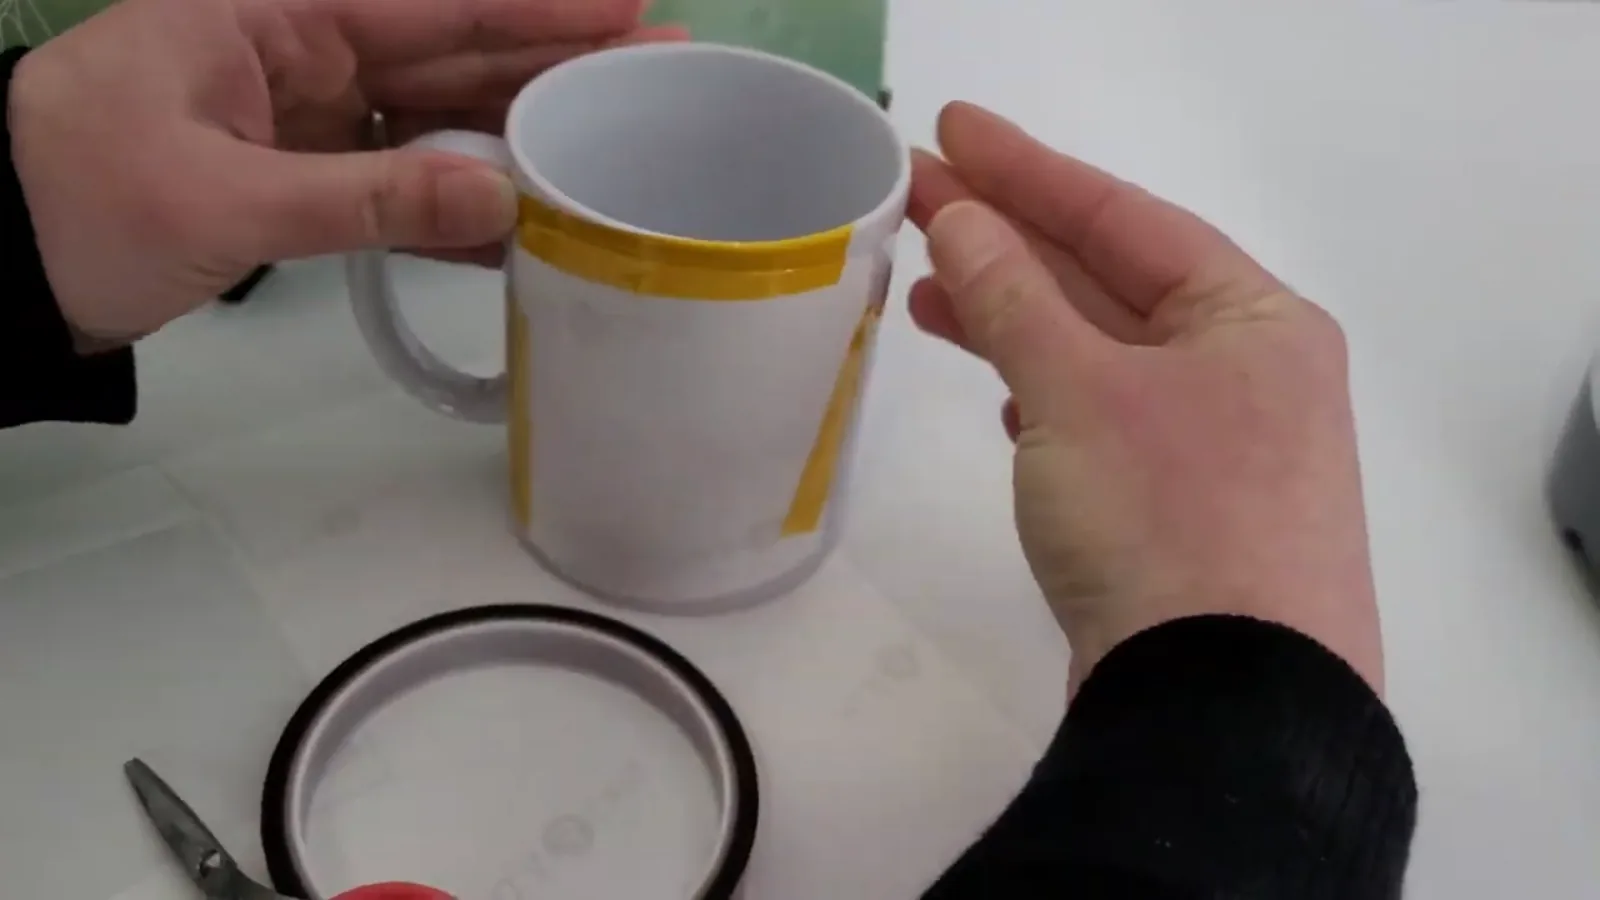
Let the alcohol dry completely, then position your design face down against the mug, hold it snug, and secure it with thermal tape. Tape all the way around the edges so nothing can shift. Any movement inside the press shows up as a ghosted double image.
If you want extra insurance against ink blowout marking your press, wrap the taped mug in butcher paper and tape that down too. That is standard practice for Infusible Ink mugs and it does not hurt here either.
Step 5: Press It
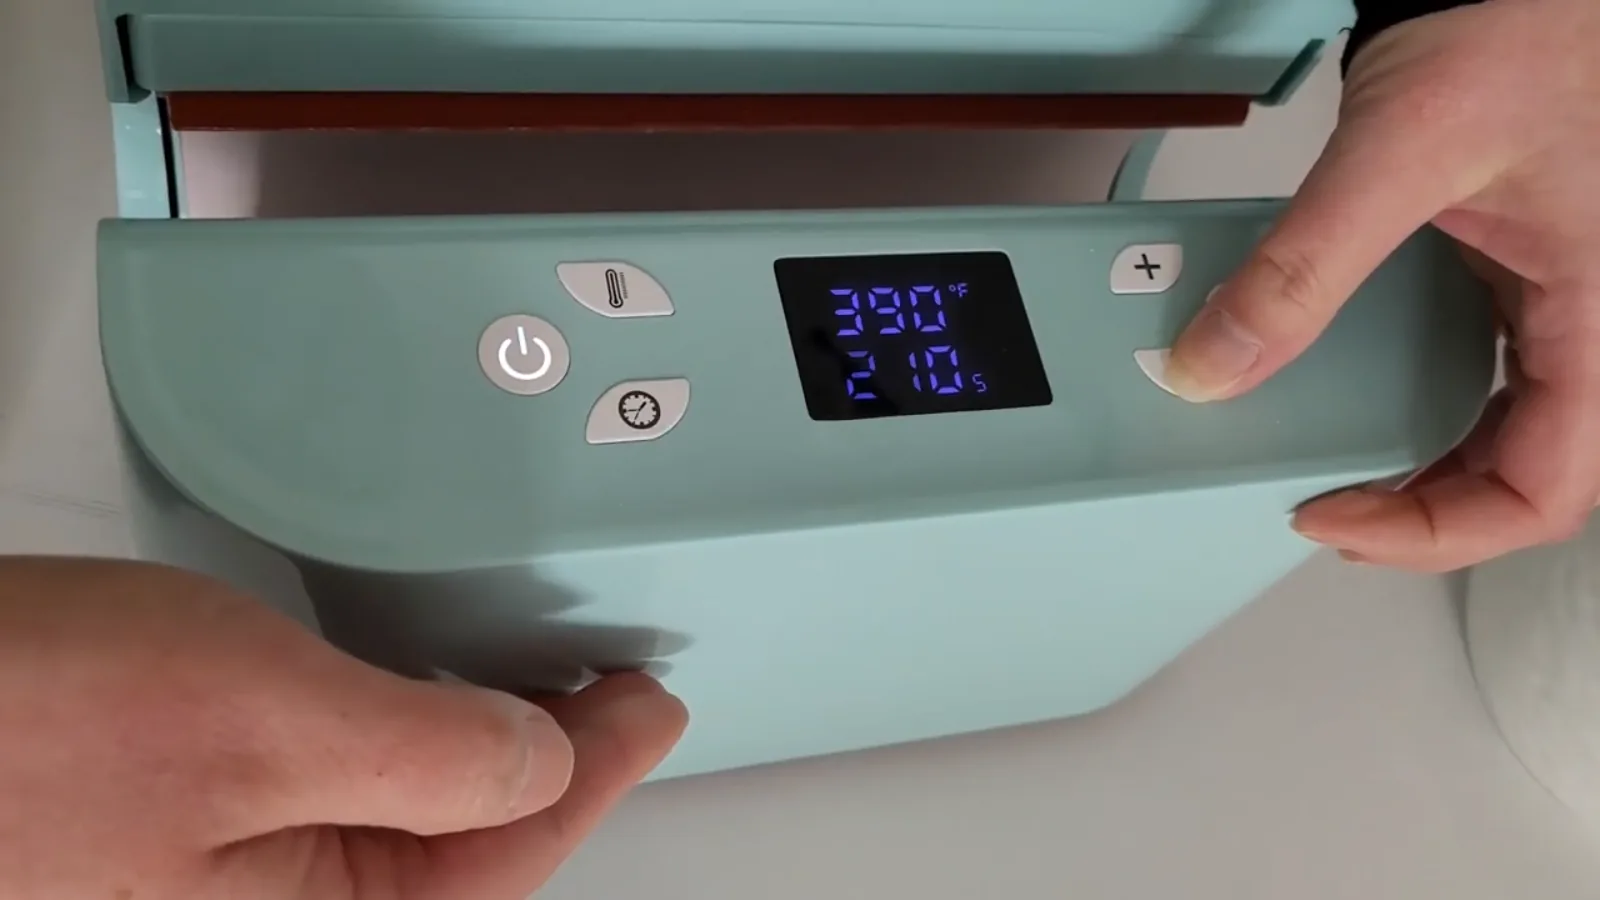
My HTVRont press arrives set to 390°F for 240 seconds, and 240 seconds is a little longer than a ceramic mug needs.
HTVRont's own time and temperature guide calls for 380°F to 400°F for 150 to 210 seconds on ceramic mugs. I split the difference and run:
390°F for 210 seconds.
That has been reliable for me across a lot of mugs. Check your own press's guide, because every machine runs slightly differently, and treat any number in a blog post as a starting point rather than gospel.
Slide the mug in, hit start, and the countdown begins on its own.

Two safety notes worth taking seriously. Work in a well ventilated space, since pressing can give off some fumes. And never walk away from a heating press. I had a mug press wire catch fire years ago and only caught it because I happened to be standing right there watching it smoke. If I had wandered off to do something else, that story ends very differently.
Step 6: Cool, Then Peel
Gloves on. The mug is genuinely burning hot coming out.
I pull the mug out with one glove and set it down on the other one to cool. Then I leave it alone. Properly alone.
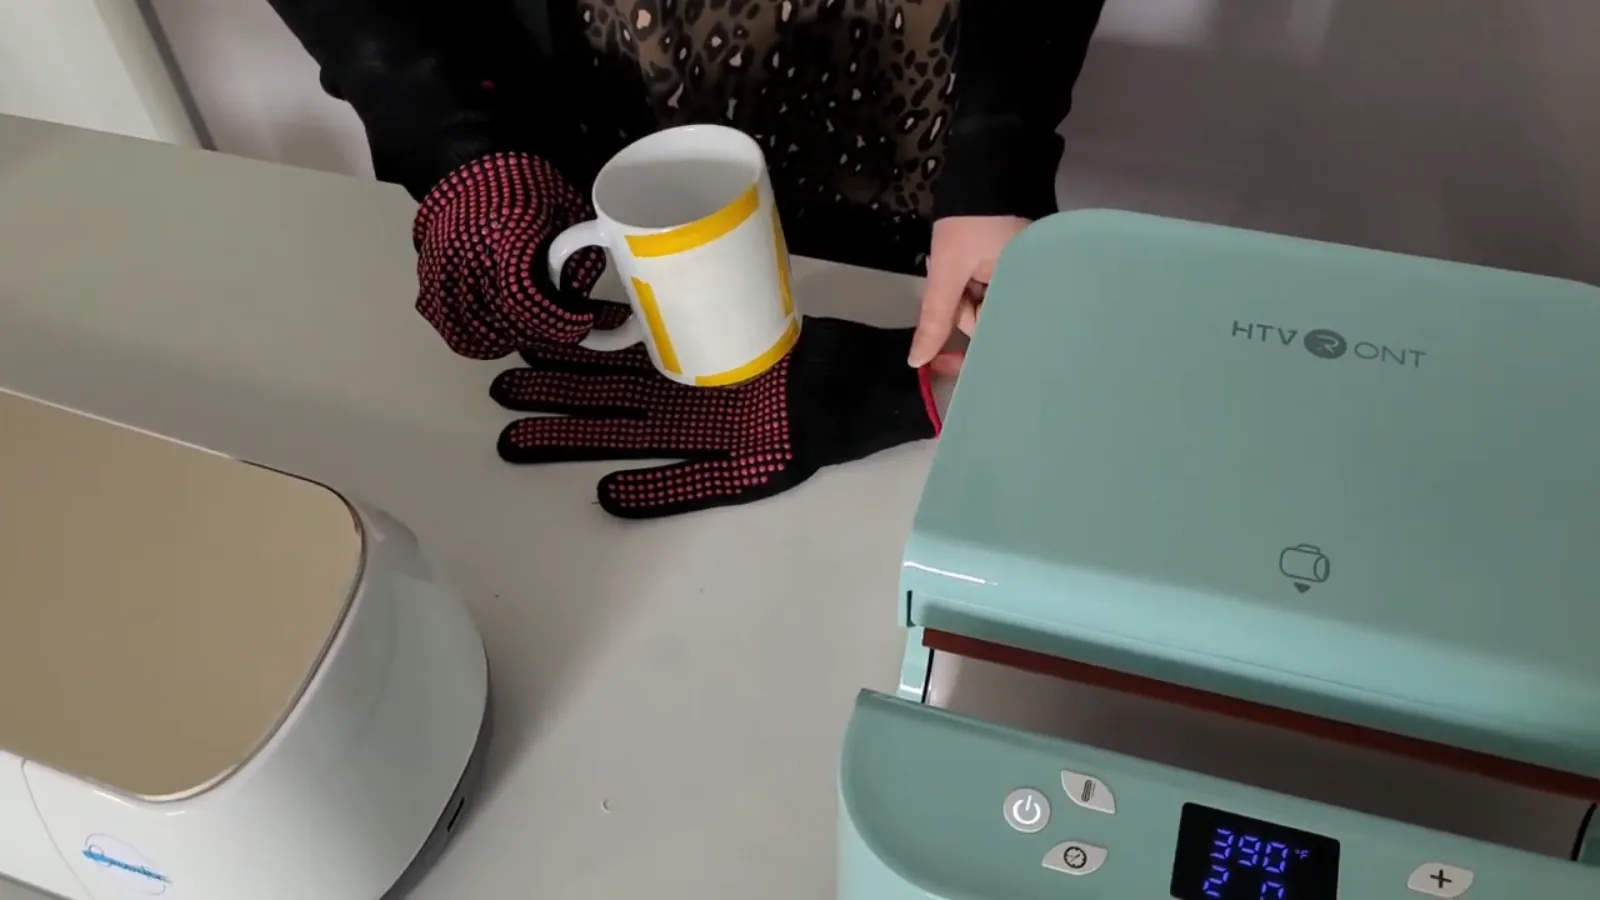
Let it cool completely before you peel. I usually go do something else entirely and come back when the mug is cool to the touch. Peeling early smudges the design, and there is no fixing it once it smudges. For Infusible Ink mugs the guidance is 15 to 30 minutes, and sublimation is no different in spirit: patience costs you nothing and impatience costs you the mug.
When it is cool, peel the tape and paper away and you are done.
Sublimation Mugs vs Infusible Ink Mugs
These two get confused constantly, so here is the short version.
Infusible Ink is Cricut's version of sublimation. You cut a transfer sheet on your machine, weed it, and press it. No printer required, which is the appeal, but you are limited to the sheets and pens Cricut sells. Press it at around 400°F for 4 to 6 minutes and let it cool 15 to 30 minutes before peeling.
Sublimation printing needs a converted printer and ink up front, but after that you can print literally any design in full color, including photographs. Per mug it is cheaper, and the design freedom is not close.
Both end up in the same place chemically. The ink becomes part of the mug's coating instead of sitting on it. If you already own a Cricut and no printer, Infusible Ink gets you started this weekend. If you make mugs regularly, a converted printer pays for itself fast.
Tips and Troubleshooting
My design came out faded. Usually not enough time or not enough heat. Add 15 to 30 seconds before you change anything else.
My design is blurry or doubled. The paper shifted in the press. Tape more, and tape all the way around.
There are speckles or spots in the design. Something was on the mug when you pressed. Clean more carefully and let the alcohol dry fully.
My colors look dull compared to the screen. Some shift is normal. Bright, saturated designs sublimate better than muted ones, so pick artwork with punchy color to begin with.
The design wiped off. That mug was not a sublimation blank. There is no way around the coating. If you are not sure what you are holding, my guide to sublimation blanks that actually work covers how to spot a coated blank before you press it.
A note on auto presses. They are wonderfully convenient, but most of them do not let you adjust pressure manually. If a design is not adhering well and your time and temperature are right, pressure is the variable you cannot see, and it is worth knowing that before you blame yourself.
More broadly, my 10 essential sublimation tips covers the mistakes that apply across every blank, not just mugs.
Frequently Asked Questions
Can you sublimate on any mug?
No. The mug needs a polymer coating made for sublimation. On a plain ceramic mug the ink has nothing to bond with and the design will rub straight off.
What temperature do you sublimate a mug at?
For ceramic mugs, 380°F to 400°F for 150 to 210 seconds. I run 390°F for 210 seconds. Check your press's own guide, because machines vary.
Are sublimated mugs dishwasher safe?
Yes. The ink infuses into the coating rather than sitting on the surface, so sublimated mugs go in the dishwasher and the microwave. That is the main reason I use sublimation rather than vinyl on anything I drink from.
What size should a mug design be?
Start around 2.5 inches wide by 3.25 inches tall for a standard mug, then measure your own blank and adjust. Mug shapes vary more than you would think.
Do I need to mirror my design for a mug?
Yes. Every sublimation design gets mirrored before printing, or your text comes out backwards.
Why does my sublimation print look faded before pressing?
That is completely normal. Sublimation ink looks dull on paper and only develops its full color when heat is applied.
11 oz or 15 oz mugs, which is better?
For most presses, 11 oz. I pressed a 15 oz mug that only just fit, and while it came out fine, the 11 oz blanks fit with room to spare and press more evenly.
Can I use a regular heat press instead of a mug press?
Not well. Mugs are curved, and a flat platen cannot make even contact around a curve. A dedicated mug or tumbler press is shaped for it, and it is the one piece of kit worth buying properly.
Your Turn
Mugs are the project I recommend to everyone starting out in sublimation. They are quick, they are cheap to practice on, and a personalized mug lands better as a gift than almost anything else you can make in half an hour.
Once you have the hang of them, the same skills carry straight over to sublimation ornaments and full wrap photo tumblers.
Made one? I would love to see it. Come share it in my Facebook group.



