
Yes, I already own a ridiculous number of laser engravers. But there are projects I have wanted to make for years that my blue diode lasers simply can't do, so I put this Monport laser, the MEGAS 70W CO2, to the test on clear acrylic, mirrored acrylic, glass, and a sheet of acrylic almost 3/4 of an inch thick.
Here's my short answer. If you want to cut clear or mirrored acrylic, make your own blanks, or engrave glass with no coating, a CO2 laser really does open up a whole new set of projects. The MEGAS did all of that for me. It also came with a few surprises, like fumes that needed a booster fan and one project my husband had to finish with a pocket knife.
Monport sent me this machine and paid me to make this video and post. I chose every project myself, and everything here is my real experience, including the parts that didn't go as planned.
This post contains affiliate links. If you buy through them, I may earn a small commission at no extra cost to you.
 20:21
Watch the full tutorial
CO2 vs Diode Laser: What Can a CO2 Laser Do That a Diode CAN'T?
🛒 SHOP THE MONPORT MEGA S 70W CO₂ LASER
Key Takeaways
- A CO2 laser cuts clear acrylic and a blue diode laser can't. Blue diode light passes right through a clear sheet, while the acrylic absorbs CO2 laser light, so extra diode power doesn't solve it.
- The Monport MEGAS cut 18mm clear cast acrylic in one pass at 95% power and 1 mm/s. That result needed an external air pump. With no air assist running, the same sheet took 4 passes.
- The MEGAS has a 27.56″ x 13.78″ work area in a machine about 44″ wide. Setup took about 25 minutes, but getting it into the house took two people, a tractor and a dolly.
- A CO2 laser engraves clear glass directly, with no coating. On the Monport MEGAS I started at 20% power and 300 mm/s and slowed to about 125 mm/s for detail, and bold designs read far better than thin script.
- Plan on extra ventilation for a CO2 laser. Even with the MEGAS built-in exhaust fans vented outside, cutting acrylic smelled strong in my house until I added an inline booster fan.
Quick Links
- Key Takeaways
- What Is the Monport MEGAS?
- CO2 vs Diode Laser: What Can a CO2 Do That a Diode Can't?
- Unboxing and Setup
- Real Projects I Made With It
- Monport MEGAS Settings That Worked for Me
- What I Love and What Could Be Better
- Who Should Buy This and Who Shouldn't
- Monport MEGAS vs the Alternatives
- FAQ
- Final Verdict: Is This Monport Laser Worth It?
What Is the Monport MEGAS?
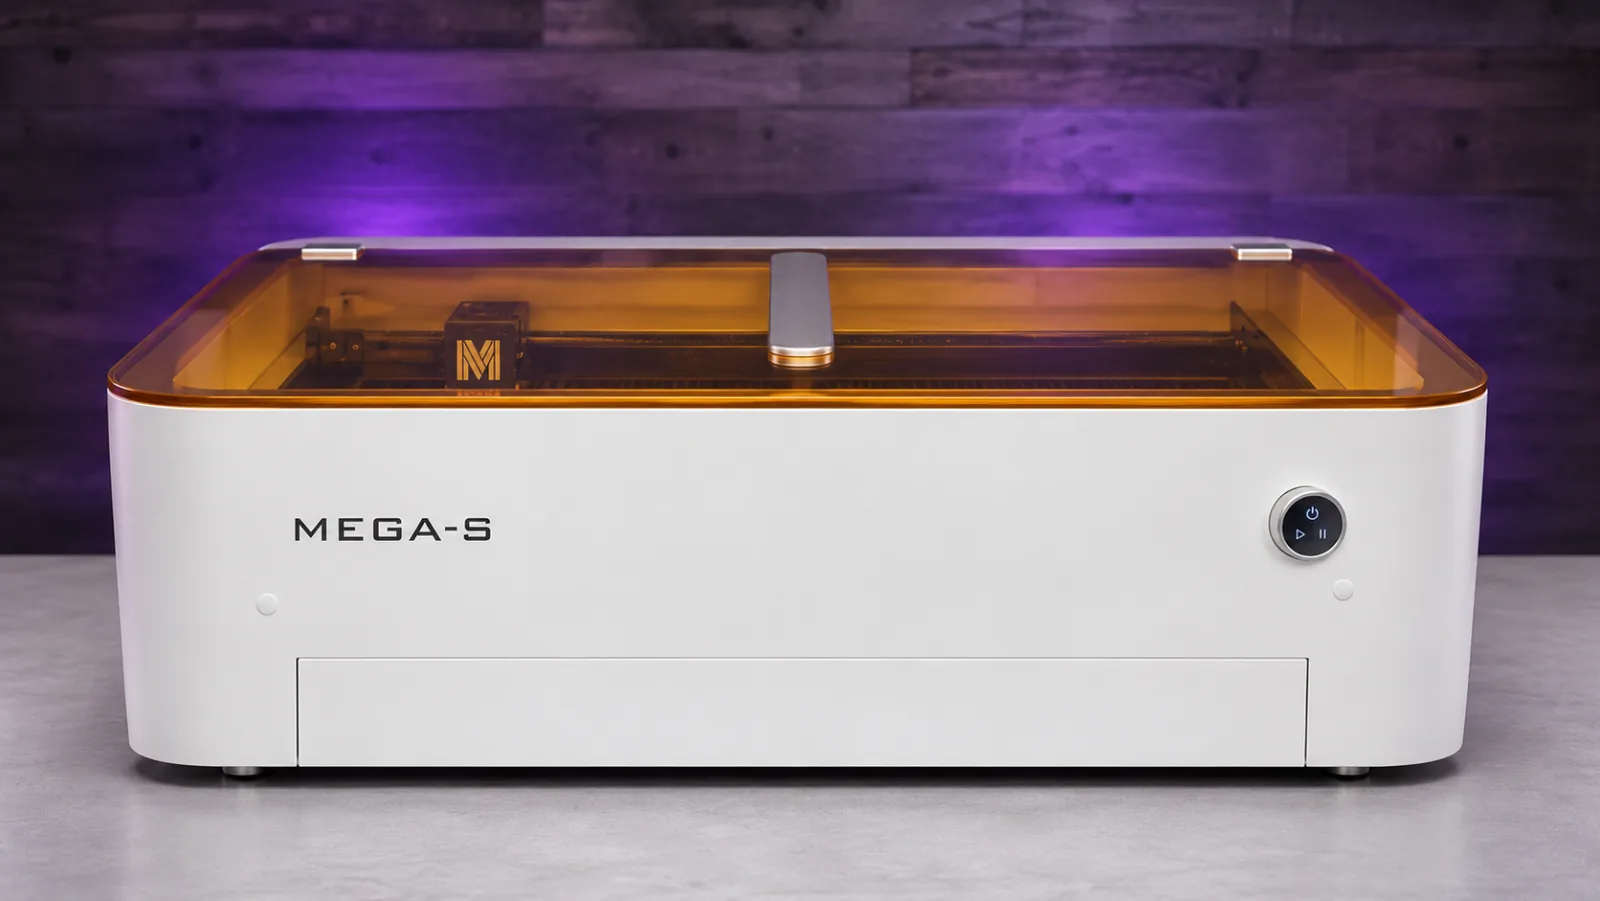
The Monport MEGAS (full name: Monport 70W Desktop CO2 Laser Engraver & Cutter, and you'll also see it written as “Mega S”) is a large enclosed desktop CO2 laser. It uses a 70W glass laser tube, and the cooling tank and pump are built in.
| Spec | Monport MEGAS |
|---|---|
| Laser | 70W CO2 glass tube |
| Work area | 27.56″ x 13.78″ |
| Bed size | 30.71″ x 17.32″ |
| Machine size | 44.09″ W x 26.38″ D x 12.99″ H |
| Camera | Built-in 8MP |
| Focus | Auto-measure thickness sensor |
| Cooling | Built-in water tank and pump |
| Air assist | Built-in, external pump connection |
| Software | M-Design Hub (included), LightBurn supported |
| Listed max engraving speed | 600 mm/s, with Monport noting best results at 300 mm/s or less |
| Listed cutting capacity | 20mm acrylic, 18mm basswood |
| Warranty | 2 years on the machine, 6 months on the tube |
| Price | $2,825 at the time of writing |
Those last few rows come from Monport. What I can tell you from my own testing is what the rest of this post covers. I cut 18mm acrylic, not 20mm, and I have not tried 18mm basswood.


CO2 vs Diode Laser: What Can a CO2 Do That a Diode Can't?
If you're new to the difference, my guide to the best laser engraver for beginners walks through diode, CO2 and fiber machines. Here's the part that made me want a CO2 in the first place.
| Job | Blue diode laser | CO2 laser |
|---|---|---|
| Cut clear acrylic | No, the light passes through | Yes |
| Engrave clear acrylic | Only with paint or a coating | Yes |
| Cut mirrored acrylic | Really struggles | Yes |
| Engrave clear glass | Usually needs a coating | Yes, directly |
| Cut thick material | Limited | 18mm acrylic in one pass, with an external pump |
| Cut wood | Yes | Yes, faster and thicker |
| Engrave faux leather | Yes | Yes |
Yes, you can paint clear acrylic black and engrave it with a diode. But getting an even coat is tricky, you have to wait for it to dry and wash it off after, and you still can't cut the clear shape out. If you've watched my channel, you know how I feel about painting!

To be fair to diode lasers, a strong one can get through some colored acrylic, and I tested that in my guide to cutting acrylic on a diode. Clear is the wall you can't get past, and that's what a CO2 solves.
Unboxing and Setup
This thing is an absolute beast. It showed up in a huge wooden crate, and getting it into the house was a two-person job. We actually had to use a tractor and a dolly.
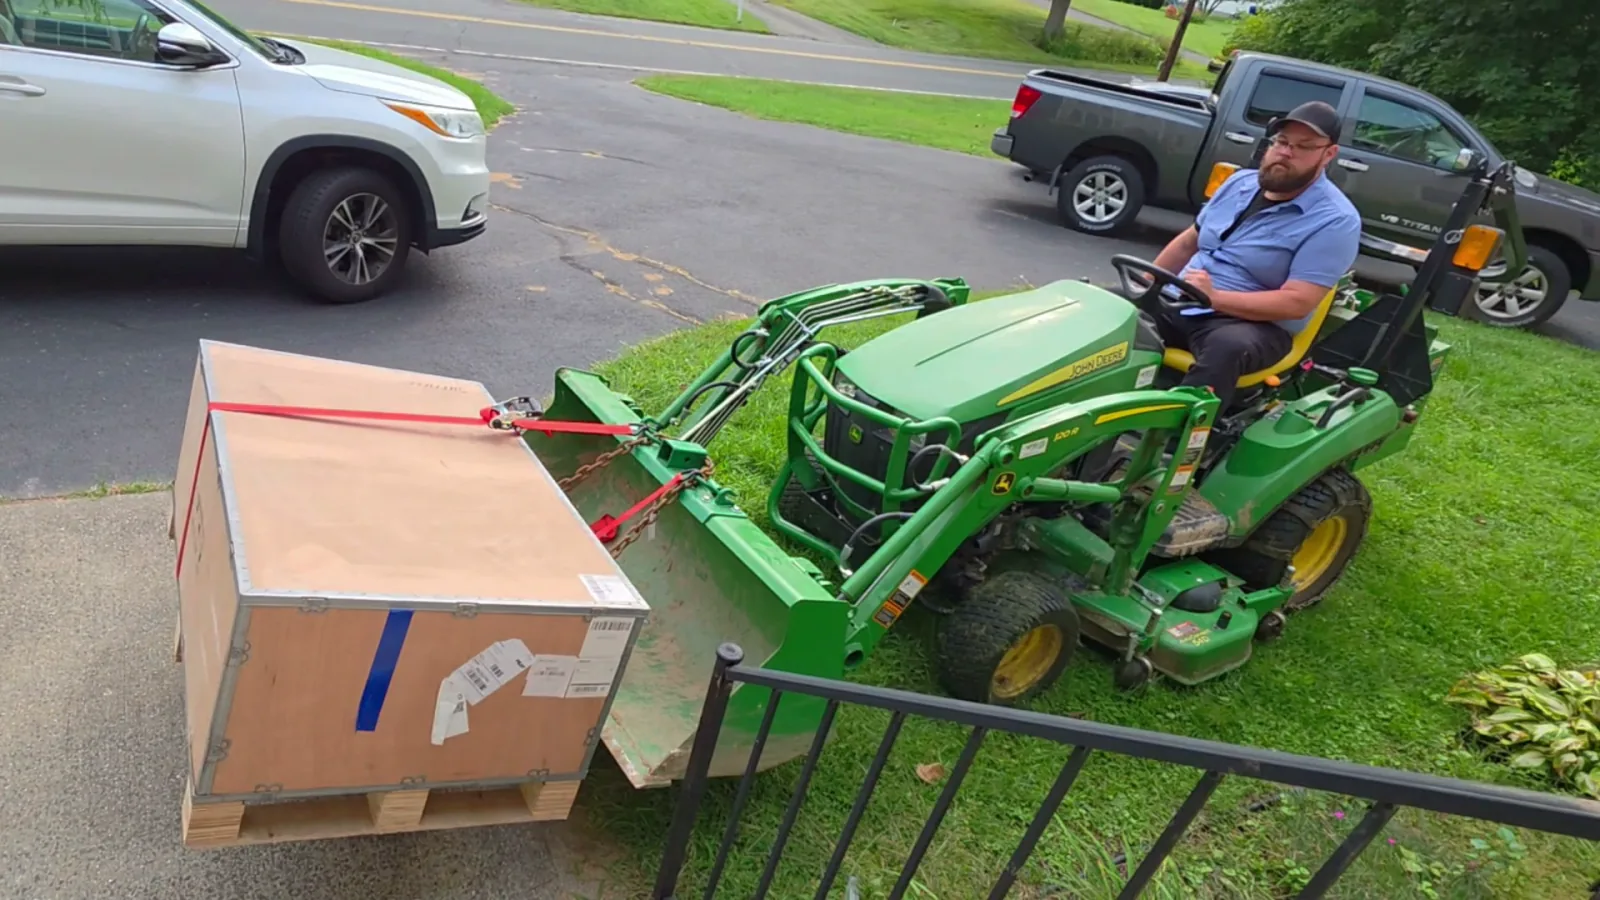
Before you order one, figure out where it's going to live. In exchange for all that size, you get a work area big enough for signs, large cutting boards and bigger sheets of wood and acrylic.

Once it was inside, setup was pretty straightforward because it comes almost fully assembled. The whole thing took about 25 minutes:
- Take out the packing foam and cut the zip tie.
- Remove the shipping brackets.
- Peel the tape off the mirrors.
- Slide in the honeycomb bed.
- Fill the cooling tank, then top it up after the first startup pulls water through the tube.
- Attach the exhaust hose and vent it outside.
- Install M-Design Hub and connect. Wi-Fi didn't find my machine at first, but USB worked right away, and I added Wi-Fi from there.

CO2 laser tubes need water moving through them to stay cool. Some machines have you set up a separate tank and pump, but on the MEGAS both are built in, so there's no bucket sitting on my basement floor. I live in New England and my basement gets cold, so I also added the included antifreeze. Follow the chart in the manual for your own temperatures.
The camera is one of the features I was most looking forward to. Mine looked really dark at first, so here's the fix: go to More, then Exposure, and change it to Auto. It brightened right up.
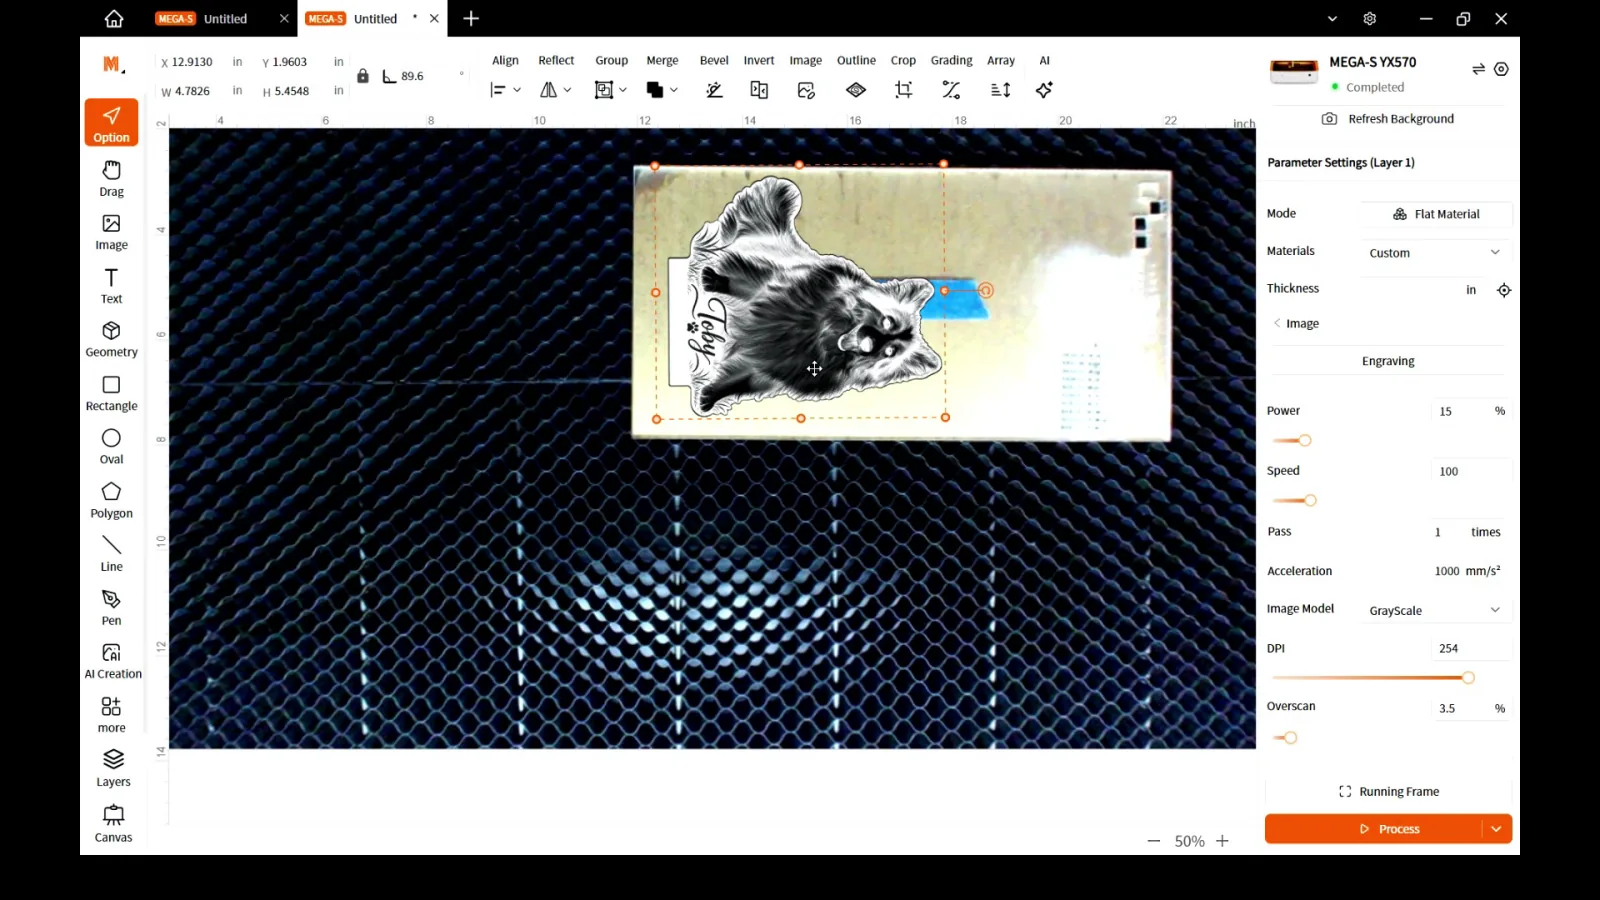
The auto-measure tool reads the thickness of your material so the laser can set its focus. On clear acrylic, you may need a small piece of painter's tape on the surface to help it get a reading. You can also measure with digital calipers and type the number in yourself.
One safety note: clear the bed first. The head lowers before it travels over to your design, so a clamp or a hold-down pin in its path can get hit.
Ventilation: Budget for a Booster Fan
Cutting acrylic stinks. It smells like burning plastic, because that's pretty much what it is.
The built-in exhaust fans push the fumes out through the hose, but the smell was still strong in my house even with it vented outside. Adding an inline booster fan definitely made a difference. If you're planning on a CO2 laser, include that in your budget, and make sure you have a safe way to get fumes outdoors.
Exhaust and air assist are two different jobs, by the way. Exhaust pulls fumes out of the machine. Air assist blows air right at the cut.
And please, never laser PVC, which includes most craft vinyl. My post on which vinyl is laser safe explains why.
Real Projects I Made With It
I skipped the projects I can already make on my diode lasers. Each of these was picked to test something specific.
LED Photo Nightlight on Clear Acrylic
A friend of mine recently lost her dog, Toby, and I wanted to make something for her daughter's room. I've seen LED acrylic signs like this all over Etsy, but I've never been able to make one completely from scratch.

I started with a plain sheet of 3mm clear cast acrylic, engraved Toby's picture at 20% power and 350 mm/s, then cut around the outline of his body at 80% power and 12 mm/s. I added a small tab at the bottom so it would drop into an LED light base. Most of my materials came from Johnson Plastics Plus, and code KERRICRAFTSIT gets you 10% off list price.

Your photo matters a lot on this project. Start with something clear and sharp with good light, remove the background, and bump up the contrast. If you're not comfortable editing photos, upload yours to ChatGPT and try this prompt:
Prepare this photo for laser engraving on clear cast acrylic. Remove the distracting background and convert the image to grayscale. Adjust the brightness and contrast to bring out fine details, especially in the face and fur. Keep the subject's original appearance, facial features, proportions, and pose exactly the same. Do not add or change any details. Use a clean white background.
Always compare the result to your original, because AI can change small details. That really matters on something sentimental like this.

My first one came out with Toby's body two different colors, split right down the middle. The original photo looks nothing like that. I engraved the same picture with the same settings on a new piece of acrylic and it looked great, so I think something was off with that first sheet. It's one more reason to keep a spare.


One more tip: measure the slot on your LED base before you cut. They aren't all the same. I tried a wooden base too, and it sat so low that part of Toby's picture disappeared inside it. The wooden one also only lit up white, so the color-changing black base won easily.
Custom Acrylic Blanks for UV Printing
While the acrylic was out, I cut a few pieces for an upcoming project on my eufyMake E1 UV printer: black cast acrylic for a friend's arcade sign, 3″ clear circles for Christmas ornaments, and an 8″ round for a memorial suncatcher.

This surprised me the most. I stopped needing to buy pre-cut blanks, because I could just cut the acrylic I already had into whatever shape I wanted. Pairing a laser cutter with a UV printer opens up a lot of custom products, and if you plan to sell them, test your blanks before selling.
Cutting 18mm Clear Acrylic
Monport advertises cutting thick acrylic in a single pass, so I had to see what it would really take. I tried 18mm clear cast acrylic, which is almost 3/4 of an inch thick.


With no air assist running, it took 4 passes to get through. The MEGAS has built-in air assist, but I found it pretty weak. Monport also sent me an external air pump, so I connected that and ran 95% power at 1 mm/s. It went all the way through in one pass.


Two honest caveats. I never ran a controlled cut with only the built-in air assist, so I can't tell you how many passes that would take. And this was with a pump Monport sent me, so check whether one comes in the package you're buying, because packages and promotions can change.
On thin 3mm acrylic, we tried the external pump and saw no difference from the built-in air assist. For thin material, built-in is plenty.
Curious about the machine behind all of these? Here's where to see the current price and what's included.
Layered Family Name Sign
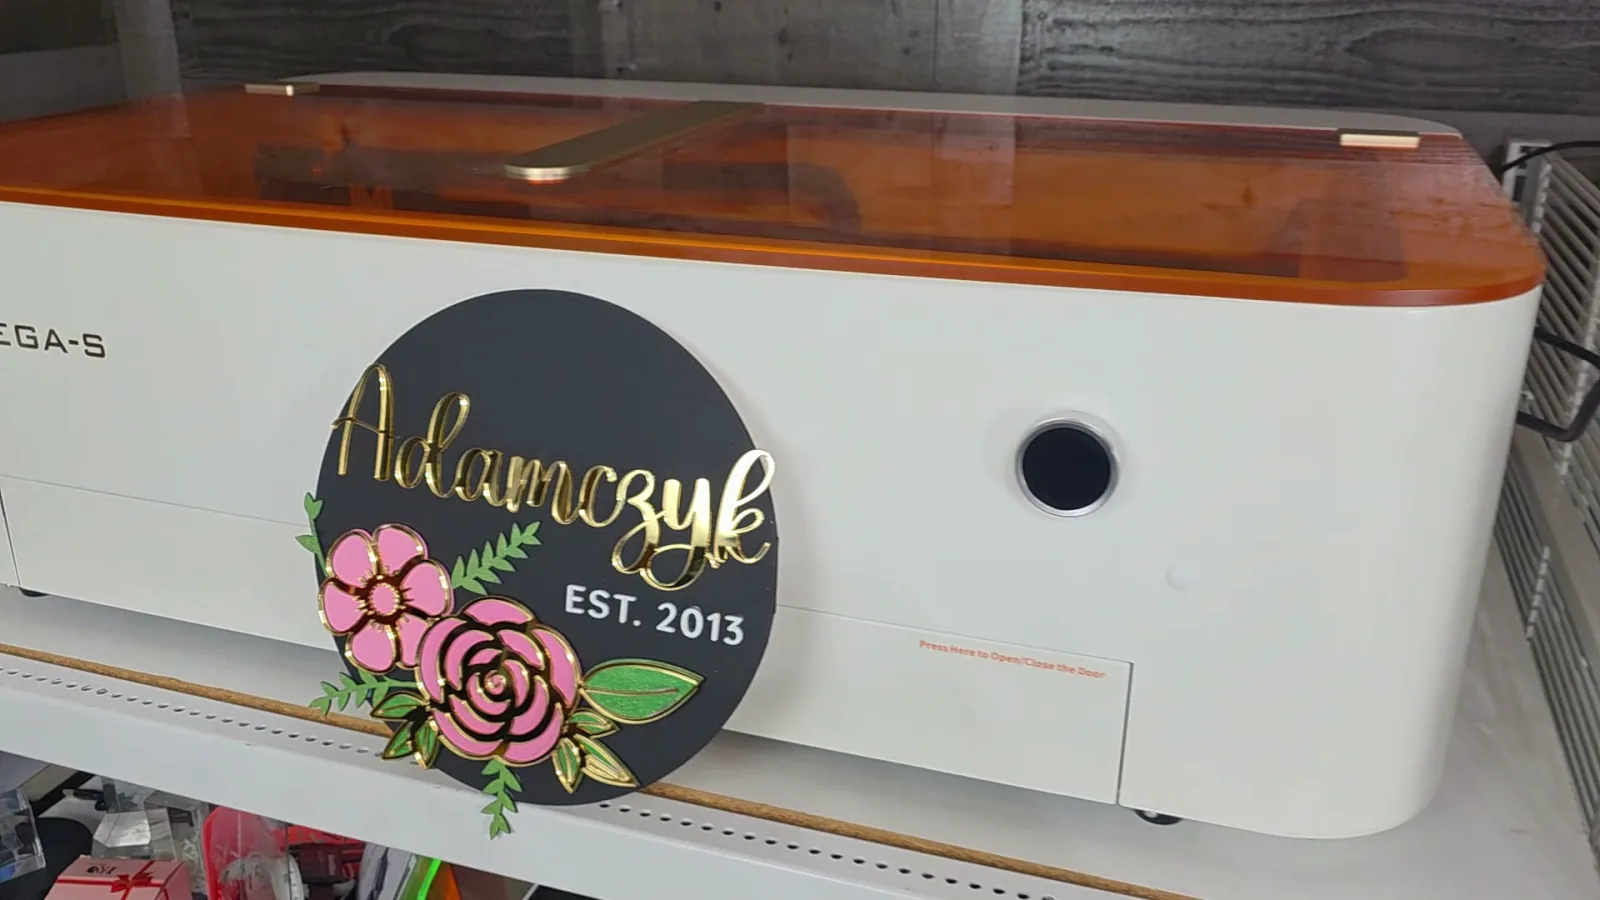
For this one I wanted to test wood, gold mirrored acrylic, white acrylic and tiny details all in one project: a layered sign with our family name and EST. 2013, the year my husband and I got married.

This is where things went sideways. My 1/4″ maple LaserWood sheet was only about 11 3/4″ wide, so an 11.5″ circle left almost no room for error. The placement came out off, and the circle ended up cutting right to the edge of the board.

It also didn't cut all the way through at 80% power and 10 mm/s, even though those same settings had worked on smaller test circles. Normally I'd run a second pass, but I had already picked the board up, and there was no way to get it back in the exact same spot. My husband finished the cut with a pocket knife, and we saved it.

The lesson: don't move your material until you've checked that the cut went all the way through.
The rest went beautifully. The flowers came out of 3mm basswood with all their small details and tight curves intact.

Then came what I'd been waiting for. I cut the lettering from gold mirrored acrylic at 80% power and 12 mm/s, and the EST. 2013 from white acrylic. No paint, no workarounds, and a real mirrored finish.


I paid a little extra for 3M adhesive backing on the mirrored acrylic. It's so much easier than glue, but it's insanely sticky, so once a piece is down, you're committed. I also forgot to score guide lines for my pieces, so assembly was the hardest part. Learn from me and score your placement marks first.
I ended up painting the maple black. My husband says that's a crime, so please don't hate me.


A Laser-Cut Wooden Castle
My son had a castle project for school. The teacher offered options like paper or cardboard, but of course we broke out the laser.
We found a castle template on Creative Fabrica, used a few sheets of 3mm basswood, and let the Monport engrave a stone pattern on the walls before cutting out every piece. He glued it together and painted it himself, and it kept him busy for hours.


Engraving Glass Christmas Ornaments
A CO2 laser creates a frosted look directly on glass with no coating, so I tried some 3.5″ glass circle ornaments. Glass definitely took some experimenting.
My first design was a Christmas tree with thin script lettering. It came out fuzzy and hard to read, it didn't engrave all the way across the middle, and it needed multiple passes. I started at 20% power and 300 mm/s, and slowing down to around 125 mm/s helped bring out more detail.

I also tried a wedding portrait. Here's what I learned: when a CO2 laser hits glass, it makes tiny fractures in the surface. That's what gives you the frosted look, and it's also why fine details turn fuzzy.

So the design was part of the problem. I switched to a bolder monogram, and what a difference! The lettering is easy to read and the frosted look against the clear glass is gorgeous. Start with bold fonts and simple designs on glass, and test before you run a batch, because different glass engraves differently.


Faux Leather Bottle Openers
These faux leather bottle openers are only about $3 each, and I made one as a gift for my friend who's opening an arcade.
I started at 20% power and 200 mm/s, and it was too aggressive. The engraving came out really deep. For the other side I kept 20% power and raised the speed to 350 mm/s, and it looked much cleaner in just 2 minutes and 31 seconds.


A diode laser can do this one too, but it shows the range of the machine. The built-in camera made lining up such a small piece easy, too. If you're curious how fake leather compares with the real thing, I tested genuine vs fake leather too.
Monport MEGAS Settings That Worked for Me
These are what worked on my materials on my machine, so treat them as a starting point and run your own tests.
| Material | Job | Power | Speed | Notes |
|---|---|---|---|---|
| 3mm clear cast acrylic | Photo engrave | 20% | 350 mm/s | Clean result |
| 3mm clear cast acrylic | Cut | 80% | 12 mm/s | Clean edges |
| 3mm gold mirrored acrylic | Cut | 80% | 12 mm/s | Same as clear |
| 18mm clear cast acrylic | Cut | 95% | 1 mm/s | One pass, external air pump |
| 1/4″ maple LaserWood | Cut | 80% | 10 mm/s | Small circles cut in one pass, an 11.5″ circle did not |
| 3mm basswood | Cut | 80% | 20 mm/s | 50% at 30 mm/s didn't always cut through |
| 3mm basswood | Engrave | 20% | 500 mm/s | Nice results |
| Glass ornament | Engrave | 20% | 300 mm/s | Slow to 125 mm/s for detail |
| Faux leather | Engrave | 20% | 350 mm/s | 200 mm/s was too deep |
Two things that helped. If your cuts aren't going all the way through early on, run the auto focus calibration in the software, because that fixed ours. And M-Design Hub has a material test grid under More, then Material Settings Test, which builds a grid of power and speed combinations for you. It makes up for a lot of the thin preset library.
What I Love and What Could Be Better
What I love:
- The large work area
- Built-in cooling, with no bucket on the floor
- Clean cuts on everything from thin acrylic to that 18mm sheet
- Cutting clear, white and mirrored acrylic without workarounds
- The built-in camera for lining up designs on your material
- M-Design Hub is beginner-friendly
What could be better:
- The built-in air assist felt pretty weak on thick acrylic.
- The built-in exhaust wasn't enough on its own for acrylic in my house.
- The material library is thin. A better one would have saved me a lot of trial and error.
- Camera accuracy varies. Placement was perfect some days and off on others, so leave some margin on tight layouts.
- The size. You need a real plan for where it goes and how it gets there.
What I haven't tested yet: I haven't used LightBurn on this machine, I haven't tried the batch-fill feature that's supposed to recognize multiple objects, and I can't tell you how it holds up after months or years. These are first impressions after several weeks of use.
If you're on a Mac, check Monport's software page before buying. It lists compatibility for certain macOS versions and recommends Windows for the initial network setup. I use Windows, so I can't speak to it from experience.
Who Should Buy This and Who Shouldn't
The MEGAS makes sense if you:
- Want to cut clear, white or mirrored acrylic
- Want to make your own blanks in any shape
- Want to engrave glass without coating it
- Sell acrylic products, or pair a laser with a UV printer
- Have the space and can vent outdoors
You should probably skip it if you:
- Mostly engrave wood, slate and leather, which a diode laser handles well
- Don't have a way to vent fumes outside
- Want a machine you can move around or put away
Monport MEGAS vs the Alternatives
A blue diode laser costs far less and takes up much less room. If you don't need clear acrylic or uncoated glass, it's still what I'd tell most crafters to start with. My WeCreat vs xTool comparison is a good place to compare those.
A budget CO2 laser gets you the same kind of cutting for a lot less money, but you give up a lot of convenience. When I tested a $384 Vevor 40W, it got the job done but had no camera, no air assist, no rotary and basic software.
 10:15
See the budget CO2 test
Can a $384 CO2 Laser ACTUALLY Cut Clear Acrylic? (Vevor 40W Review)
The xTool P2S is the closest competitor on paper, with 55W and a 600 x 305mm bed compared to 70W and 700 x 350mm on the MEGAS. I haven't tested the P2S, so I can only compare the listed specs.
FAQ
Can a diode laser cut clear acrylic?
No. Blue diode light passes right through clear acrylic, so even a powerful diode can't cut it. You can paint the surface to engrave it, but you still can't cut out a clear shape.
Is a CO2 laser worth it for crafters?
It depends on what you want to make. If you want clear, white or mirrored acrylic, custom blanks, or glass engraving with no prep, it opens up a lot. If you mainly engrave wood and leather, a diode laser costs much less and does the job.
Is the Monport MEGAS good for beginners?
The software is beginner-friendly and setup took me about 25 minutes. The harder parts are the size, the ventilation, and learning settings with a thin material library, so expect to do some test cuts.
How thick can the Monport MEGAS cut?
Monport lists 20mm acrylic and 18mm basswood. I cut 18mm clear cast acrylic in one pass at 95% power and 1 mm/s with an external air pump. Without air assist, the same sheet took 4 passes.
Do I need an external air pump for the Monport MEGAS?
Not for thin material. On 3mm acrylic we saw no difference from the built-in air assist. For really thick acrylic, the external pump is what got me a single pass.
Does the Monport MEGAS work with LightBurn?
Monport says it does, and M-Design Hub is included with the machine. I've only used M-Design Hub so far, so I can't speak to LightBurn on this machine yet.
Does a CO2 laser need to be vented outside?
Yes. Cutting acrylic creates strong fumes. Even with the built-in fans and an outdoor vent, I needed an inline booster fan to keep the smell down.
Why is my laser engraving on glass fuzzy?
A CO2 laser makes tiny fractures in the glass surface, which can blur fine details. Bolder fonts and simpler designs read much better, and slowing down from 300 mm/s to around 125 mm/s helped my small details.
Final Verdict: Is This Monport Laser Worth It?
I'm really happy to finally have a CO2 laser in my workshop. The MEGAS has opened up projects I just couldn't make on my blue diode lasers, and I keep reaching for it now that I can cut my own blanks for UV printing.
It isn't perfect. You'll want a booster fan, and thick acrylic needs more air than the built-in system gives you. But all of my basswood and acrylic projects came out amazing, and most of my hiccups were me still learning the settings.
If you're ready to take the leap, here's where to get the Monport MEGAS 70W Desktop CO2 Laser Engraver & Cutter.
What I Used
Most of my materials came from Johnson Plastics Plus. Use code KERRICRAFTSIT for 10% off list price.
- Clear cast acrylic
- LaserBits mirrored gold acrylic
- Black solid cast acrylic
- Unfinished maple LaserWood (I used the 1/4″ thickness)
- 3.5″ glass circle ornaments
- Faux leather bottle openers
- LED nightlight bases with clear acrylic blanks
What would you like to see me make next with the Monport? Tell me in the comments on the video, and if you make any of these, I'd love to see them!
#Monport #MonportMEGAS #CO2Laser #LaserEngraver #LaserCutter