I used to think you needed an expensive laser engraver to etch glassware. You don't. You can do it with the Cricut you already own, a bottle of etching cream, and a scrap of vinyl.
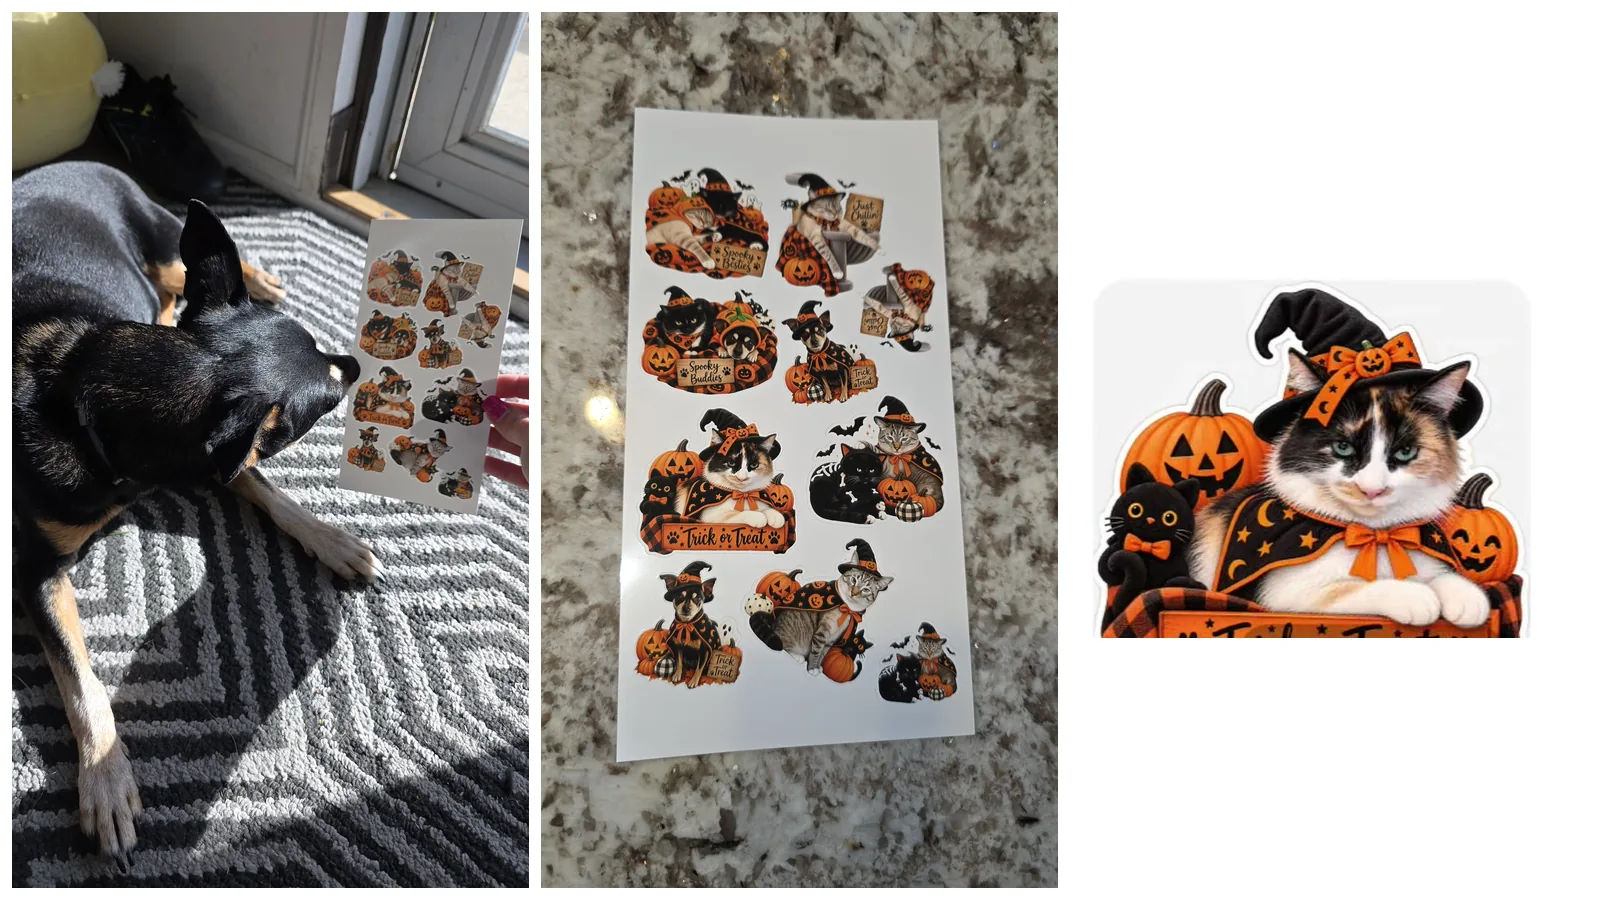
Here's the part that sold me. Permanent vinyl isn't really permanent. Put a vinyl decal through the dishwasher a few times and it starts peeling like this, and it isn't microwave safe either. I hate hand washing dishes. I want my glassware to be dishwasher safe.
Etching is genuinely permanent. The design is in the glass, not stuck on top of it.
The technique is simple: you cut the same cute vinyl decal you'd normally use, but instead of sticking it on as the design, you use it as a stencil.
This post contains affiliate links. If you buy through them, I may earn a small commission at no extra cost to you.
Watch the full process:
 13:44
13:44
See this step
How to Etch Glass with a Cricut | Easy DIY Glass Etching Tutorial Using Armor Etch
Read This Before You Start
Etching cream is acidic and genuinely caustic. The active ingredient is ammonium bifluoride, and if it can eat away glass, it can eat away skin. This is the one part of the project I would not improvise on.
- Wear safety gloves and safety glasses. Put them on before you start, not at the rinse stage like I did.
- Wear a respirator or face mask as well, and work somewhere well ventilated. The fumes are the part people forget about.
- Work near a sink so you can rinse quickly.
- Cover your work surface with newspaper or a drop cloth. Stray drips will etch whatever they land on.
- It's only for glass. It will not work on metal (there's a different method for that, further down).
Keep Etching Off Food Surfaces
This matters more than most tutorials let on. Etching cream is not food safe. Even after a thorough wash, traces can linger, and etched glass is slightly porous, so it holds onto residue and bacteria in a way smooth glass does not. Acidic food and heat can draw chemicals back out of it.
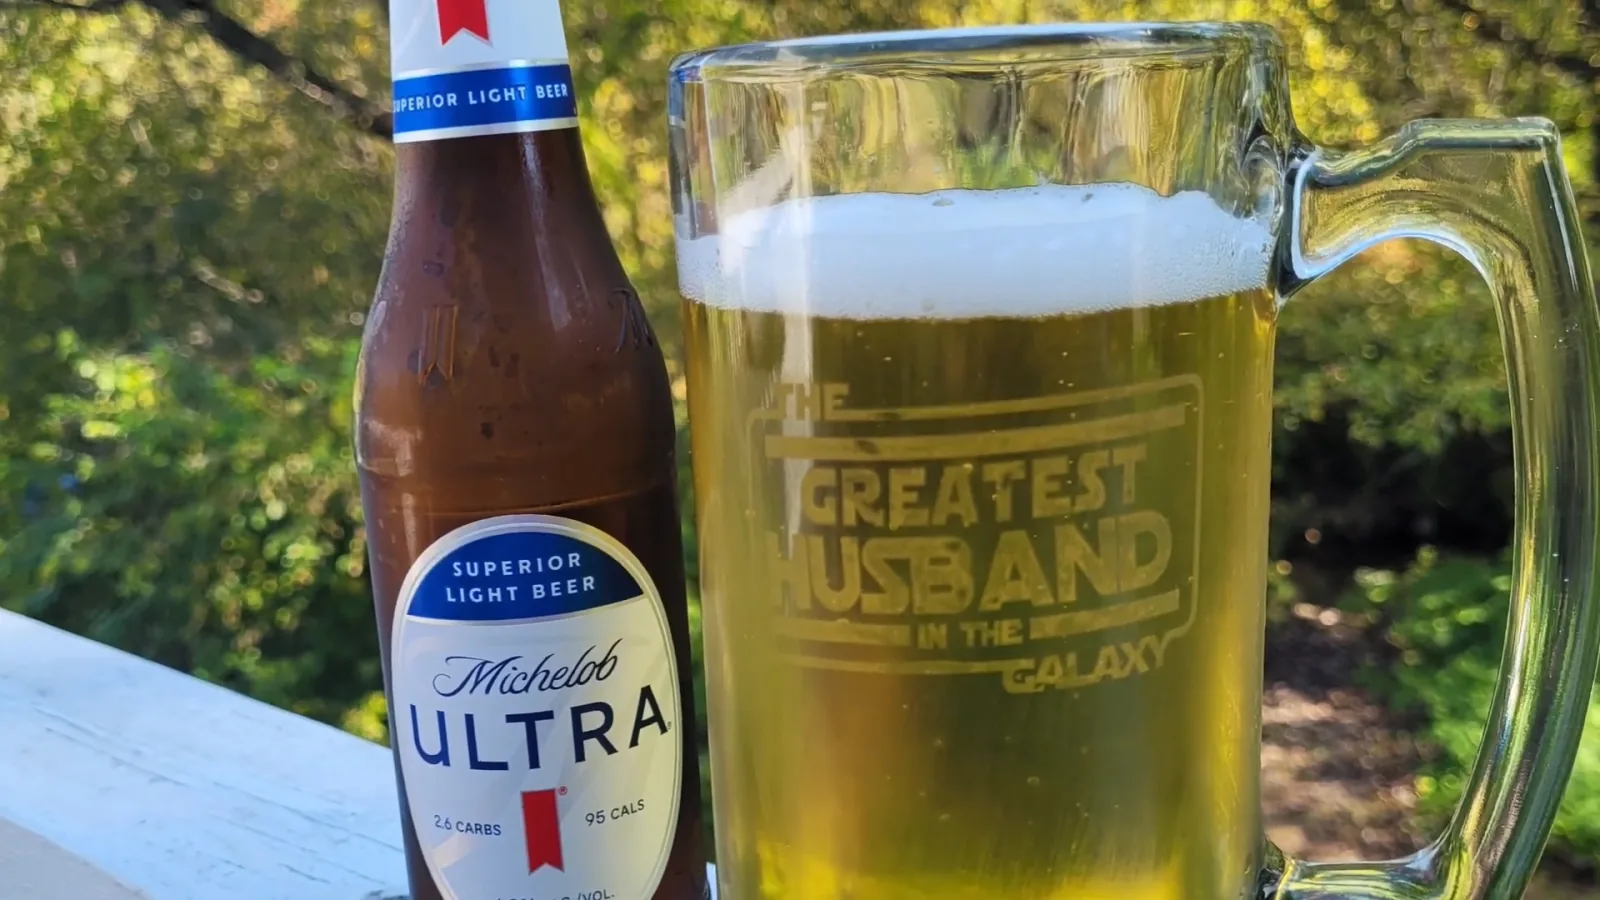
So the rule is simple: etch the outside only, and never anywhere food or drink actually touches. The mug in this tutorial is etched on the outer wall, so the beer never meets the etched surface. That is fine.
What is not fine is etching the inside of a bowl, a plate, or a casserole dish. If you want a design on a dish like that, mirror it and etch the underside so it shows through the glass without ever contacting the food.
Quick Links
- What You'll Need
- Step 1: Set Up Your Design
- Step 2: Size It to Your Glass
- Step 3: Cut the Vinyl
- Step 4: Reverse Weed the Stencil
- Step 5: Clean the Glass
- Step 6: Apply the Stencil
- Step 7: Brush On the Etching Cream
- Step 8: Rinse and Peel
- The Mistake That Makes Etching Look Spotty
- Frequently Asked Questions
What You'll Need
- Any Cricut machine. Joy, Explore, Maker, it does not matter. You're only cutting vinyl.
- Armour Etch etching cream. One bottle goes a very long way. Let it come up to room temperature before you use it, and if it looks crystallized, stand the sealed bottle in warm water for 15 to 20 minutes and shake it well.
- Adhesive vinyl. Oracal 651 is what I use. Scraps are perfect for this, since stencils are small.
- Transfer tape
- A small paintbrush
- Safety gloves and safety glasses
- Isopropyl alcohol and a lint-free wipe
- Weeding tools and a scraper for peeling the stencil off afterward
- Glassware. A mug, wine glass, pint glass, mason jar, anything smooth.
New to cutting vinyl at all? Start with my guide to making vinyl decals with a Cricut, then come back.
Prefer to watch before you start? Here is the whole etching process in under a minute:
 0:37
0:37
See this step
CRICUT TIKTOKS - HOW TO ETCH GLASS WITH ANY CRICUT MACHINE! ARMOUR ETCH HACK
Step 1: Set Up Your Design
Any design works, but simpler is better. Thin, delicate lines are harder to weed and more likely to lift.
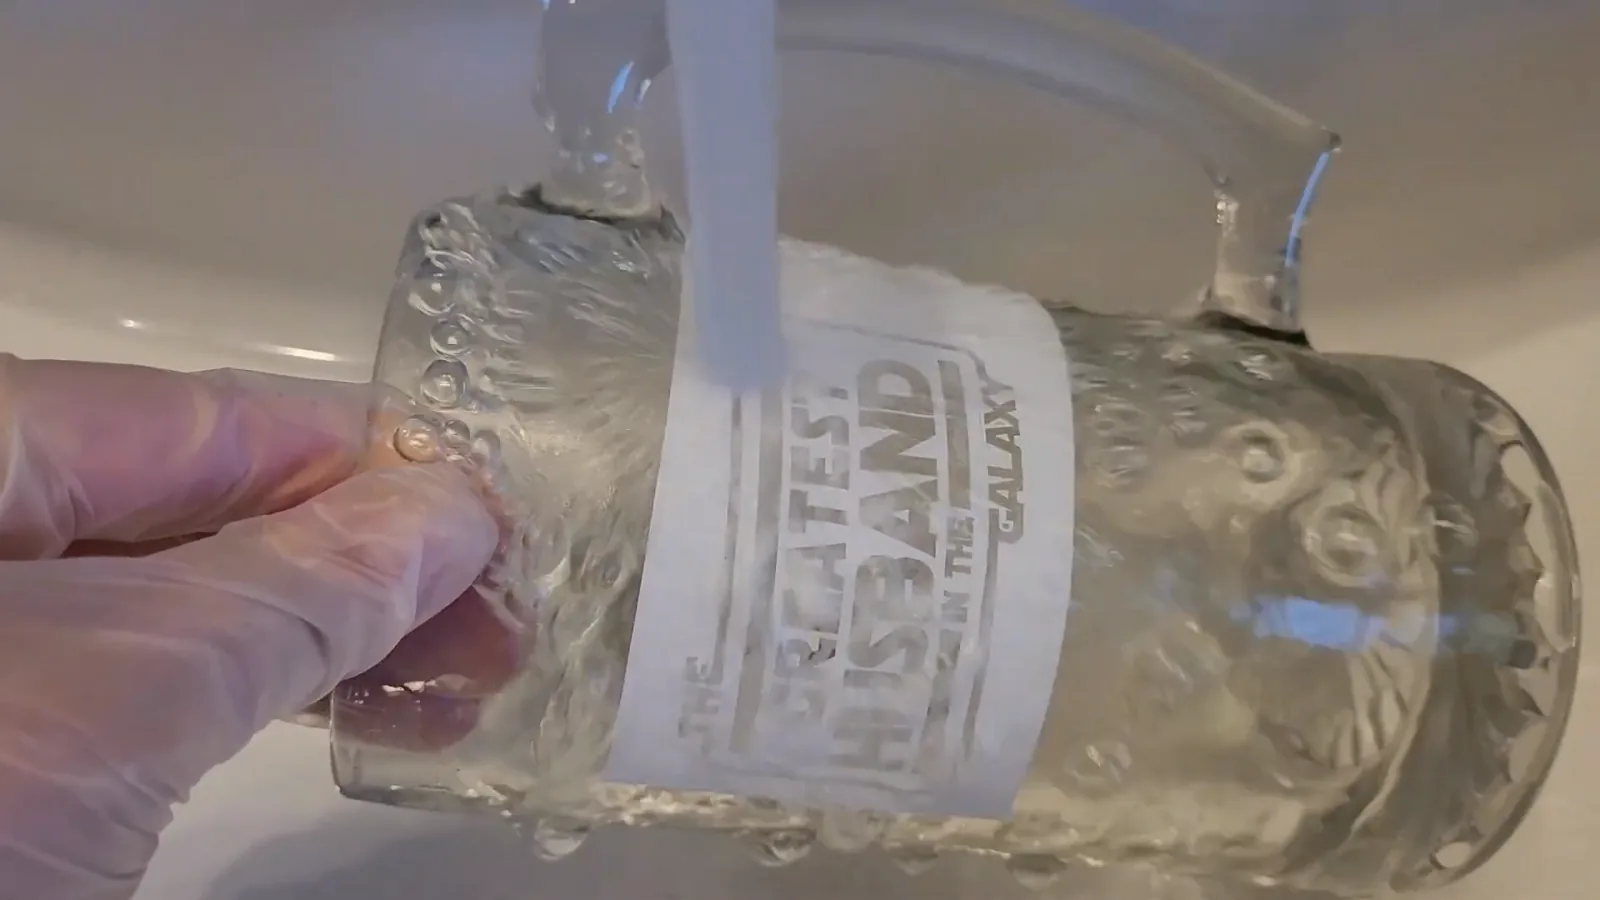
I made this beer mug as an anniversary gift for my husband. He's a huge Star Wars fan, so it reads “greatest husband in the Galaxy” in a font called Death Star.
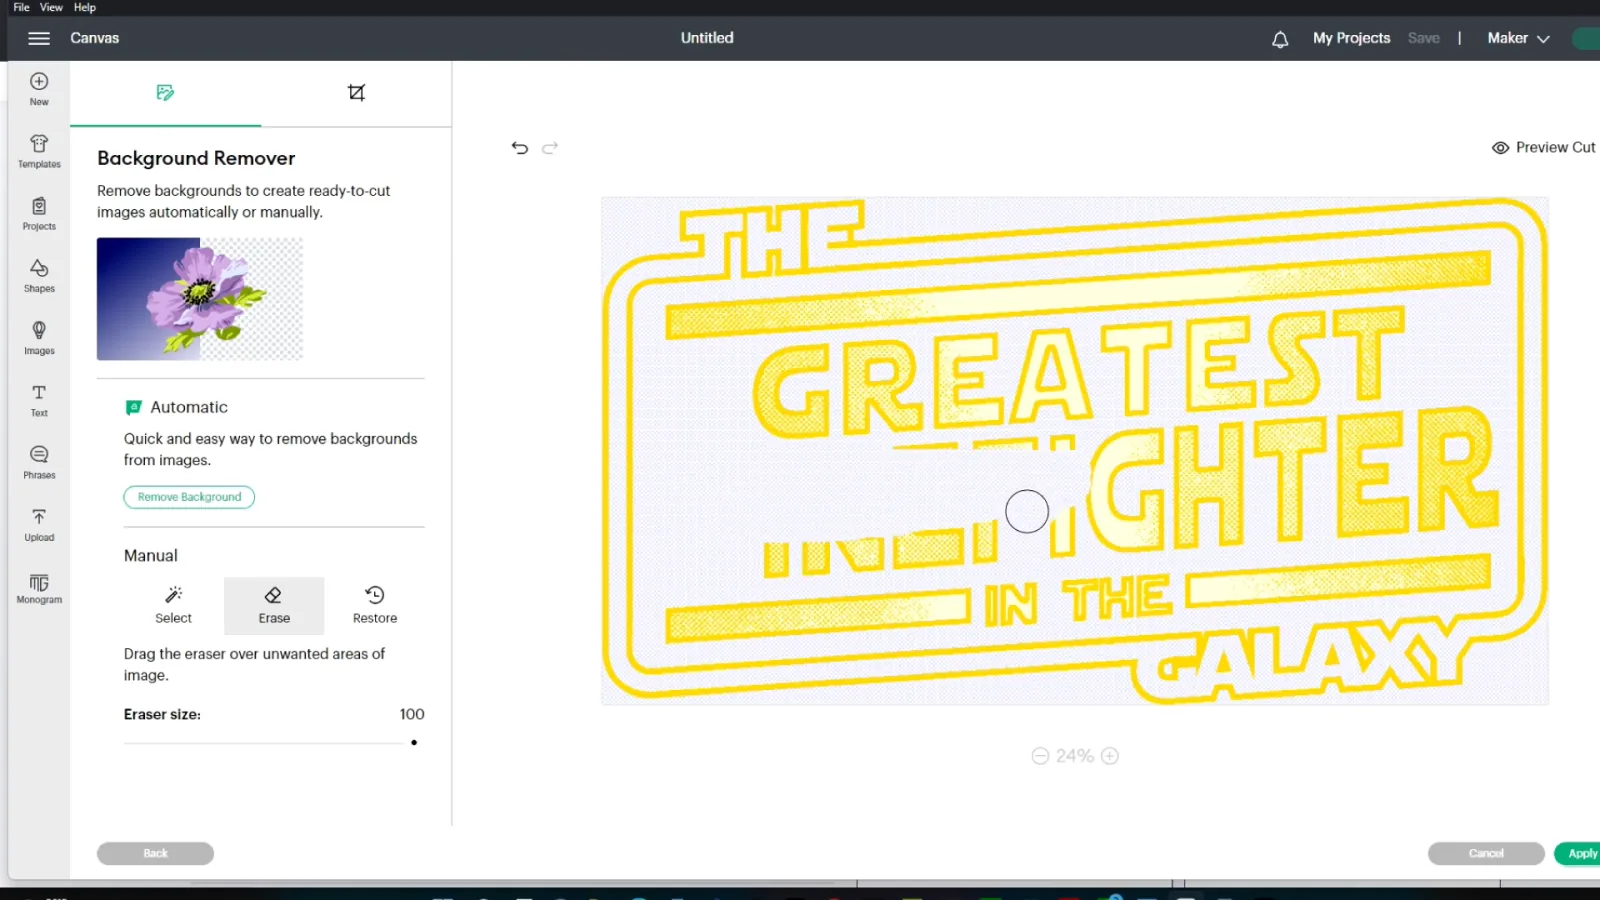
The original file I found said “greatest firefighter in the Galaxy” and my husband isn't a firefighter. So I uploaded it to Cricut Design Space, used the eraser tool to remove the word firefighter, and typed “husband” in its place.
To do that yourself: click Upload, select your image, choose Simple, then use the eraser. Scale the eraser as large as it will go so you can work quickly, and if you erase something you didn't mean to, hit the back arrow and try again.
When your text is in place, select the whole design and Weld it so it becomes one piece.
Step 2: Size It to Your Glass
Measure your glass and size the design in Design Space before you cut. Curved glassware is unforgiving, and a stencil that's too big will not sit flat.
For my beer mug I wanted the design under 3 inches square. I ended up at 2.8 inches wide by 1.7 inches tall.
Step 3: Cut the Vinyl
Load your vinyl onto the mat and click Make It.
Do not mirror the design. This trips people up because they're used to iron-on. You're cutting adhesive vinyl here, not heat transfer vinyl, so it goes on face up and reads the right way round.
Set your material to Vinyl, load the mat, and press the flashing Cricut button.
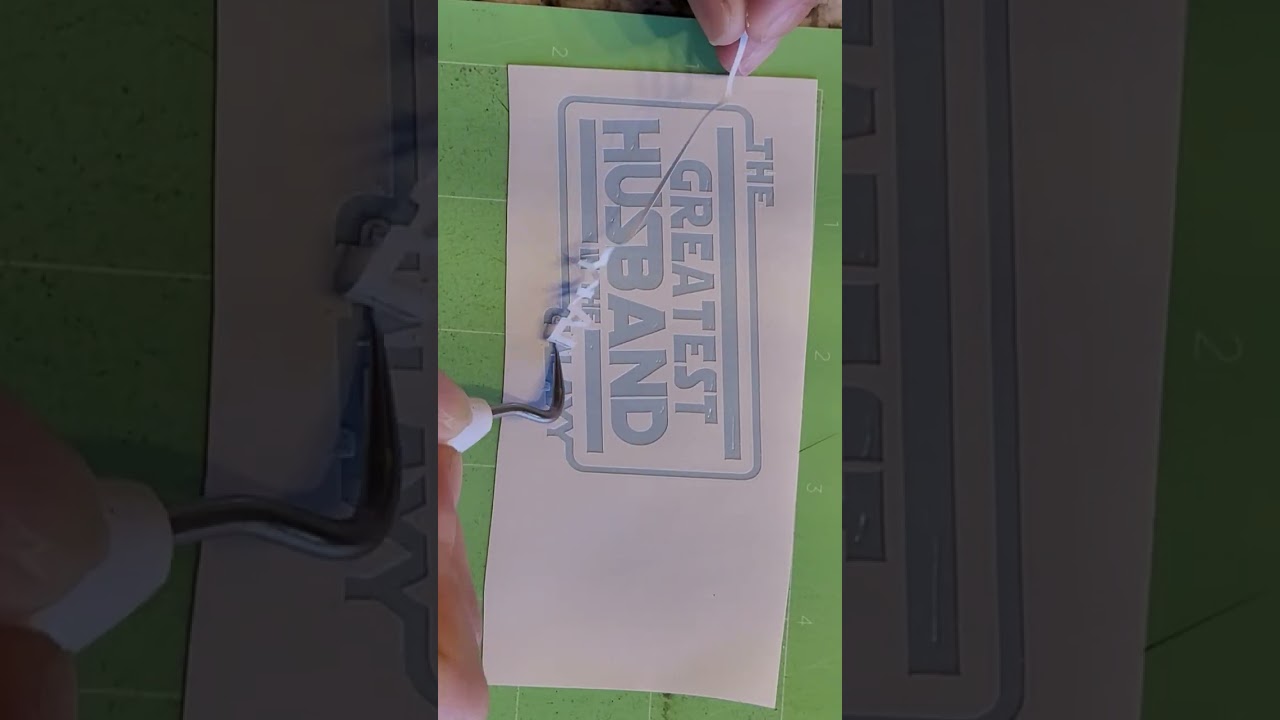
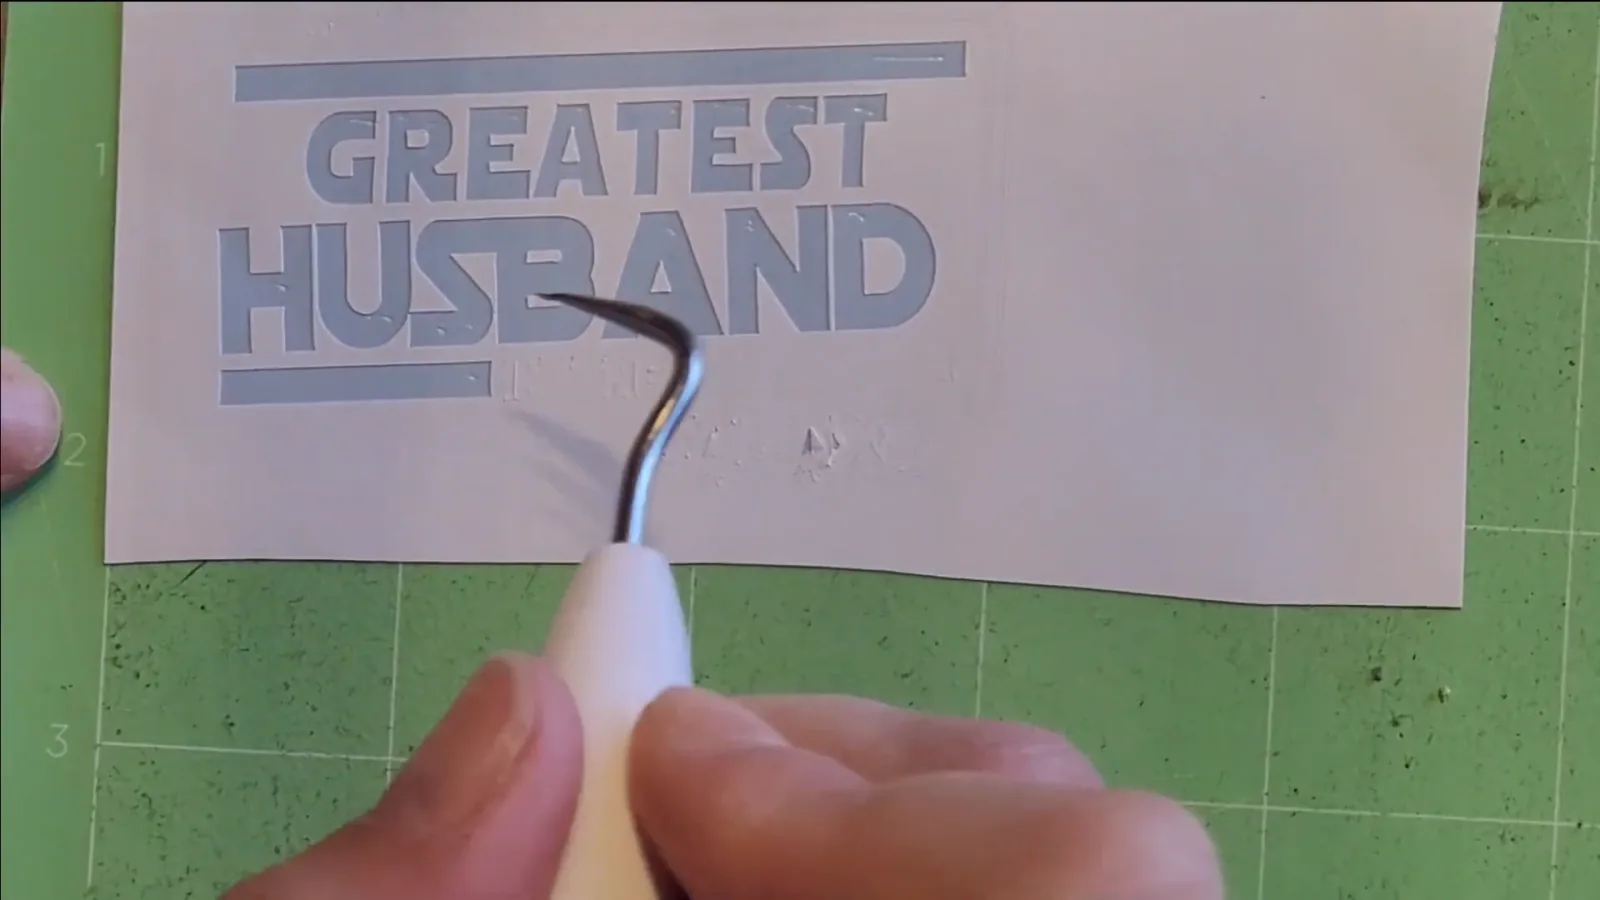
Step 4: Reverse Weed the Stencil
This is the step that's backwards from everything else you've done with vinyl.
Normally you weed away the excess and keep your design. Here you do the opposite. You weed away the design itself and keep the surrounding vinyl.
Think about what you're making: you need holes where the etching cream will touch the glass. The vinyl that stays behind is what protects everything else.
Step 5: Clean the Glass
Wipe the glass down with isopropyl alcohol before the vinyl goes anywhere near it. Any grease or dust and your stencil will lift.
My favorite hack here: use a coffee filter as your lint-free wipe. Most people grab a paper towel, but paper towel just deposits more lint on the glass. A coffee filter leaves none.
Step 6: Apply the Stencil
Cut a piece of transfer tape roughly the size of your stencil and press it over the whole thing. Flip it over and peel the backing away.
Position it on the glass, smooth it down flat, then peel the transfer tape off.
Take your time pressing the edges down, especially around the inside of letters. Any gap is somewhere the cream will creep.
Step 7: Brush On the Etching Cream
Gloves and glasses on first.
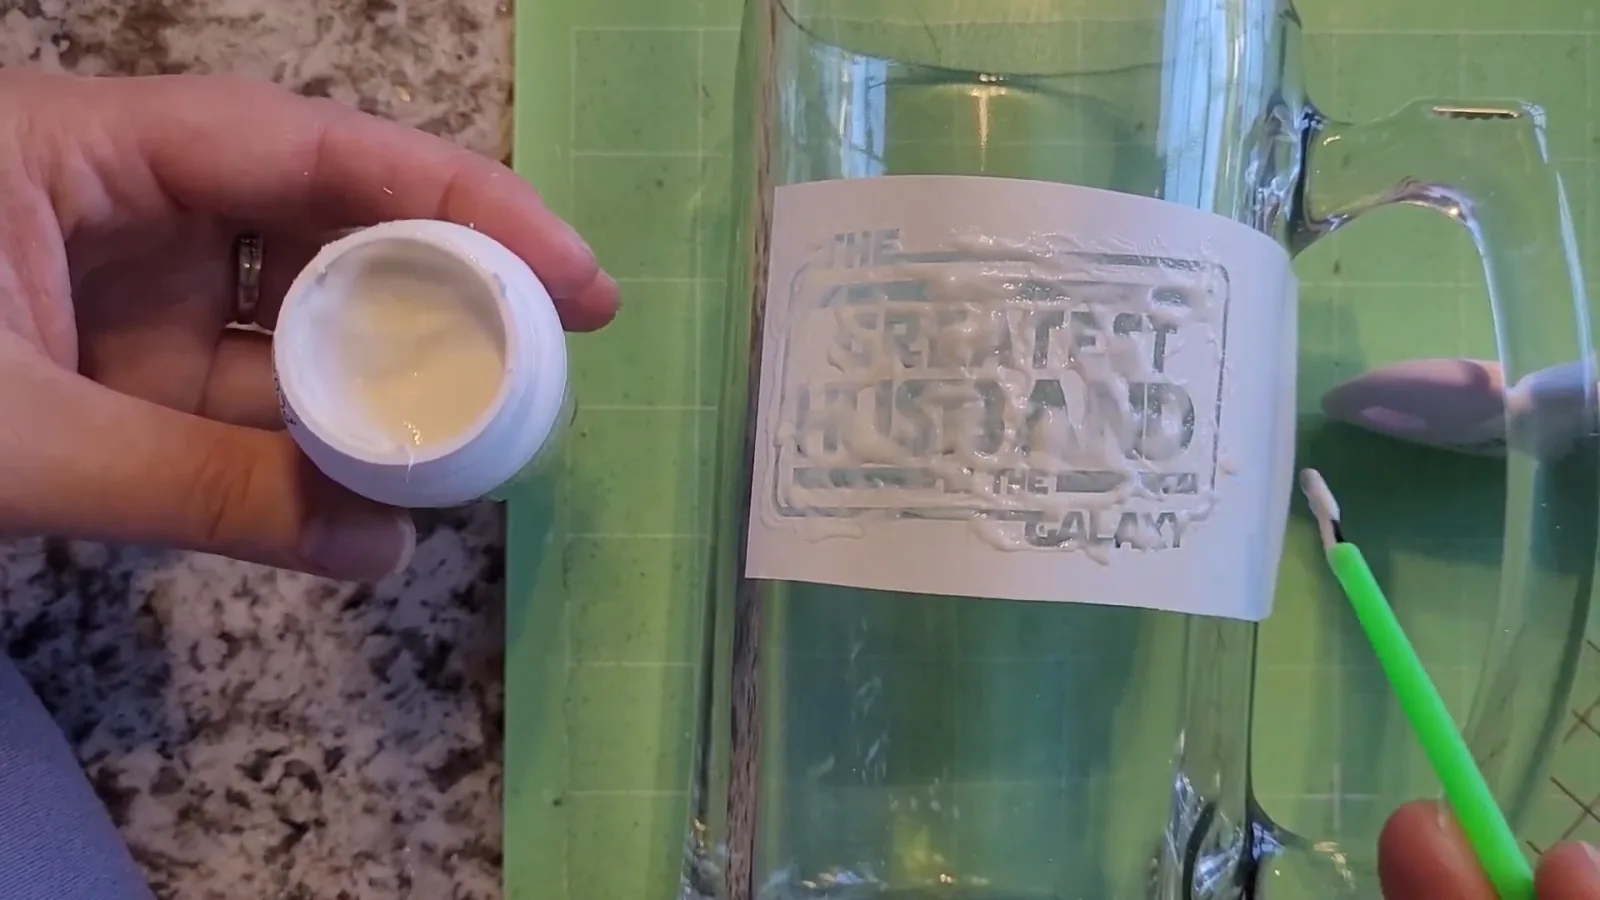
Shake the bottle well, then use a small paintbrush to apply a very generous layer of cream over the exposed design. Don't be shy with it.
Then keep brushing. Back and forth, up and down, and diagonally, for a full three minutes. Not three minutes of sitting there. Three minutes of active brushing. The bottle gives a range of three to five minutes, so if your design is large or detailed, lean toward five.
I'll explain why that matters below, because I got it wrong.
Step 8: Rinse and Peel
After three minutes, take it straight to the sink and rinse under cool running water. You can use the same paintbrush to work off any cream that doesn't rinse away on its own.
Then peel off the vinyl stencil. It's very sticky by this point, so a scraper or a weeding pick helps with the small pieces stuck inside letters.
Give it a final wipe with alcohol and a lint-free wipe to be sure every trace of cream is gone, then wash it properly with soap and water before anyone drinks out of it.
The Mistake That Makes Etching Look Spotty
Look closely at my finished mug and a few patches are lighter than others. Here's exactly why.
I brushed the cream on for about 30 seconds, then let it sit for three minutes. That is not the same thing. The instructions mean three minutes of brushing, keeping the cream moving across the surface the whole time.
Etching cream doesn't work by soaking. It works where it's agitated against the glass. Leave it still and you get an uneven, patchy etch.
So: brush continuously, change direction constantly, and give it the full three minutes. That single change is the difference between a blotchy result and a crisp white one.
Selling These? Include a Care Card
Quick business tip. If you sell etched glassware, include washing instructions with it. It heads off the “it came out cloudy” message later.
Creative Fabrica has care card templates for just about every blank, including wine glasses and tumblers, and they're customizable. You can run them through Print Then Cut to make them quickly. If Print Then Cut is new to you, I have a full walkthrough here.
Frequently Asked Questions
Is etched glass dishwasher safe?
Yes, and that's the whole point. The design is etched into the glass itself, so there's nothing to peel or lift. Vinyl decals aren't dishwasher safe and aren't microwave safe either.
Is etched glass food safe?
Not on any surface that touches food or drink. Etching cream isn't food safe, and etched glass is slightly porous, so it can hold residue. Etch the outside of mugs and glasses only, and if you want a design on a dish, etch the underside so it shows through without touching the food.
Can I etch glass with a Cricut Joy?
Yes. Any Cricut works, because the machine is only cutting the vinyl stencil. The Joy's 4.5 inch cut width is fine for most glassware designs.
Do I need to mirror the design?
No. You're cutting adhesive vinyl, not iron-on, so it goes on face up. Mirroring is only for heat transfer vinyl.
What vinyl should I use for an etching stencil?
Regular permanent adhesive vinyl like Oracal 651 works well and sticks tightly enough to stop cream creeping under the edges. Scraps are ideal since stencils are small.
How long do you leave Armour Etch on glass?
Three minutes, brushing continuously the entire time. Letting it sit still for three minutes is the most common mistake and gives you a patchy finish.
Can I use etching cream on metal?
No. Armour Etch is formulated for glass only, and it will not touch stainless steel or aluminium. Metal uses a completely different method: the same vinyl stencil technique, but you brush on Citristrip instead of etching cream. I walk through that one on YouTube:
 0:23
0:23
See this step
How to Etch Metal with ANY Cricut Machine using a Stencil and Citristrip
Can I reuse the vinyl stencil?
No. It comes off in pieces and the adhesive is spent. Cut a fresh one each time, which is why scrap vinyl is perfect for this.
Is etching cream dangerous?
It's acidic and will burn skin. Wear gloves and eye protection, keep it off your skin, work near a sink, and wash the finished piece thoroughly before drinking from it.
Your Turn
That's the whole process. A scrap of vinyl, a bottle of cream, and you get a permanent, dishwasher safe design that looks like it came off a laser.
Just remember the three minutes of brushing. Everything else is forgiving. That part isn't.
Made one? I'd love to see it.