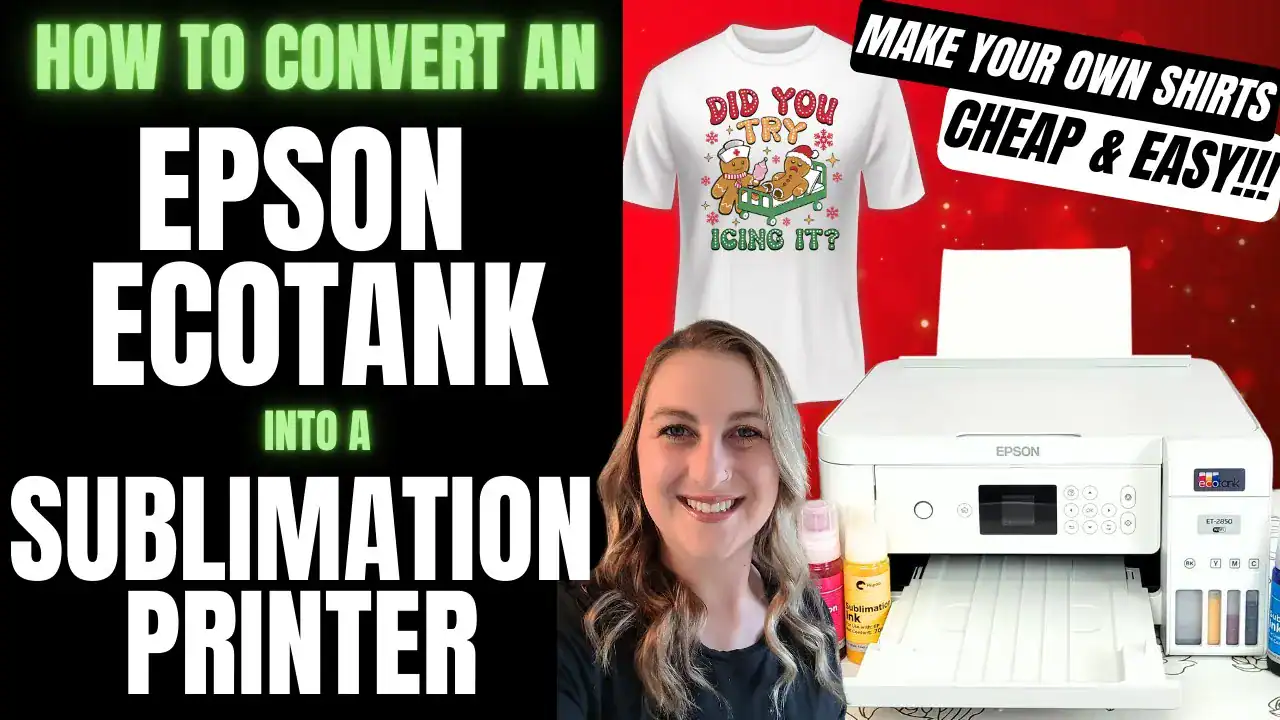

Discover how to set up your Epson EcoTank for sublimation. I'll show you how to convert an ecotank printer into a budget-friendly sublimation printer for just around $200. In this comprehensive guide, you will learn the essentials of ecotank sublimation, from unboxing to heat pressing your first project.
Once your printer is set up, check out my 15 must-know sublimation tips to avoid the most common beginner mistakes.

Table of Contents
- Step 1: Unbox Your Epson EcoTank
- Step 2: Prepare Your Materials for Sublimation Printing
- Step 3: Understanding Printer Compatibility for Sublimation
- Step 4: Choosing the Right Sublimation Ink
- Step 5: Filling Your EcoTank with Sublimation Ink
- Step 6: Loading Sublimation Paper
- Step 7: Powering On Your Printer
- Step 8: Installing Printer Drivers and Software
- Step 9: Adding Your Epson Printer to Your Computer
- Step 10: Best Print Settings for Sublimation
- Step 11: Printing Your First Design
- Step 12: Preparing for Heat Pressing
- Step 13: Heat Pressing Your Design
- Step 14: Final Reveal of Your Sublimation Project
- FAQ: Common Questions About EcoTank Sublimation
Which Epson EcoTank Should You Buy for Sublimation?
Short answer: the ET-2400 or the ET-2800. They are the cheapest way into sublimation, they are the two most people actually buy for it, and for letter-size printing they do the same job as the pricier models.
| Model | Best for | What you should know |
|---|---|---|
| ET-2400 | Tightest budget | Prints up to 8.5″ x 11″. No screen, no auto document feeder. Still does the job. |
| ET-2800 | Most people | The one I point beginners to. Same print size as the 2400, nicer to live with. |
| ET-2803 | Same as the 2800 | A retailer-exclusive version of the ET-2800. Buy whichever is cheaper on the day. |
| ET-2850 | Small step up | Adds a little screen. Fine, but you are paying for very little. |
| ET-15000 | Wide format | Prints up to 13″ x 19″. The only reason to spend this much is if you need bigger than letter. |
| ET-8550 | Photo quality | Six inks and wide format. Overkill for most sublimation, and pricey to fill. |
Print size is really the only decision that matters. If 8.5 x 11 is big enough, buy the cheapest one on that list. If you want to sublimate anything larger, you need the ET-15000 and there is no cheaper route to it.
Read This Before You Convert Anything
It has to be a brand new printer. The tanks must never have held regular Epson ink. Once pigment ink has been through the lines you cannot flush it out well enough, and you will fight muddy colour and clogs forever. Do not convert the printer already on your desk.
Converting voids your Epson warranty. Epson sells EcoTanks as ordinary inkjets. The moment third-party sublimation ink goes in, you are on your own for support. Everyone doing this has made that trade, but make it knowingly rather than discovering it later.
A converted printer clogs if you let it sit. This is the most common way people ruin one. Print something small at least once a week, even a colour swatch. I wrote a full guide on fixing and preventing clogs on a converted EcoTank, because it is the question I get asked more than any other.
Converted EcoTank or a Dedicated Sublimation Printer?
Time for the honest version, because I have been on both sides of this.
I have thrown away three converted printers. Not because I did anything wrong in the conversion, but because I went a few weeks without printing and the print heads dried out. Every time, it was money straight in the bin.
That is the real cost of a converted EcoTank, and it is not the sticker price. It is the fact that the machine only survives if you keep using it. If you sublimate every week, a converted EcoTank is genuinely the cheapest good option and I still recommend it. If you craft in bursts and then go quiet for a month, you are on a clock.
That is why I eventually switched to a dedicated sublimation printer, the Epson SureColor F170. It costs several times what an EcoTank does, but it is built for sublimation ink, it holds up better when it sits, and nothing about it voids a warranty.
So Which One Should You Buy?
- Convert an EcoTank if you are starting out, you want the lowest possible entry cost, and you will realistically print at least once a week.
- Buy a dedicated printer if you craft in bursts, you are selling and cannot afford downtime, or you have already lost a converted printer to dried heads.
If you are going the converted route, read my guide on preventing and fixing clogs before you start. It is the difference between a printer that lasts and one that becomes an expensive paperweight.
I talk through why I switched, and show five sublimation projects that actually sell, in this video:
 18:42
18:42
Watch the full tutorial
5 Sublimation Projects to Sell (Beginner Friendly + High Profit!)
Want to make money with sublimation? In this video, I’m sharing 5 sublimation projects to sell that are beginner-friendly, profitable, and perfect for starting a craft business.
Which Sublimation Ink Do You Need?
I use Hiipoo sublimation ink. Two reasons: the bottles have easy-fill tips that actually seat in the tank instead of dribbling down the side, and the colours come out rich rather than washed out once they are pressed.
Buy the set made for your model. Ink is sold per printer, and the bottles for an ET-2400 and an ET-15000 are not interchangeable.
Step 1: Unbox Your Epson EcoTank
Unboxing your Epson EcoTank is the first step in your ecotank sublimation journey. Today, I'll be converting the Epson Ecotank ET-2850, but the process is pretty much the same for all Epson Ecotank printers.
Carefully open the box and remove the printer, power cord, and any included documentation. Make sure to check for any accessories that may come with your model, such as a software CD.
However, most modern computers no longer support CD drives, so downloading software from Epson's website is a good alternative.

When unboxing, be sure to set aside any Epson ink that comes with the printer if you plan to convert it to sublimation. This ink should not be used in your new setup. You'll also want to peel off all blue tape from the printer, but do not power it on yet; you need to fill it with sublimation ink first.

Step 2: Prepare Your Materials for Sublimation Printing
Before diving into the actual sublimation process, gather all necessary materials. In addition to your EcoTank printer, you'll need high-quality sublimation ink, preferably Hiipoo. This ink is known for its vibrant colors and excellent results.

You'll also need sublimation paper, heat-resistant tape, butcher paper, and a heat press or mug press. Ensure your computer is ready for setup as well; this guide uses Windows for the tutorial.

Step 3: Understanding Printer Compatibility for Sublimation
Not all printers are suitable for sublimation. While the Epson EcoTank can be converted, many other brands cannot. For instance, thermal inkjet printers from Canon, HP, Lexmark, or Dell will not work for sublimation. The thermal printheads in these printers heat the ink too soon, preventing it from transferring properly.

To ensure optimal results, choose an EcoTank model that has never been filled with regular ink. This way, you can start fresh with sublimation ink without worrying about any residual ink affecting your projects.
Step 4: Choosing the Right Sublimation Ink
Your choice of sublimation ink is crucial for achieving professional-quality prints. Hiipoo sublimation ink is highly recommended due to its vibrant colors and reliability.
When purchasing, you may find two types: those that require syringes to fill the printer and those with autofill tops designed for specific EcoTank models.

Opt for the autofill bottles if they are compatible with your printer. They simplify the filling process significantly. If you have the syringe type, ensure you use it up first as sublimation ink has an expiration date.
Step 5: Filling Your EcoTank with Sublimation Ink
Now it's time to fill your EcoTank with sublimation ink. Start by lifting the top of your printer and opening the ink compartment. You'll notice two holes for each ink color: cyan, magenta, yellow, and black.

If using the syringe method, insert the syringe into the hole and slowly dispense the ink until the tank is filled to the upper line. For autofill bottles, simply press down until you hear the ink flowing, which indicates the tank is filling.

After filling all the ink tanks, close the ink tank cover and the scanner unit.
Step 6: Loading Sublimation Paper
Loading sublimation paper correctly is crucial for achieving high-quality prints. Start by pulling out the paper tray from your Epson EcoTank. You'll notice a slot designated for paper loading.

Take your sublimation paper, which should have one side that is printable. The back of the paper usually has a brand label; for example, if you're using A-Sub paper, make sure the label is facing down when you load it into the tray. Ensure that the paper is aligned correctly with the guides in the tray to avoid jams.
That same tray also takes DTF transfer film, which is how you get a sublimation design onto 100 percent cotton. You load it matte side up and mirror the design, exactly like sublimation paper. Here is the full walkthrough: sublimation on cotton.

Once the paper is securely in place, push the tray back into the printer. Make sure it clicks into place to ensure that the printer can feed the paper smoothly during printing. Proper loading prevents issues like misalignment and paper jams.
Step 7: Powering On Your Printer
Now that your sublimation paper is loaded, it’s time to power on your printer. Locate the power cable and plug it into the back of the EcoTank. The other end should be connected to a wall outlet.

Press the power button and follow the on-screen instructions. You’ll be prompted to select your language and other settings. Make sure to complete these steps carefully, as they will affect how your printer operates.

After powering on, the printer will start its initialization process. This can take a few minutes, during which it will feed a piece of paper to ensure everything is functioning correctly. Don’t turn off the printer during this setup process.
The printer will begin the ink initialization process, which may take about 10 minutes. During this time, monitor the ink levels; a slight drop is normal as the printer draws the ink into the system.

Step 8: Installing Printer Drivers and Software
To ensure your Epson EcoTank works seamlessly with your computer, installing the correct drivers and software is a must. Start by visiting the Epson support website. Search for your printer model, such as the ET-2850, and select it.

Choose your operating system from the provided options, then download the necessary software. Open the downloaded file and follow the prompts to install the drivers. Accept the license agreement and proceed with the installation.

Step 9: Adding Your Epson Printer to Your Computer
Now that the drivers are installed, you need to add your Epson printer to your computer. Ensure your printer is on and connected to the same Wi-Fi network as your computer. You can also connect via USB if preferred.

On your computer, navigate to the ‘Printers and Scanners' section in your settings. Click ‘Add Device', and your computer should automatically detect the Epson EcoTank. Select it and click ‘Add Device' to finalize the connection.

After the installation is complete, you can print a test page to ensure everything is set up correctly. This is a great way to verify that your printer is ready for your sublimation projects.

Step 10: Best Print Settings for Sublimation
To get the best results from your ecotank sublimation printer, you need to adjust the print settings correctly. Start by going to ‘Printers and Scanners' and selecting your printer from the list. Click on ‘Printer Preferences' to access the settings.

Change the paper type to ‘Premium Presentation Paper Mat' and set the quality to ‘High'. This ensures that your sublimation prints are vibrant and clear. Under ‘More Options', make sure to select ‘Mirror Image'.

Remember, if you mirror your image in the software, you don’t need to mirror it again in the printer settings. Just do it once to avoid confusion and ensure your design comes out correctly.

With these settings saved, you’re ready to print your first sublimation design! Your prints will look dull initially, but don’t worry; the colors will come alive once heat is applied during the pressing process
Step 11: Printing Your First Design
Now that you have set up your EcoTank sublimation printer, it's time to print your first design! Start by selecting a design that you want to transfer. For this guide, we will be using a fun design from Creative Fabrica. Make sure your design is in PNG format for the best results.

Open the design in your preferred software, such as Canva, and adjust the size to fit your sublimation paper. Remember, your print will initially look dull, which is perfectly normal. The colors will become vibrant once heat is applied during the heat pressing process.

Once you have your design ready, it's time to print. Ensure your print settings are correct, as detailed in the previous steps. Select your EcoTank printer, and hit print. Monitor as the printer does its magic!

Step 12: Preparing for Heat Pressing
Before you heat press your design, it’s essential to prepare your shirt properly. Start by removing any tags from the shirt. This will ensure a smooth surface for the transfer.

Next, use a lint roller to remove any dust, hair, or fibers from the shirt. This step is crucial as it helps prevent imperfections in the final print. After lint rolling, lay the shirt flat.

Now, preheat your heat press to 400°F. This temperature is optimal for sublimation.
The heat press I'm using today is the HTVRont Auto Heat Press 2. I'm usually not a fan of auto heat presses because there usually isn't a way to adjust the pressure the press applies to the shirt, but HTVRont solved this problem with their new Auto Heat Press 2.
Now, Place your shirt in the heat press for about 15 seconds to remove any moisture and wrinkles.

Step 13: Heat Pressing Your Design
With your design printed and your shirt prepped, it's time for the heat pressing! Slide a piece of butcher paper inside the shirt to protect it from any bleed-through of the sublimation ink.

Next, place your printed design face down on the shirt. Center it about 2 inches below the neckline. This positioning is essential for proper alignment.

Use heat-resistant tape to secure the design in place. Tape down all four sides to prevent any shifting during the heat press. Once secured, cover the design with another sheet of butcher paper.

Now, slide the shirt back into the heat press, ensuring it’s secure. Set the timer for 60 seconds and let the heat work its magic!

Step 14: Final Reveal of Your Sublimation Project
Once the timer goes off, carefully remove the shirt from the heat press. Allow it to cool for a moment before peeling back the butcher paper. This is the moment of truth!
The print quality should be crisp and vibrant, just like you hoped. If done correctly, the design will look professional and be ready to wear or sell.

Congratulations! You have successfully completed your first sublimation project with your EcoTank printer. Just imagine all the creative possibilities ahead with your new sublimation printer!
FAQ: Common Questions About EcoTank Sublimation
1. Can I switch back to regular ink after using sublimation ink?
No, once you convert your EcoTank to use sublimation ink, it should remain a sublimation printer. Switching back can cause clogs and damage to the printer.
2. What type of sublimation ink is best for EcoTank printers?
Hiipoo sublimation ink is what I use and recommend due to its vibrant colors and reliability. Autofill bottles are easier to use if compatible with your printer.
3. How often should I print to prevent clogs?
To keep the ink flowing and prevent clogs, print something small at least once a week. This habit will help maintain the health of your EcoTank sublimation printer.
4. What is the ideal temperature and time for heat pressing?
The ideal temperature for heat pressing sublimation designs is 400°F for 60 seconds. Always use a heat press for best results.
5. Can I use any type of paper for sublimation printing?
No, you must use special sublimation paper, such as A-Sub or HTVRont. Regular copy paper will not yield the desired results in sublimation printing.
Kerri's Recommended Deals
- Sign up for Creative Fabrica's FREE trial
- Sign up for Creative Fabrica's discounted yearly subscription
- Shop the best deals on Cricut machines
- Accept credit card payments with your FREE Square Card Reader
- Check out my Linktree
Connect with Kerri
Some of the links provided are affiliate links. Kerri Crafts It is a participant in the Amazon Services LLC Associates Program, an affiliate advertising program. As an Amazon Associate, I earn a commission on products purchased through these links at no additional cost to you.