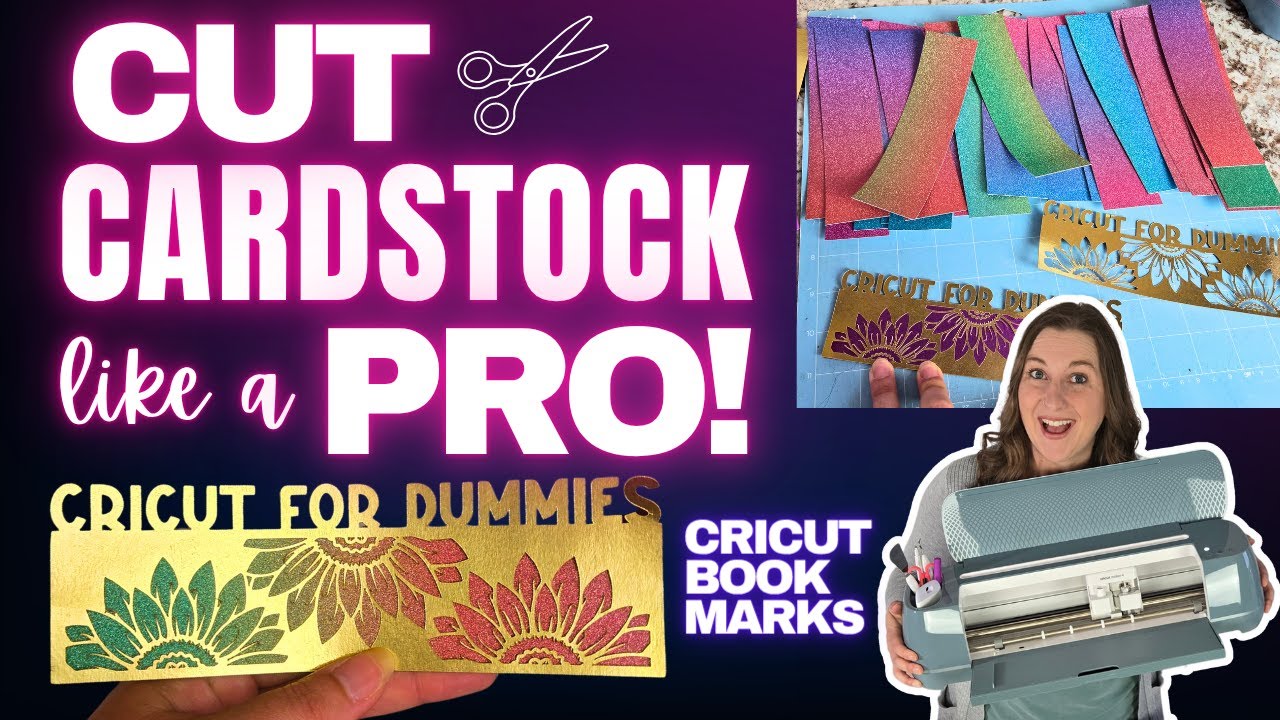
Looking for a fun beginner project to master your Cricut? DIY bookmarks are perfect for learning how to cut cardstock without stress.
I love teaching this project because it covers all the essential Cricut skills. You'll learn how to choose the right cardstock, work in Design Space, fit designs to your mat, and get clean cuts every time. Plus, these two-layer bookmarks look way more impressive than the effort they take!
I actually made these bookmarks for my Barnes & Noble book signings to celebrate the launch of my new book, Cricut For Dummies. They were such a hit that I wanted to share the idea with you here.
This blog post will give you an overview of the process, and if you want a step-by-step tutorial, you’ll find the full version inside Cricut For Dummies (see Chapter 21), or you can follow along with my YouTube video here.
Once you nail this technique, you can make gift tags, paper flowers, cake toppers, and even craft fair items to sell. Let's dive in!
Watch the Video Tutorial Here
✨ What You'll Learn
- How to choose and cut the right cardstock for crisp, clean results
- How to resize designs and create backing layers in Design Space
- Which mats work best for different paper types
- How to maximize paper usage and save money on specialty cardstock
- The best glue options for foil and glitter cardstock
Quick Links / Table of Contents
Materials You'll Need
Here's everything you'll need to create beautiful DIY bookmarks:
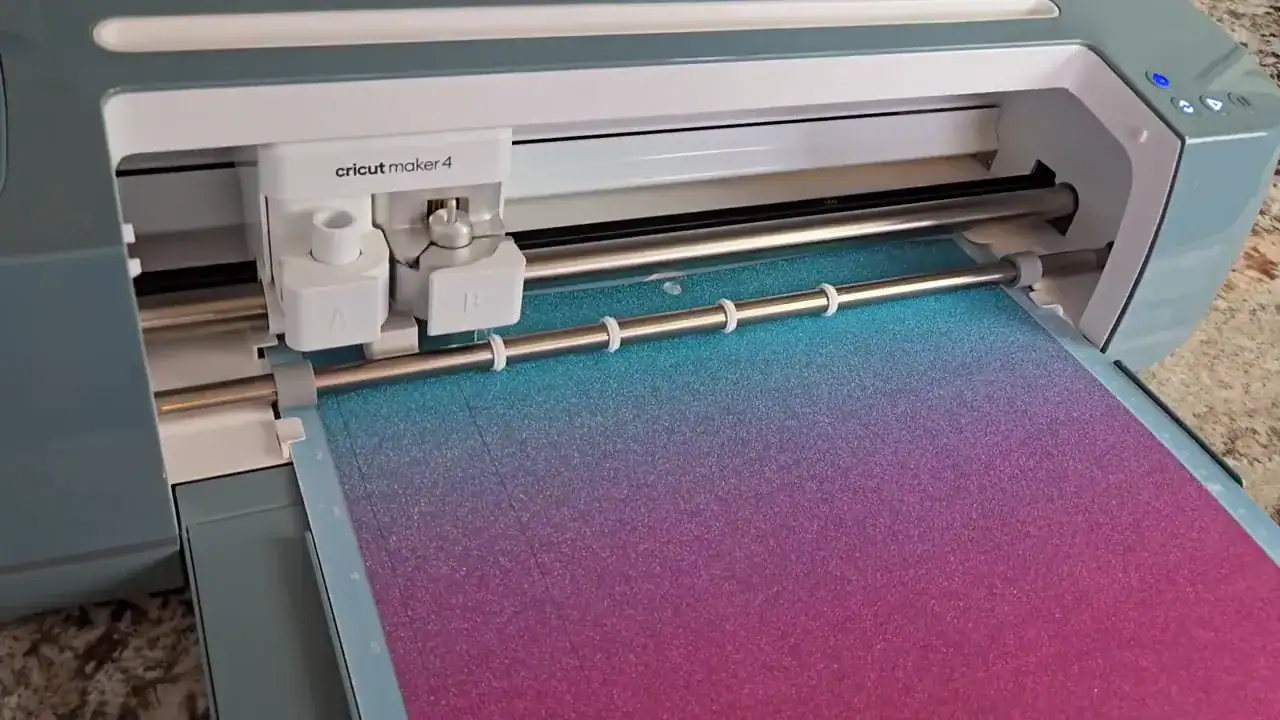
How to Choose Quality Cardstock for Cricut Projects
Not all cardstock is created equal! Here's what to look for when shopping:
Weight matters: Look for 65lb to 110lb cardstock (or 176-300 GSM if you're buying international brands). Lighter weights (65-80lb / 176-216 GSM) work great for intricate designs with lots of detail. Heavier weights (80-110lb / 216-300 GSM) create sturdier bookmarks perfect for gifts or selling.
Specialty finishes add value: Foil, glitter, and metallic cardstock make your projects feel premium. They cost a bit more but the wow factor is worth it! I buy mine in bulk packs to save money.
Avoid cheap copy paper cardstock: Dollar store cardstock often tears or doesn't cut cleanly. Invest in quality paper from craft stores or online retailers – your blade and your sanity will thank you!
Test before bulk buying: When trying a new brand, buy one or two sheets first. Cut a test piece to see how it performs with your machine before investing in a full pack.
Buy good quality cardstock in colors and finishes you love. Foil and glitter sheets make bookmarks feel special and gift-worthy!
Step-by-Step Instructions
Step 1: Gather Your Materials and Choose Your Cardstock
Start by choosing your cardstock colors and finishes. Foil pastel and gradient glitter cardstock create stunning two-layer effects.
I recommend having at least two contrasting colors – one for the decorative top layer and one for the backing. Black backing always looks sharp against bright foil or glitter!
💡 Pro Tip: Rotate gradient glitter paper before cutting to get different color alignments from the same sheet. This creates variety without buying more paper!
Step 2: Open Cricut Design Space and Upload Your Design
Start a new project in Cricut Design Space. Click the Upload Image button and browse to your bookmark SVG file.
When the preview shows a checkered background behind the design, that means the background has been removed and your file is ready to import.
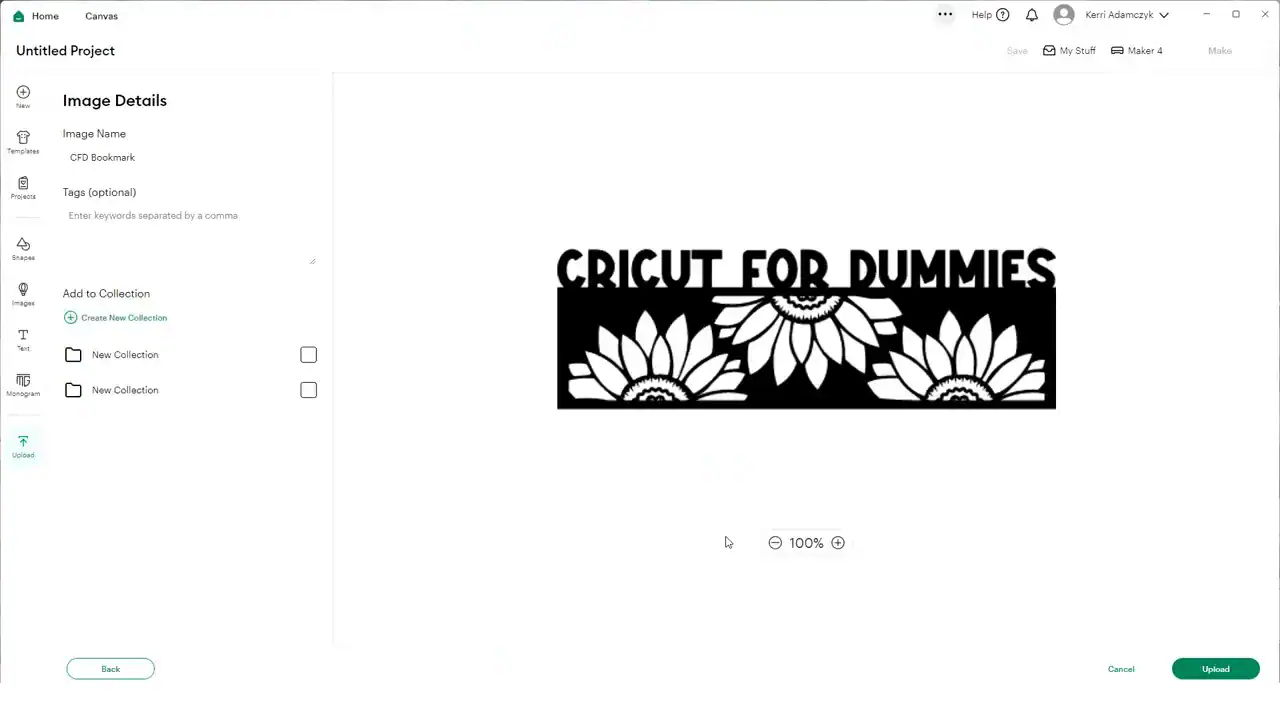
Don't have an SVG? Search for bookmark templates in Design Space's Images library. Keep in mind many require a Cricut Access subscription. Another great option is Creative Fabrica – download unlimited designs for $3.99/month with a commercial license included!
Step 3: Resize Your Design and Create the Backing Layer
Most bookmark SVGs come sized around 7 to 7.33 inches tall. I set mine to exactly 7 inches so they fit most books comfortably.
Click your design and set the height to 7 in the toolbar.
Next, add a solid rectangle for the backing layer. Click Shapes and choose a square. Resize it into a rectangle that sits behind your decorative cutout. Change its color in Design Space so you can see both layers clearly, then right click and Send to Back.
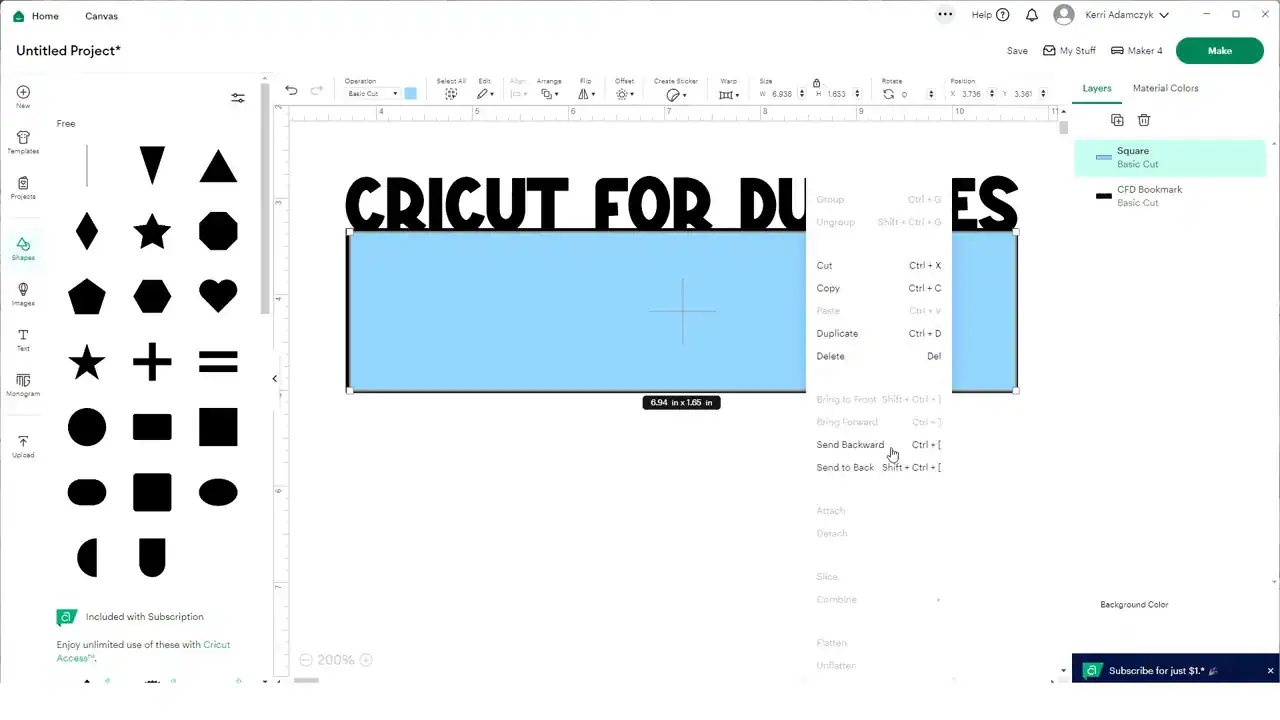
This two-layer design creates a sturdy, professional-looking bookmark!
Step 4: Arrange Copies and Set Material Size
Decide how many bookmarks you want to make. Design Space lets you increase project copies easily – I usually make batches of 8-12 at a time when I'm creating for events or my shop.
You can often fit four bookmarks on an 8.5 x 11 sheet, depending on the design complexity. On a 12 x 12 sheet, you might squeeze in 6-8 bookmarks with smart placement!
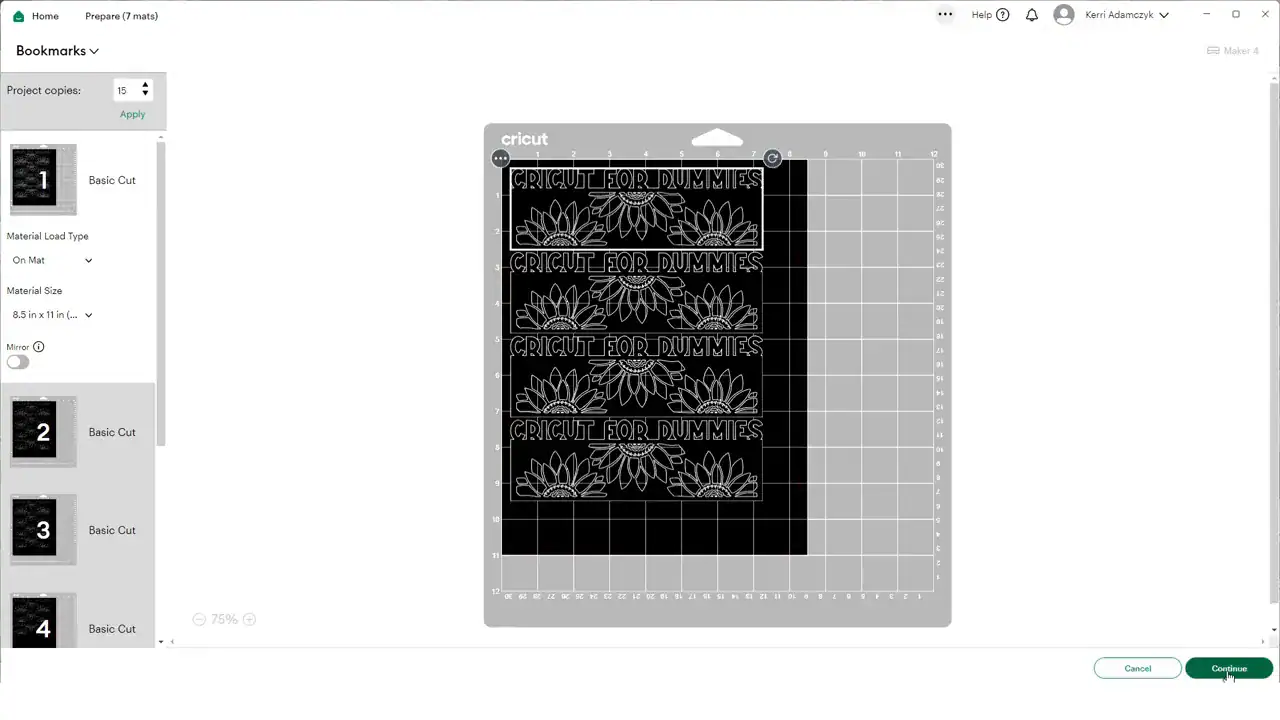
Tips for maximizing your paper:
- Use the rotation tool: Rotate bookmarks to different angles to fit more on one sheet. A 45-degree tilt can sometimes create room for an extra bookmark!
- Zoom in and check spacing: Leave about 0.25 inches between each bookmark. This gives the blade room to move without risking overlaps
- Group decorative layers separately from backing layers: This lets you cut multiple decorative pieces from one color and all backings from another color
- Check the mat preview carefully: Zoom way in and inspect every corner before hitting “Make It” – a tiny overlap will ruin two bookmarks
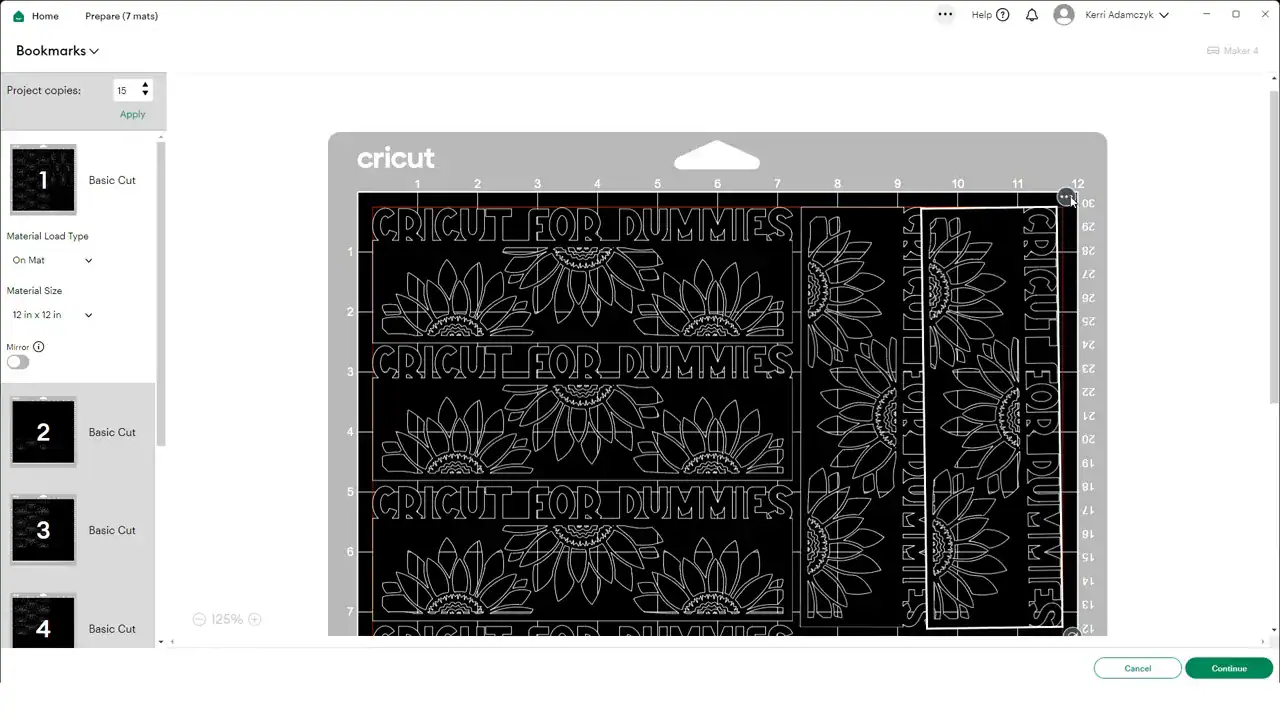
When you switch from 8.5 x 11 to 12 x 12 paper, you'll see Design Space automatically rearrange. Use the Move Object feature to shift designs between mats and pack them tighter.
⚠️ Important: Always set the correct material size for each mat! If your backing is 8.5 x 11 and your glitter paper is 12 x 12, switch the material size to match the paper you're cutting. This prevents design placement issues.
Step 5: Choose Material Settings and Load Your Machine
Select the correct material type in Design Space. For light cardstock, choose “Light Cardstock.” For glitter cardstock, search “glitter” under Browse All Materials and bookmark the setting for easy access.
I recommend increasing pressure to “More” when cutting cardstock. That extra pressure helps the blade cut cleanly through foils and heavy glitter sheets without tearing.
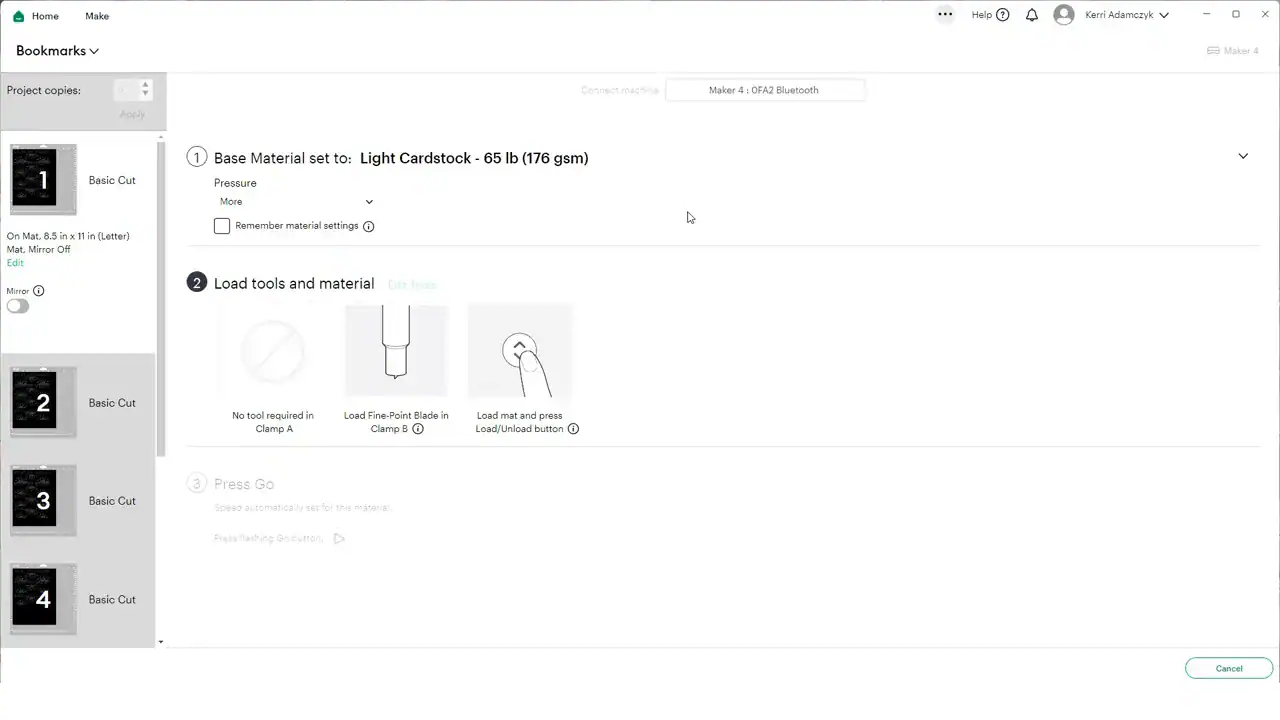
Load the fine point blade into clamp B. Remove the protective film from your cutting mat and stick the cardstock in the upper left corner. Roll a brayer or use a scraper to press it down firmly – this prevents lifting during the cut!
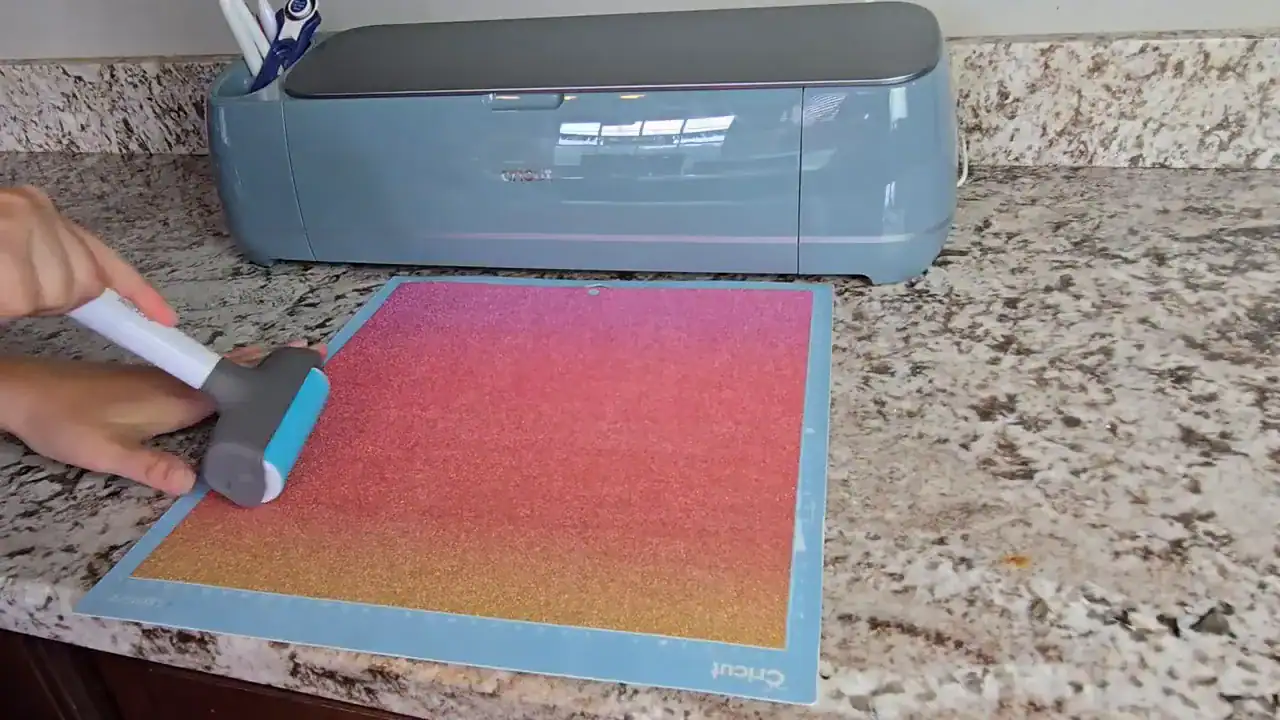
If your cutting mat is looking dirty, check out my blog post on how to clean your cricut mat!
Slide the mat under the tabs at the side of your Cricut and press the load button. Press start and stay nearby while cutting. Watch for any lifting so you can stop and fix problems mid-cut.
Step 6: Remove Cuts and Weed Excess Pieces
When the machine finishes, unload the mat. Gently peel away the leftover paper to reveal your cut bookmarks.
I like to lift the bookmarks carefully by hand so small bits stay stuck to the mat until I'm ready to clear them. Use a spatula or weeding tool for delicate areas and to pop out tiny shapes.
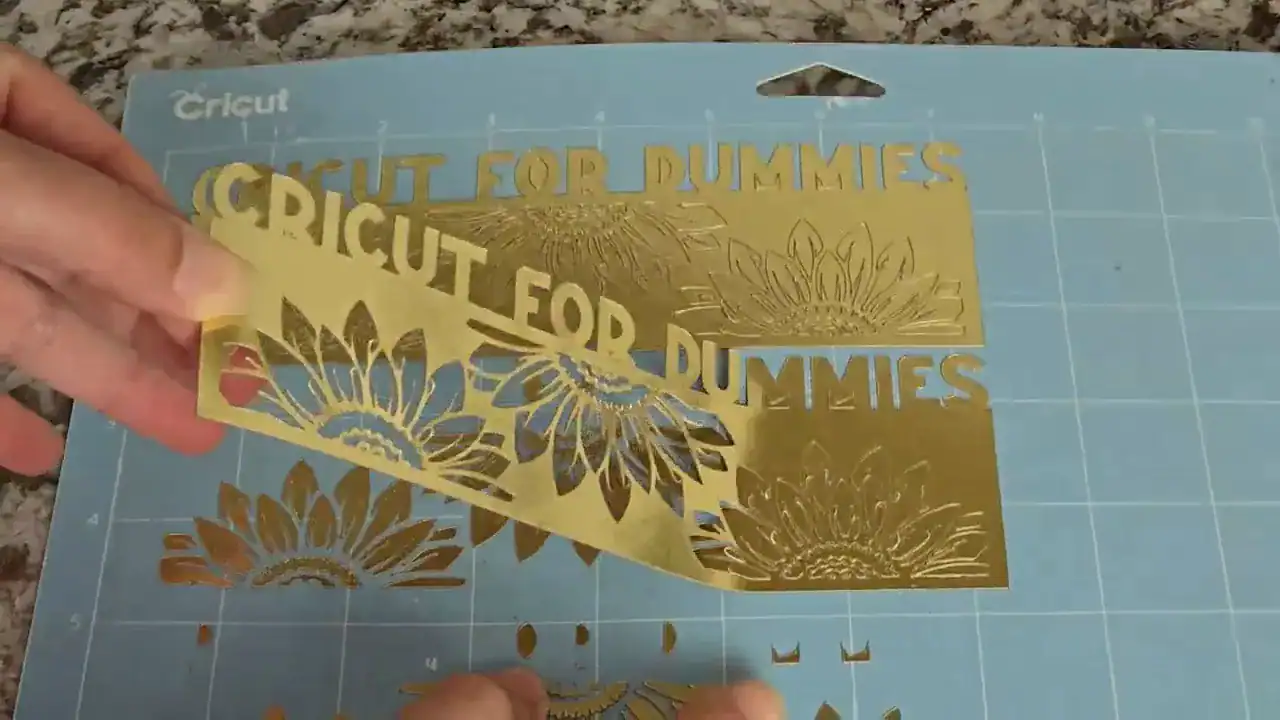
After removing the main pieces, use your scraper to clear scrap paper. Save pretty scraps for confetti or small craft accents – they're too pretty to throw away!
Step 7: Glue the Layers Together
Not all glues work the same with shiny or glitter papers. I tested several options and here's what I found:
- E6000 spray glue clogged
- Aerosol glue made foil colors run
- Barely Art glue was tidy but messy and pricey for events
- UHU glue sticks were the best – clean, fast, and easy!
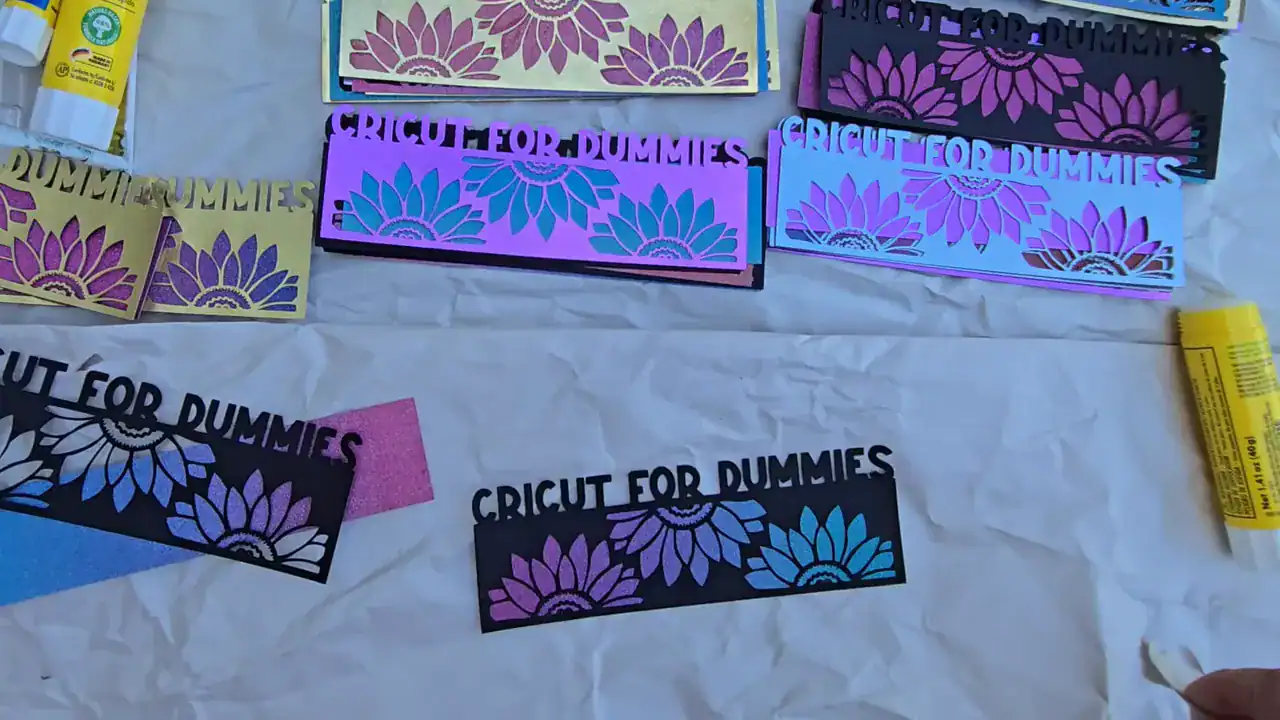
Protect your work surface with paper towels. Apply glue evenly to the back of the decorative cutout and press it onto the backing rectangle. Let the glue set on a flat surface.
💡 Pro Tip: Don't press bookmarks between book pages to dry! I learned the hard way when glue stuck pages to the bookmark and tore them out. Let them dry flat on a clean surface instead.
Step 8: Add a Sticker or QR Code for a Professional Finish (Optional)
Print then cut adds a polished detail. I place a small sticker or QR code on the back of each bookmark to link to my shop, social handles, or extra content.
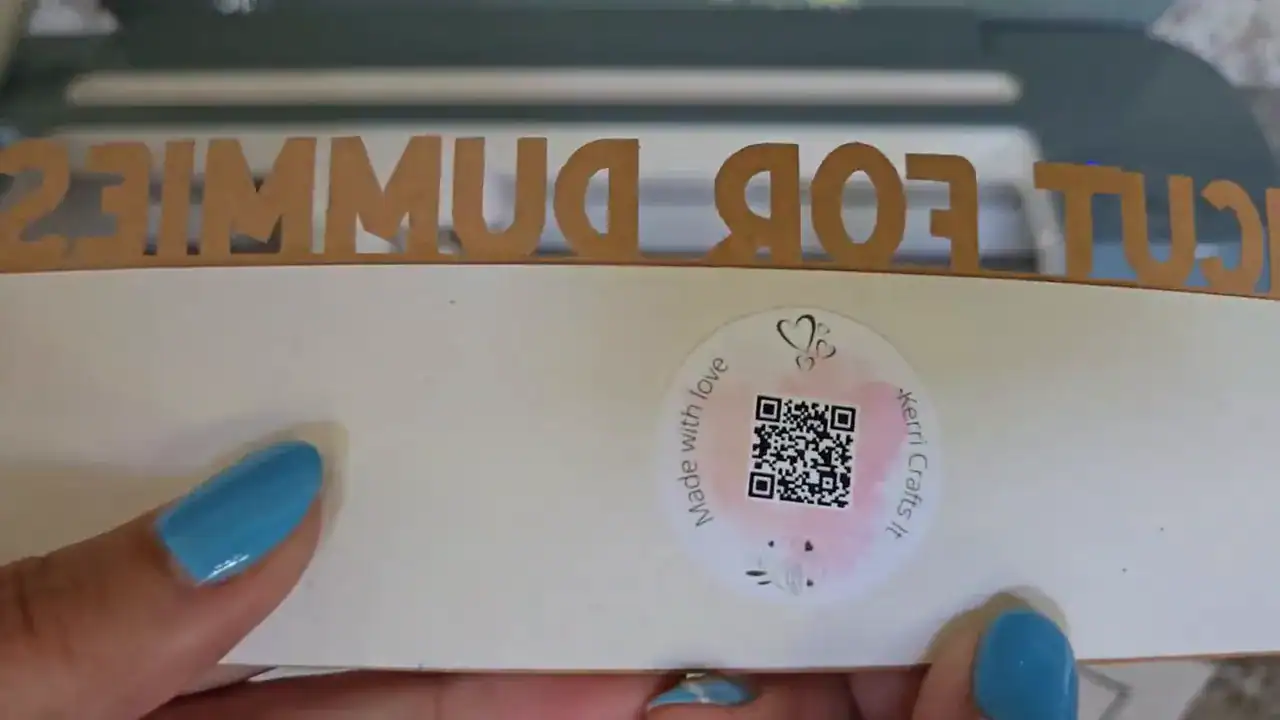
Print QR codes on printable sticker paper, then use the print then cut feature for precise stickers that align perfectly.
Keep sticker designs simple and legible. A clear QR code will scan easily and add a fun interactive element!
Step 9: Event Tips and Finishing Touches
If you plan to give bookmarks away at events or sell them, prep a mix of assembled and unassembled pieces. Let people mix foil and glitter layers to create unique combinations!
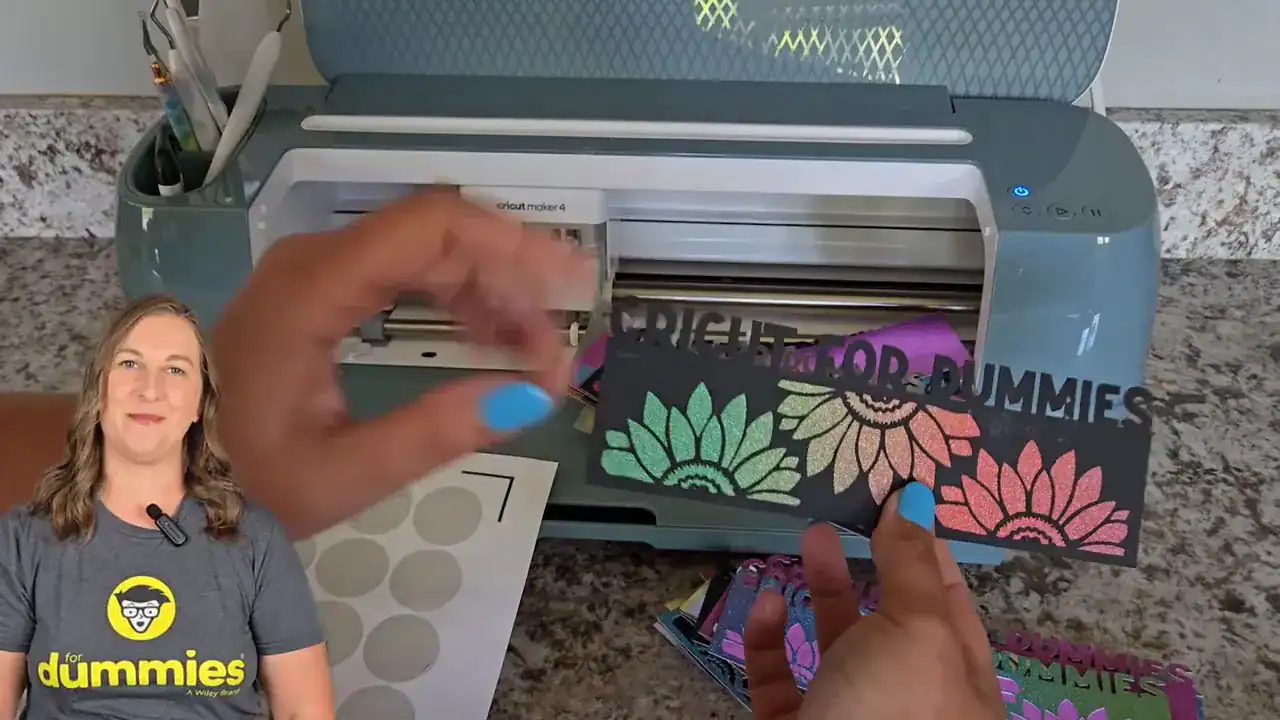
A few extra tips:
- Press paper firmly with a brayer after placing it on the mat to reduce tearing
- Keep an eye on cuts when using intricate designs – paper lifts usually show early so you can stop and fix them
- Test settings on scrap pieces if you're unsure about new paper or specialty finishes
Watch my full video tutorial here to see the entire process in action!
Tips & Troubleshooting
- Incomplete cuts: Increase cut pressure to “More” in material settings, or check if your blade needs replacing
- Paper tearing: Use a used LightGrip mat for delicate papers. Brand new mats can be too sticky!
- Glitter clogging blade: Clean your blade regularly when working with glitter. Lightly tap glitter cardstock before cutting to remove loose particles
- Glue showing through: Apply glue to the decorative layer (not the backing) for better control. UHU glue sticks dry clear and flat
- Maximize profit potential: Blank glitter and foil cardstock sheets cost about $0.50-$1 each. You can sell finished bookmarks for $3-$5 each or create sets of 4-6 for $12-$20!
FAQ
Q: How thick can Cricut blades cut through cardstock? A: Most Cricut machines with the fine point blade can cut light to medium cardstock cleanly. For heavier specialty sheets like thick glitter or chipboard, adjust the material setting, increase pressure, or use a blade designed for thicker materials. Always do a small test cut first!
Q: What mat should I use for different paper types? A: Use a LightGrip (blue) mat for thinner papers and a StandardGrip (green) mat for heavier cardstock. Avoid brand new mats for delicate paper because they can be too sticky. Clean or replace your mat when it loses grip or builds up residue.
Q: Which glue works best for glitter and foil cardstock? A: For a quick, clean bond on glitter and foil cardstock, UHU glue sticks work perfectly. They dry flat and don't cause foil inks to run. For heavier layers or long-term durability, consider Bearly Art Precision Craft Glue, but test on scrap first.
Q: How do I prevent glitter cardstock from shedding or clogging my blade? A: Use a fresh blade and clean it regularly when working with lots of glitter. Lightly tap glitter cardstock to remove loose glitter before cutting. Use a protective sheet between the glitter side and mat if shedding is severe.
Q: Can I sell items made with SVGs from Creative Fabrica? A: Yes! Creative Fabrica offers an all-access subscription that includes a commercial license for most assets. Always read the license details for each file, but their subscription usually provides commercial rights for finished products.
Downloads & Design Files
- Creative Fabrica – Download unlimited bookmark designs for $3.99/month (includes commercial license)
- Compatible with all Cricut machines: Maker, Explore, Joy, and Venture
Call to Action & Community Invite
Now it's your turn! Grab your cardstock and Cricut and start creating beautiful bookmarks.
Share your creations – I'd love to see them! Tag me on Instagram @kerricraftsit or join my Facebook community to show off your work!
Find me on all platforms: linktr.ee/kerricraftsit
Social Links:
- Visit YouTube
- Follow on Facebook
- Follow on Instagram
- Follow on TikTok
- Follow on Pinterest
- Shop on Etsy
Watch my full video tutorial: Cricut for Beginners: Cut Cardstock & Make Custom Bookmarks